
Create and Manage MCPs
Create an MCP in **Custom Plugins**, connect the required capabilities by importing existing tools or entering a JSON configuration, and modify or delete the MCP after it is created.
Create an MCP in Custom Plugins, connect the required capabilities by importing existing tools or entering a JSON configuration, and modify or delete the MCP after it is created.
Before you begin
Before you start creating an MCP, confirm that you have prepared the following information:
Determine the MCP plugin name and its primary purpose.
If you are using existing tools, determine which tools you need to import.
If you are connecting to an external MCP service, prepare the corresponding JSON configuration, Headers, and authorization information.
The JSON configuration, Headers, or authorization information may contain access credentials. When entering or capturing this information in screenshots, retain only the information required to complete the configuration. Do not send tokens, keys, or other such content to unrelated people.
Create an MCP plugin
Open MCP Plugins on the conversation page.
Switch to the Custom Plugins tab.
Click Create MCP Plugin in the upper-right corner.
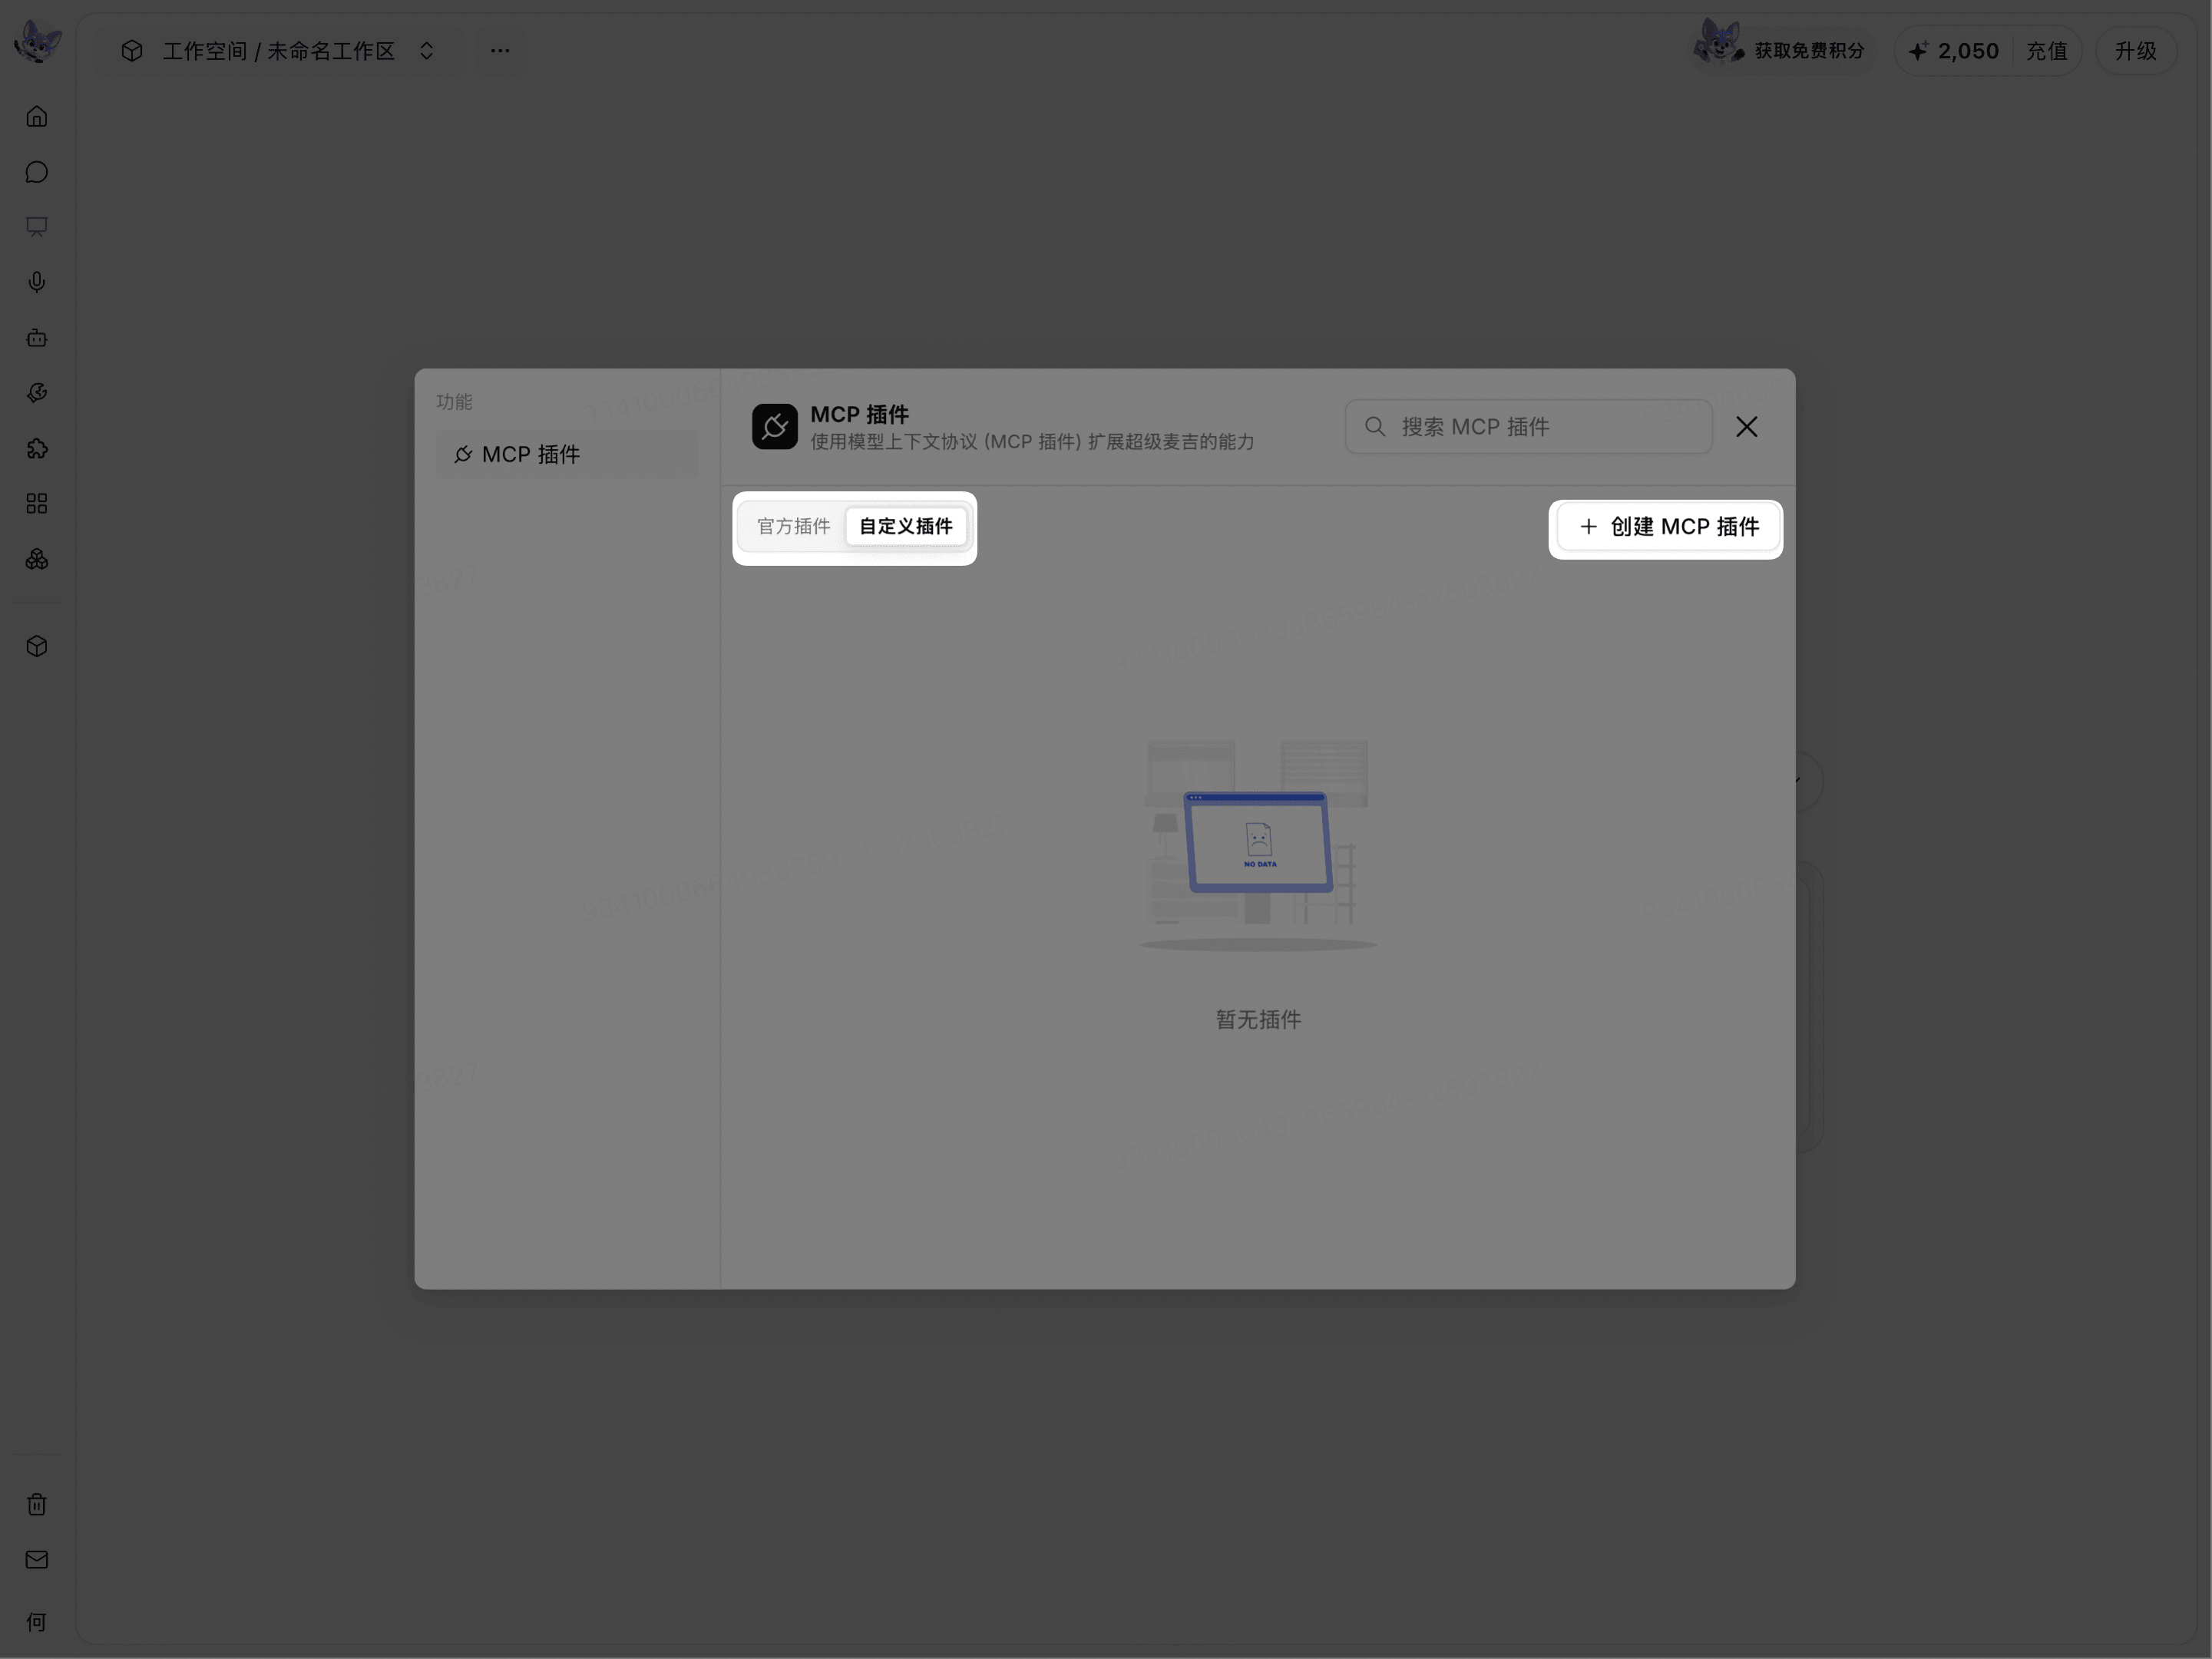
After the Create MCP Plugin form opens, you can enter basic information and select a configuration method.
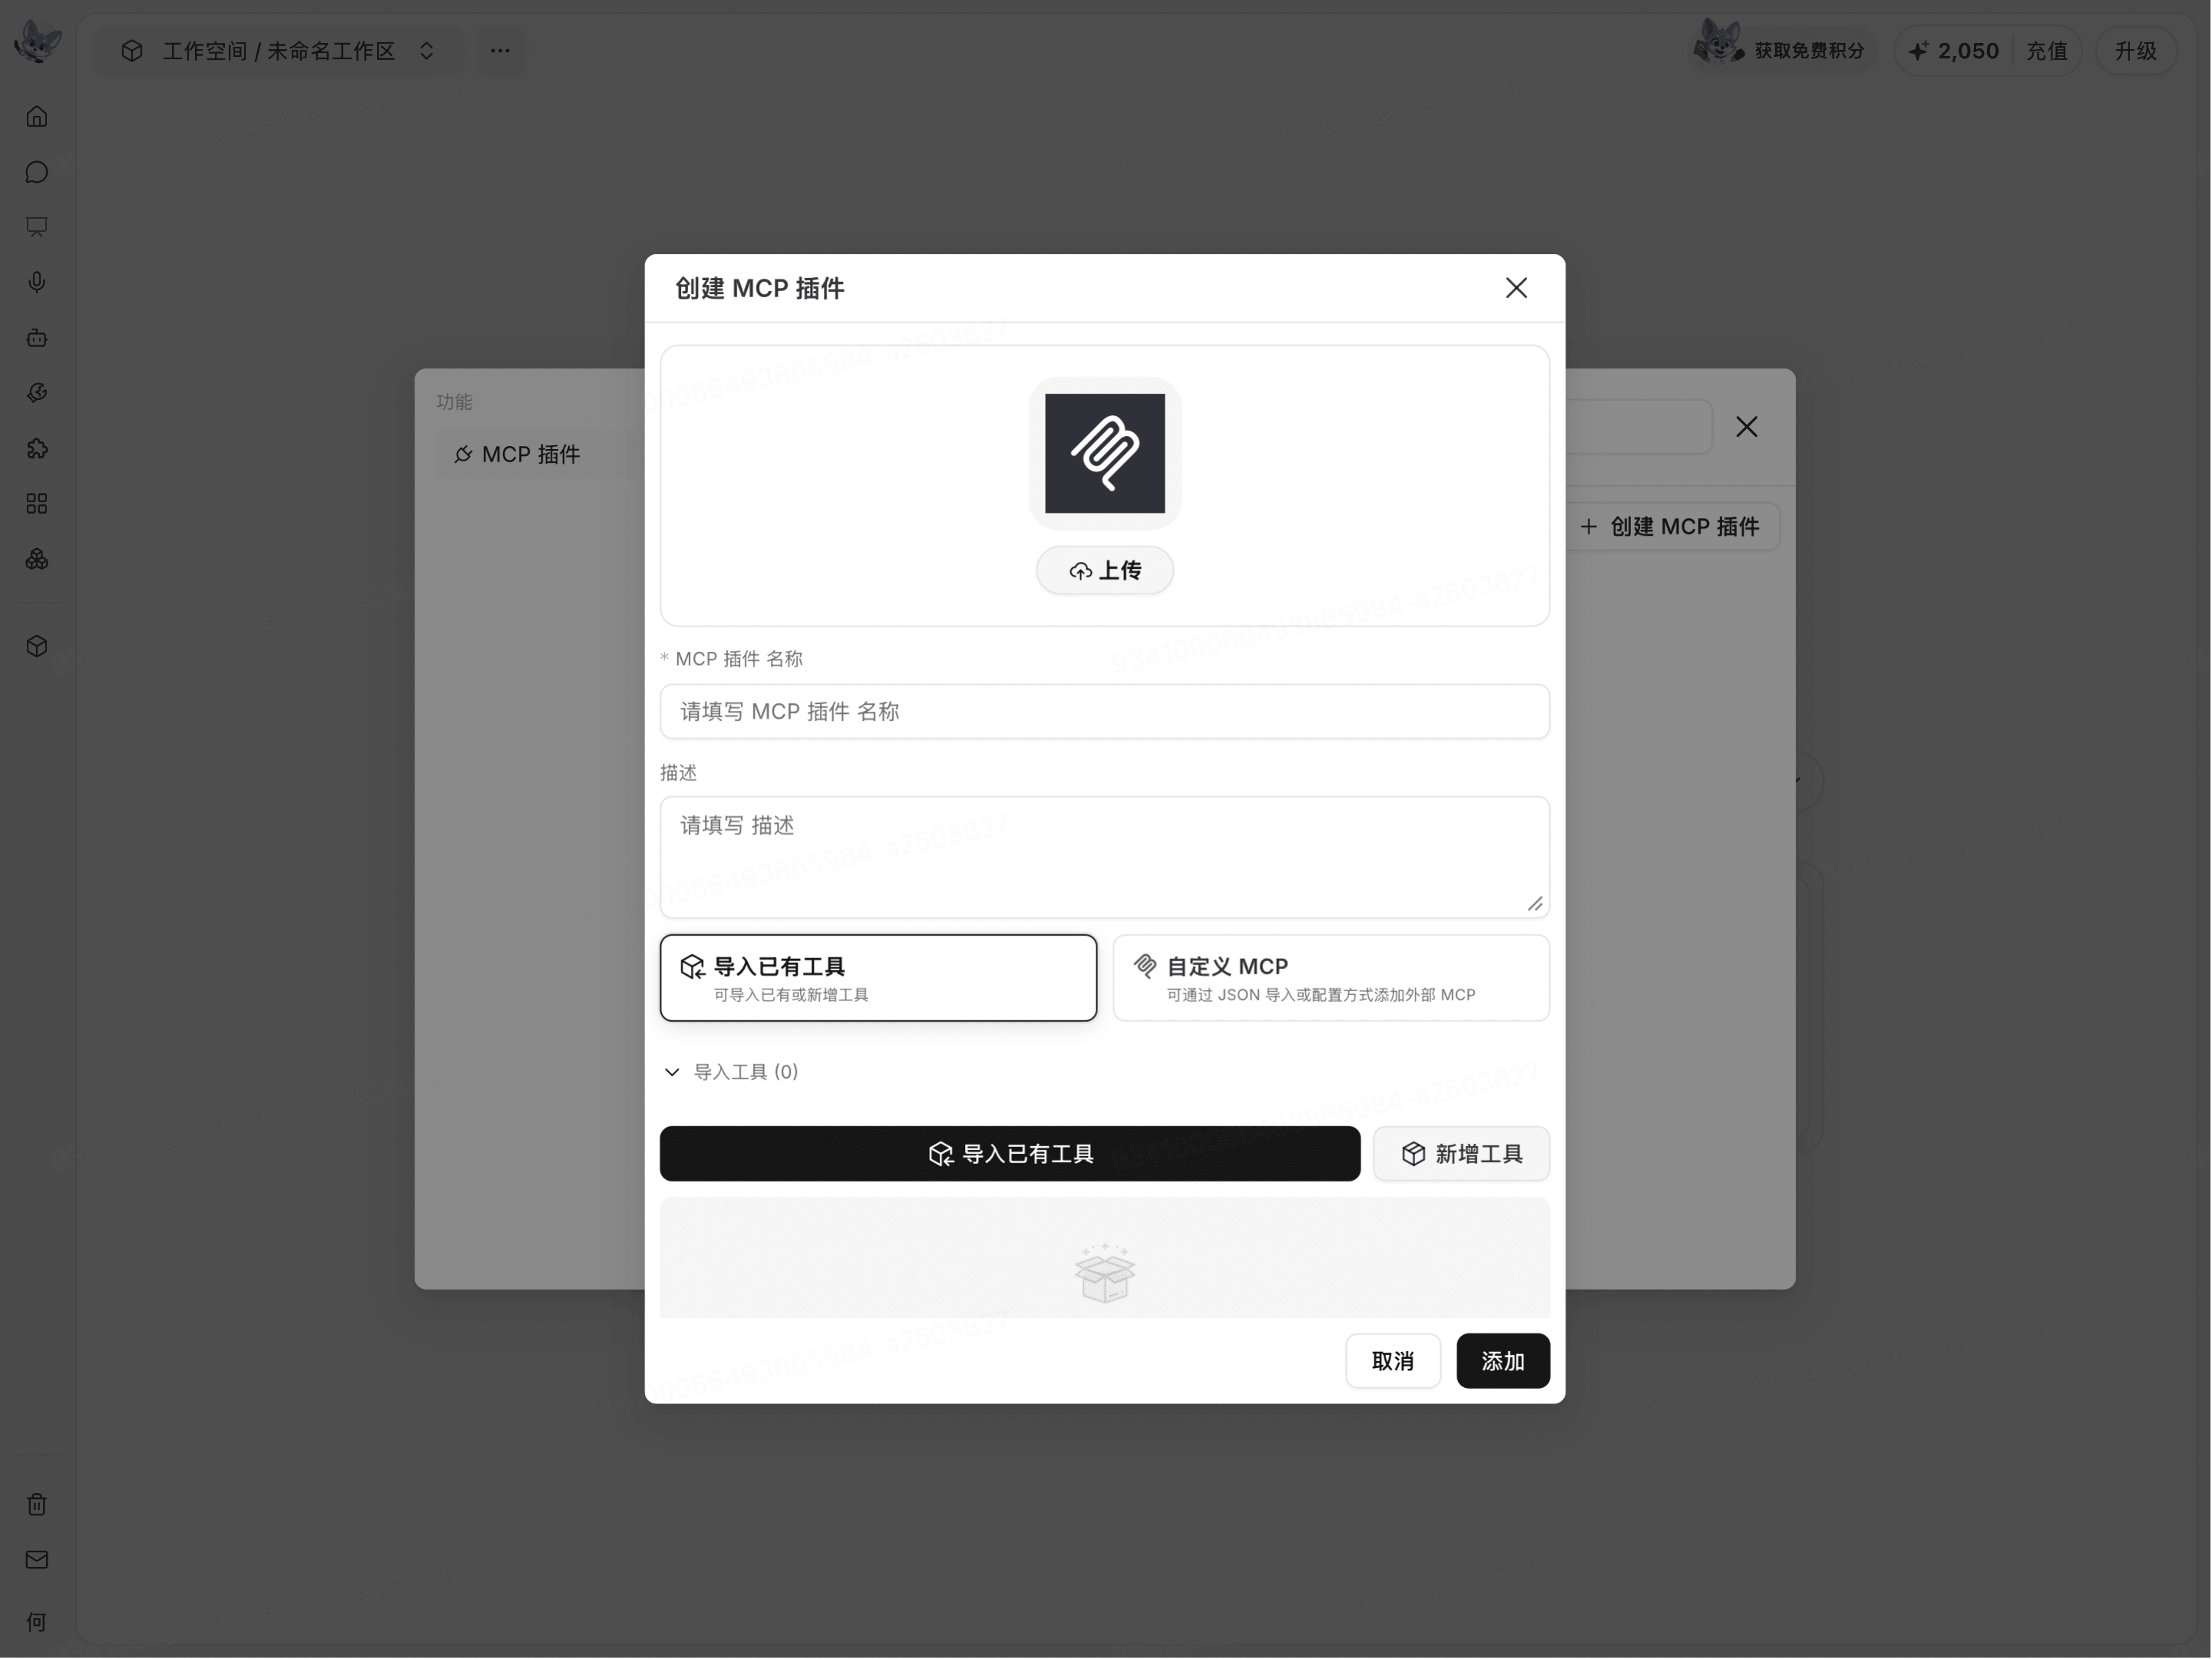
Click Upload as needed to set the plugin icon.
Enter a name in MCP Plugin Name.
Describe the plugin's primary purpose in Description.
After you complete the basic information, the page continues to display two configuration methods: Import Existing Tools and Custom MCP.

Select a configuration method
Configuration method | Applicable scenario |
|---|---|
Import Existing Tools | Select the tools you need from the tool list provided on the current page. |
Custom MCP | Connect to an external MCP service through a JSON configuration. |
After selecting a configuration method, continue entering the tools, Headers, and authorization information required for that method.
Import existing tools
Select Import Existing Tools.
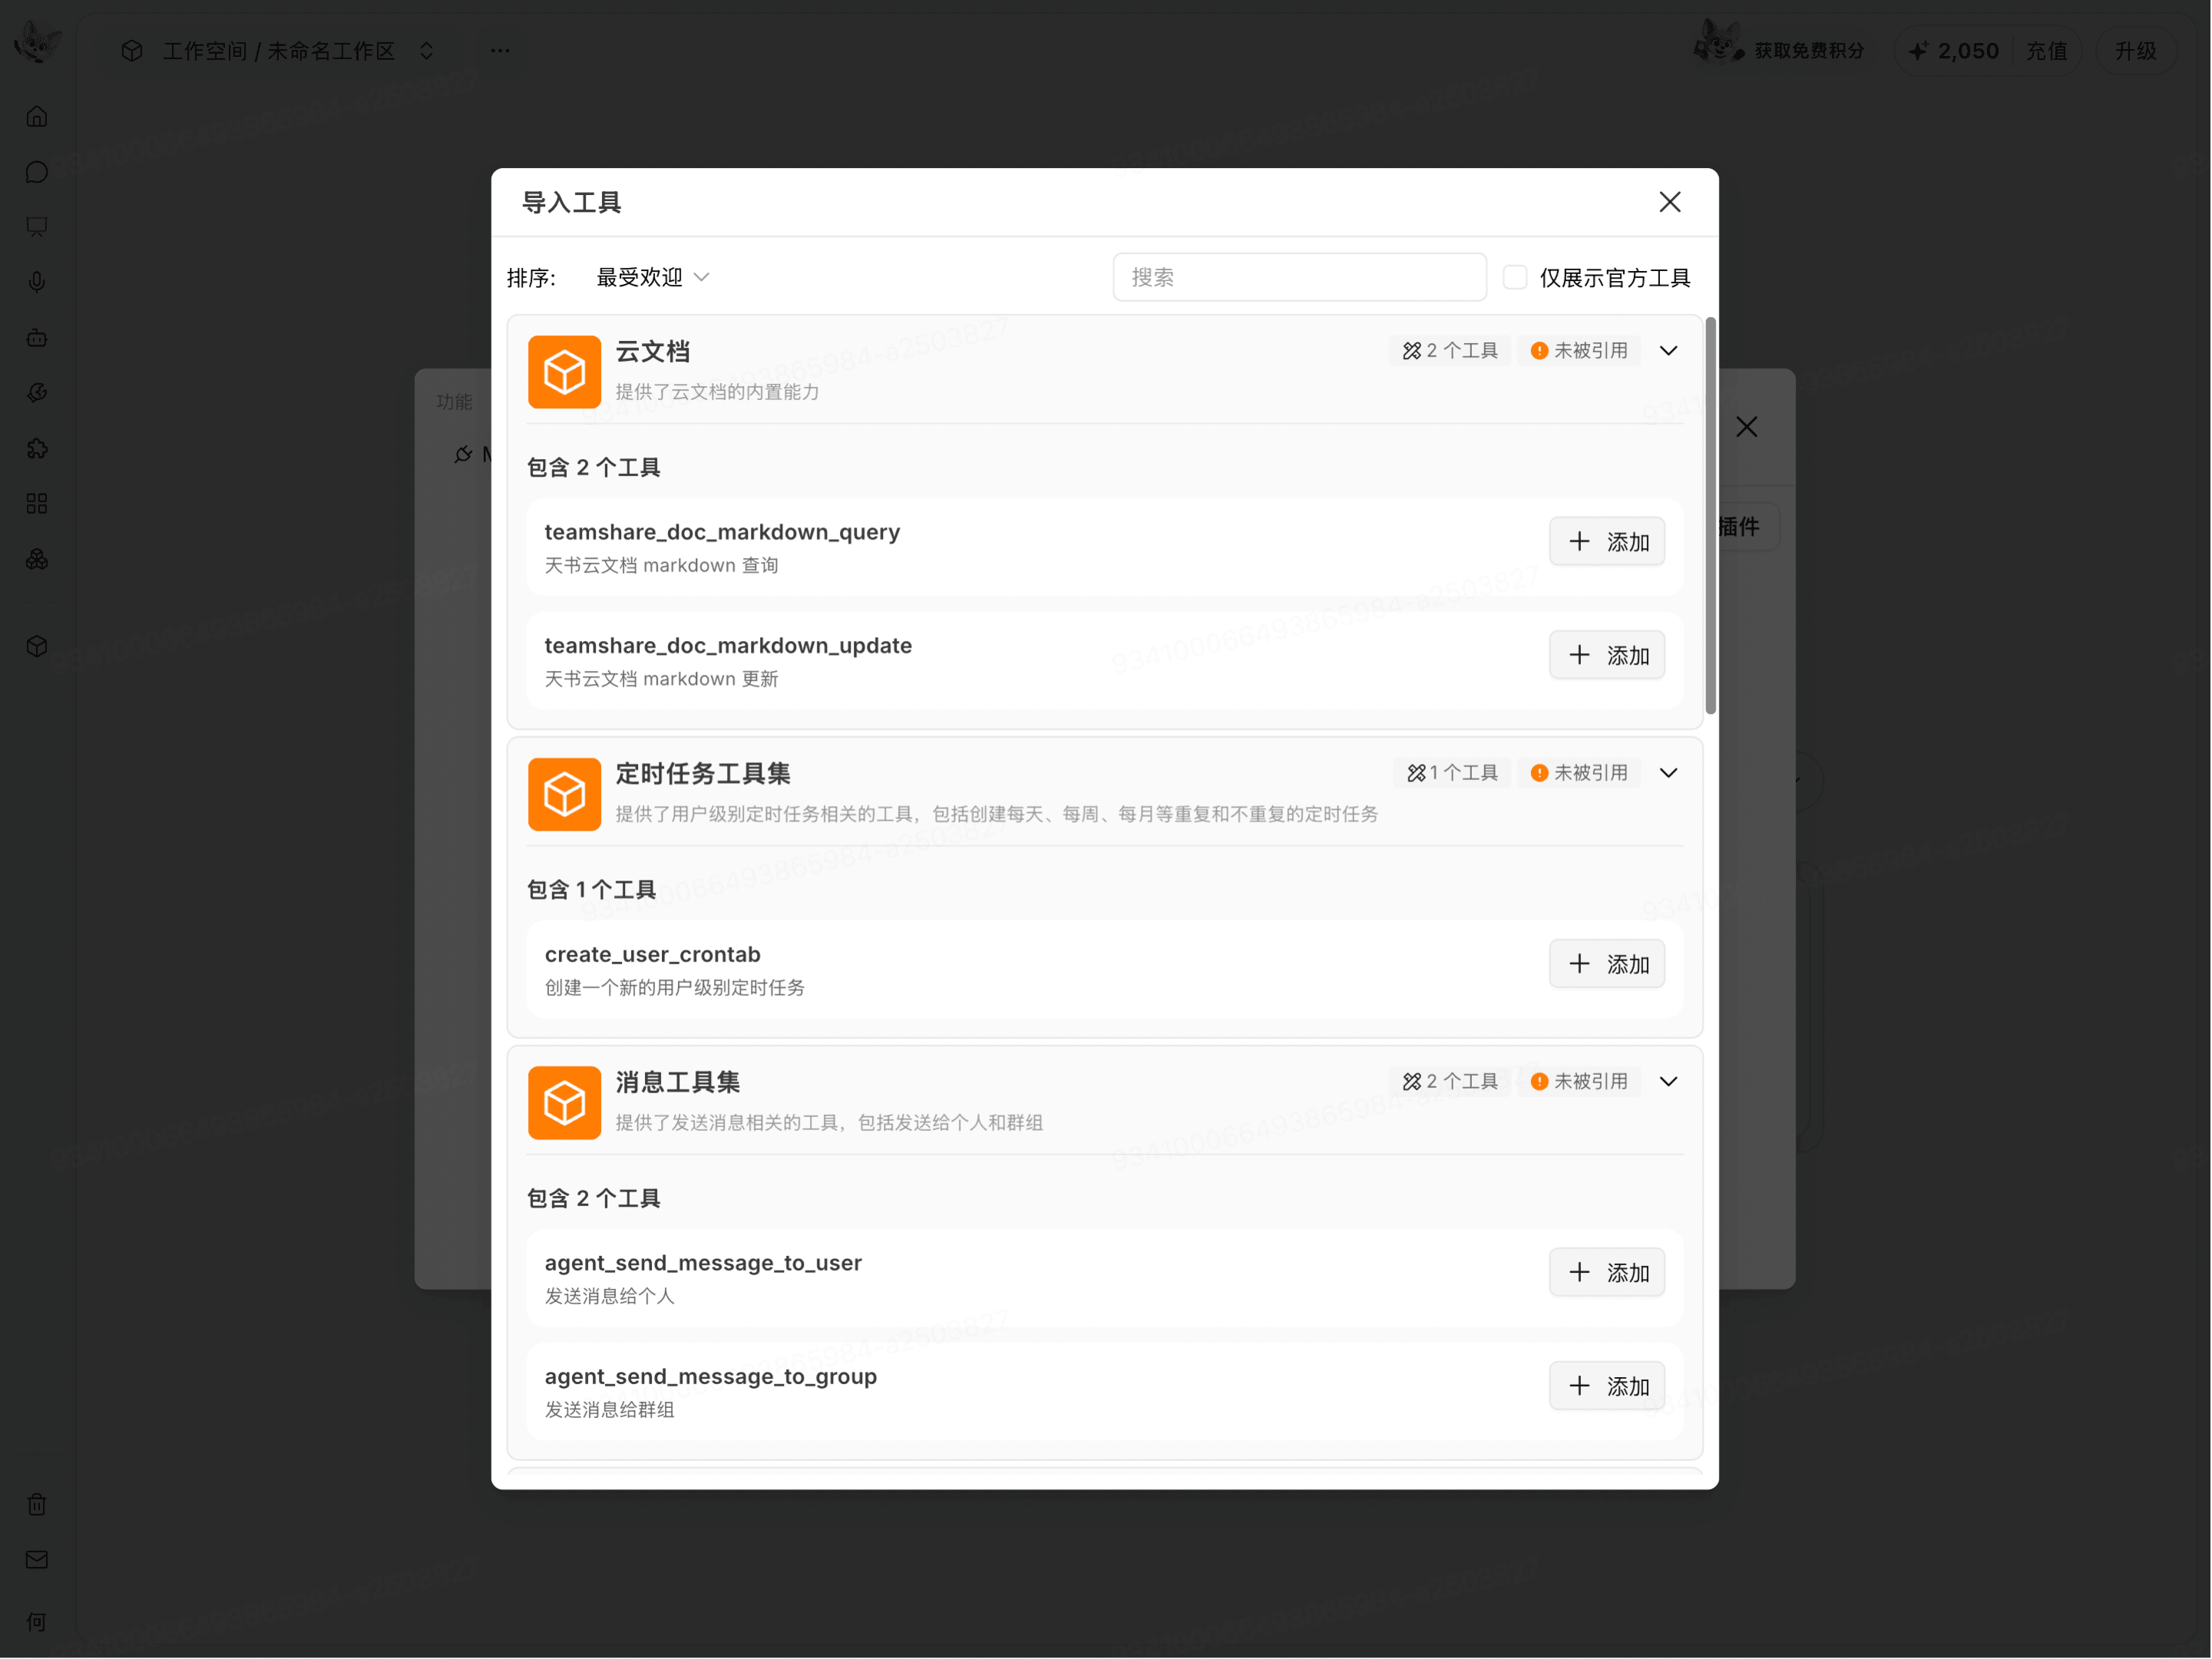
Click Import Existing Tools below.
Browse tool sets and tools on the Import Tools page.
Adjust the sorting, enter keywords to search, or select Show Official Tools Only as needed.
Expand the target tool set.
Click Add to the right of the target tool.
After adding the target tools, return to the creation form and check whether the Imported Tools section displays the tools you need to use.
The creation form also provides an Add New Tool entry point. The current screenshot does not show the complete configuration flow after clicking it. When you need to add a new tool, continue by completing the fields displayed on the page.
Configure Headers parameters
When you need to pass parameters to a tool or an external MCP service, you can add configurations in the Headers section.
Expand Headers.
Enter the required name in Parameter Name.
Enter the corresponding value in Parameter Value.
When you need to use a custom parameter, enter the content in Custom Parameter.
To add more parameters, click Add Parameter.
After completing the fields, check that the parameter names and values correspond correctly.
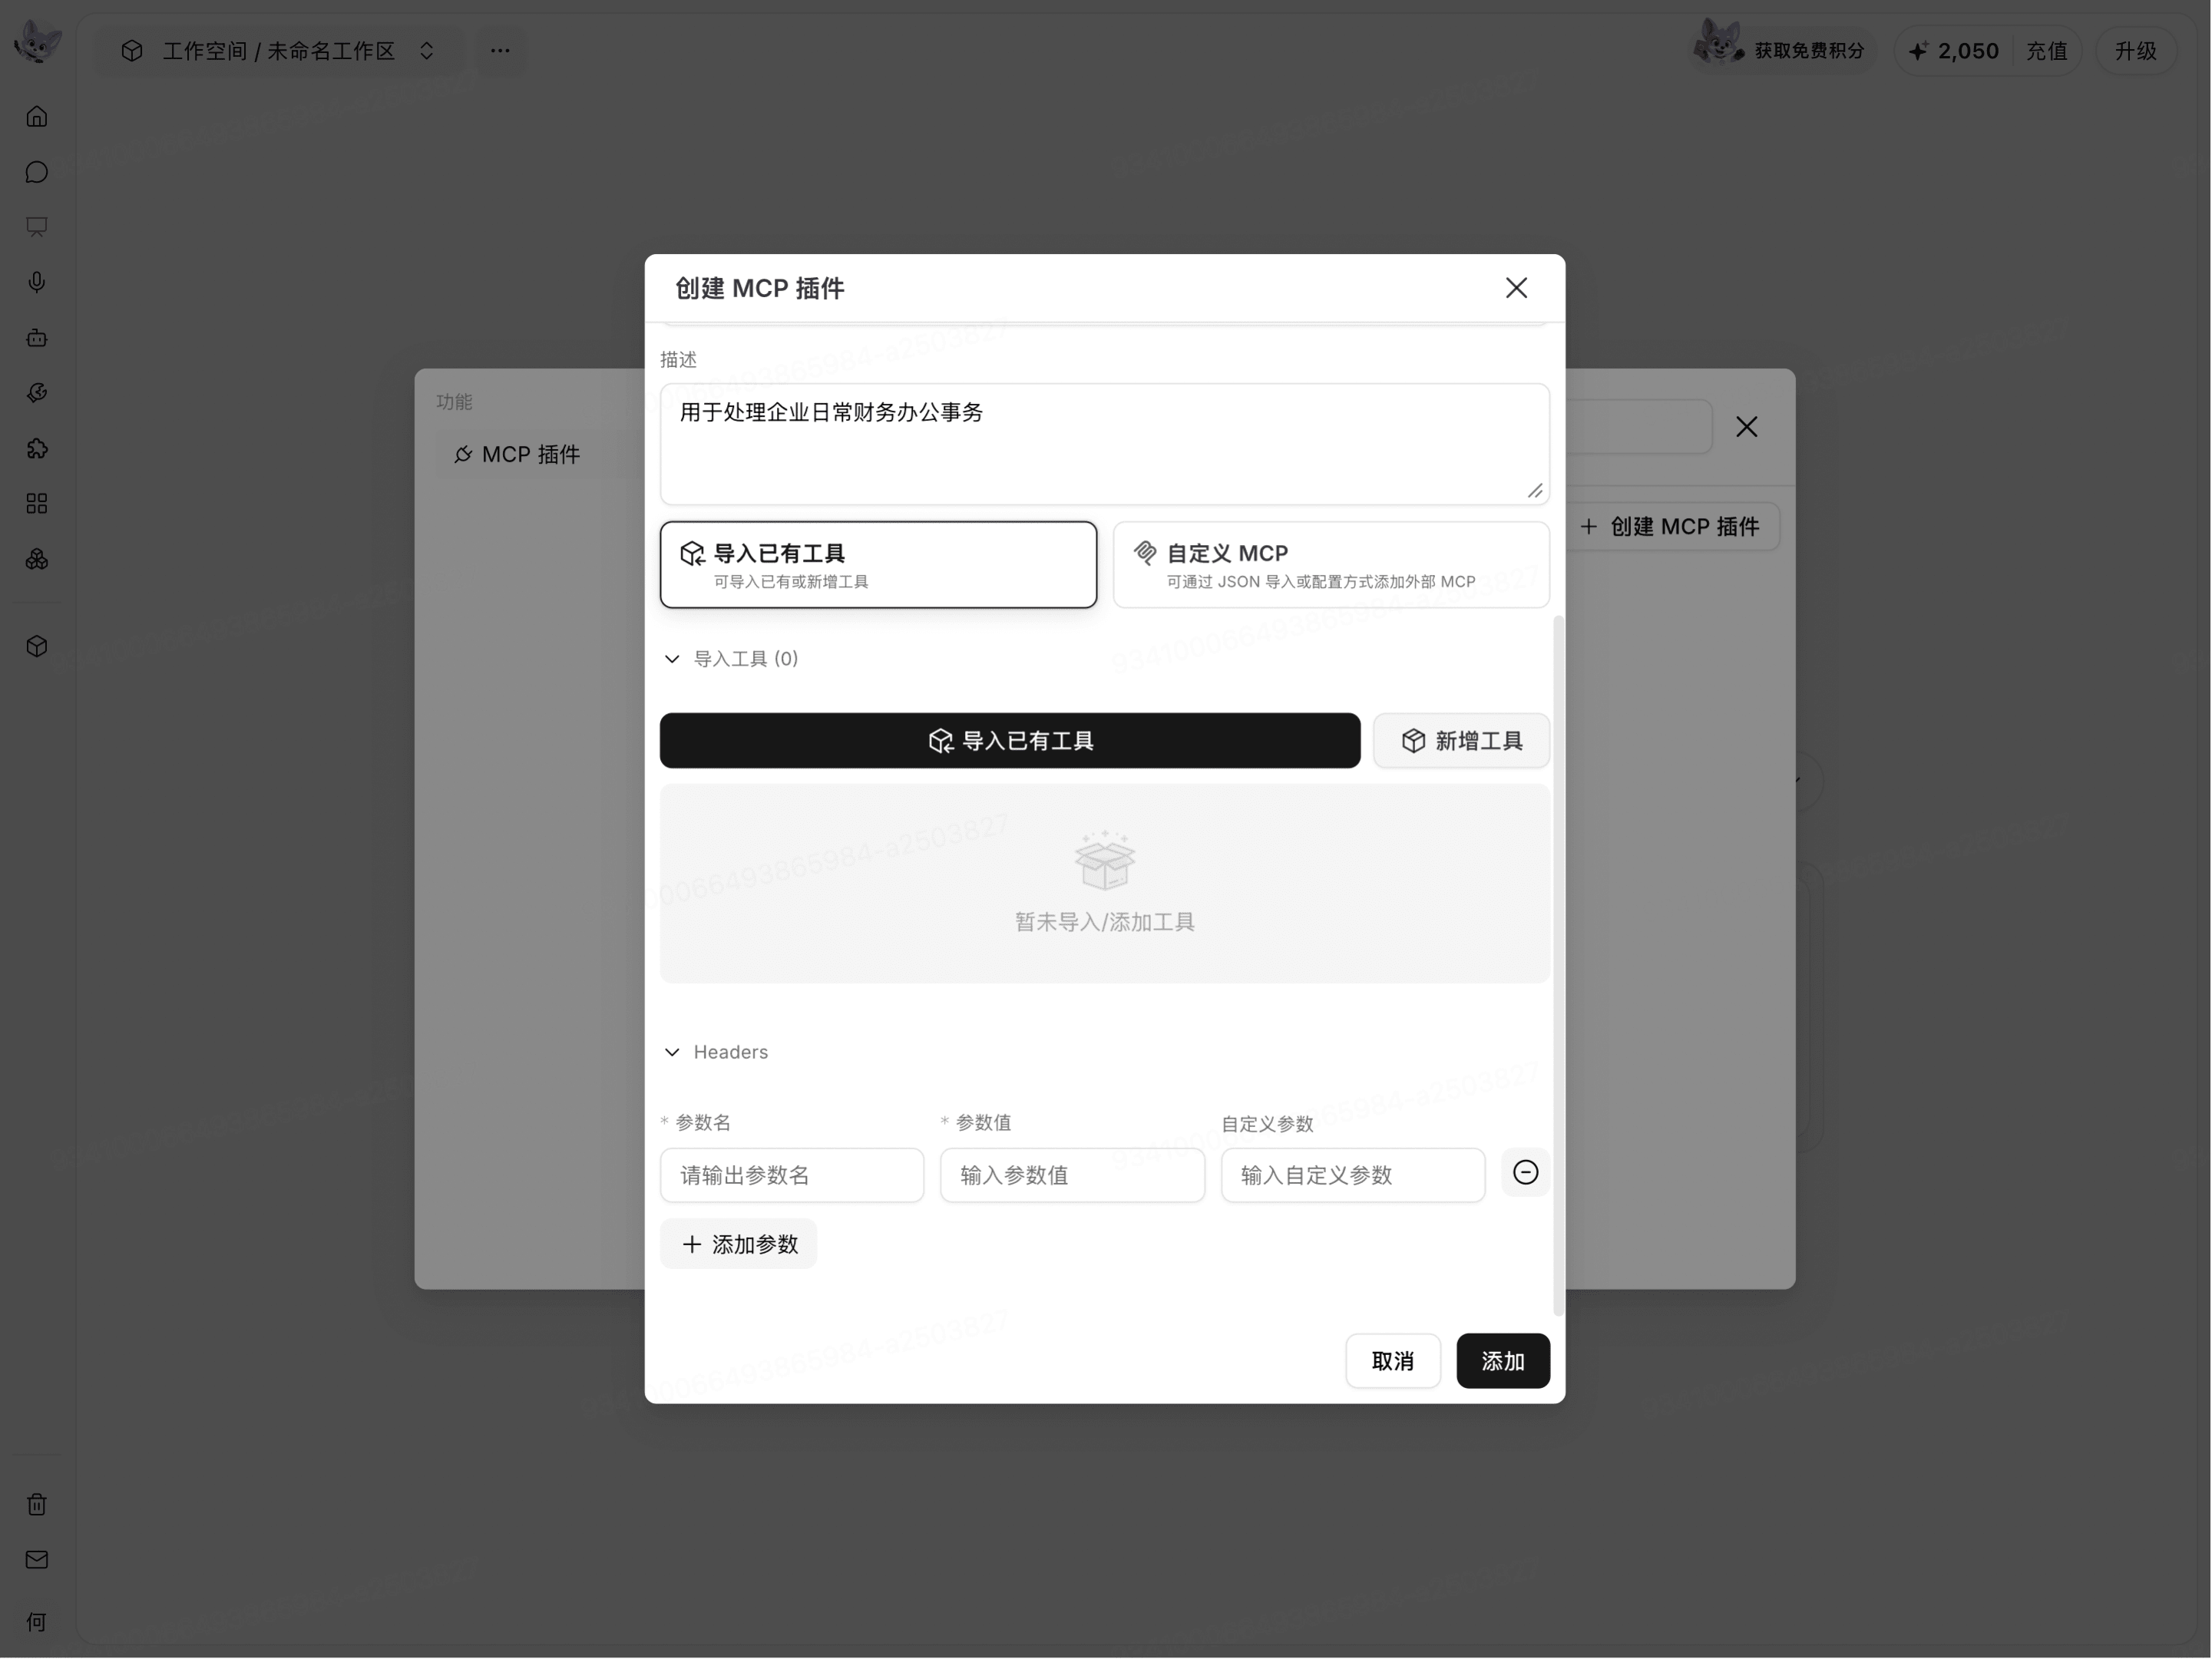
Headers may contain tokens or other access credentials. Before submitting, confirm that the parameter sources are reliable, and avoid exposing actual parameter values in screenshots or shared documents.
Customize an MCP through a JSON configuration
Select Custom MCP.
Enable Import via JSON.
Enter or paste the MCP JSON configuration in the configuration area.
Check the MCP name, description, Headers, and other content in the configuration.
The page displays the current JSON configuration. You can continue to configure Headers and the authorization method.
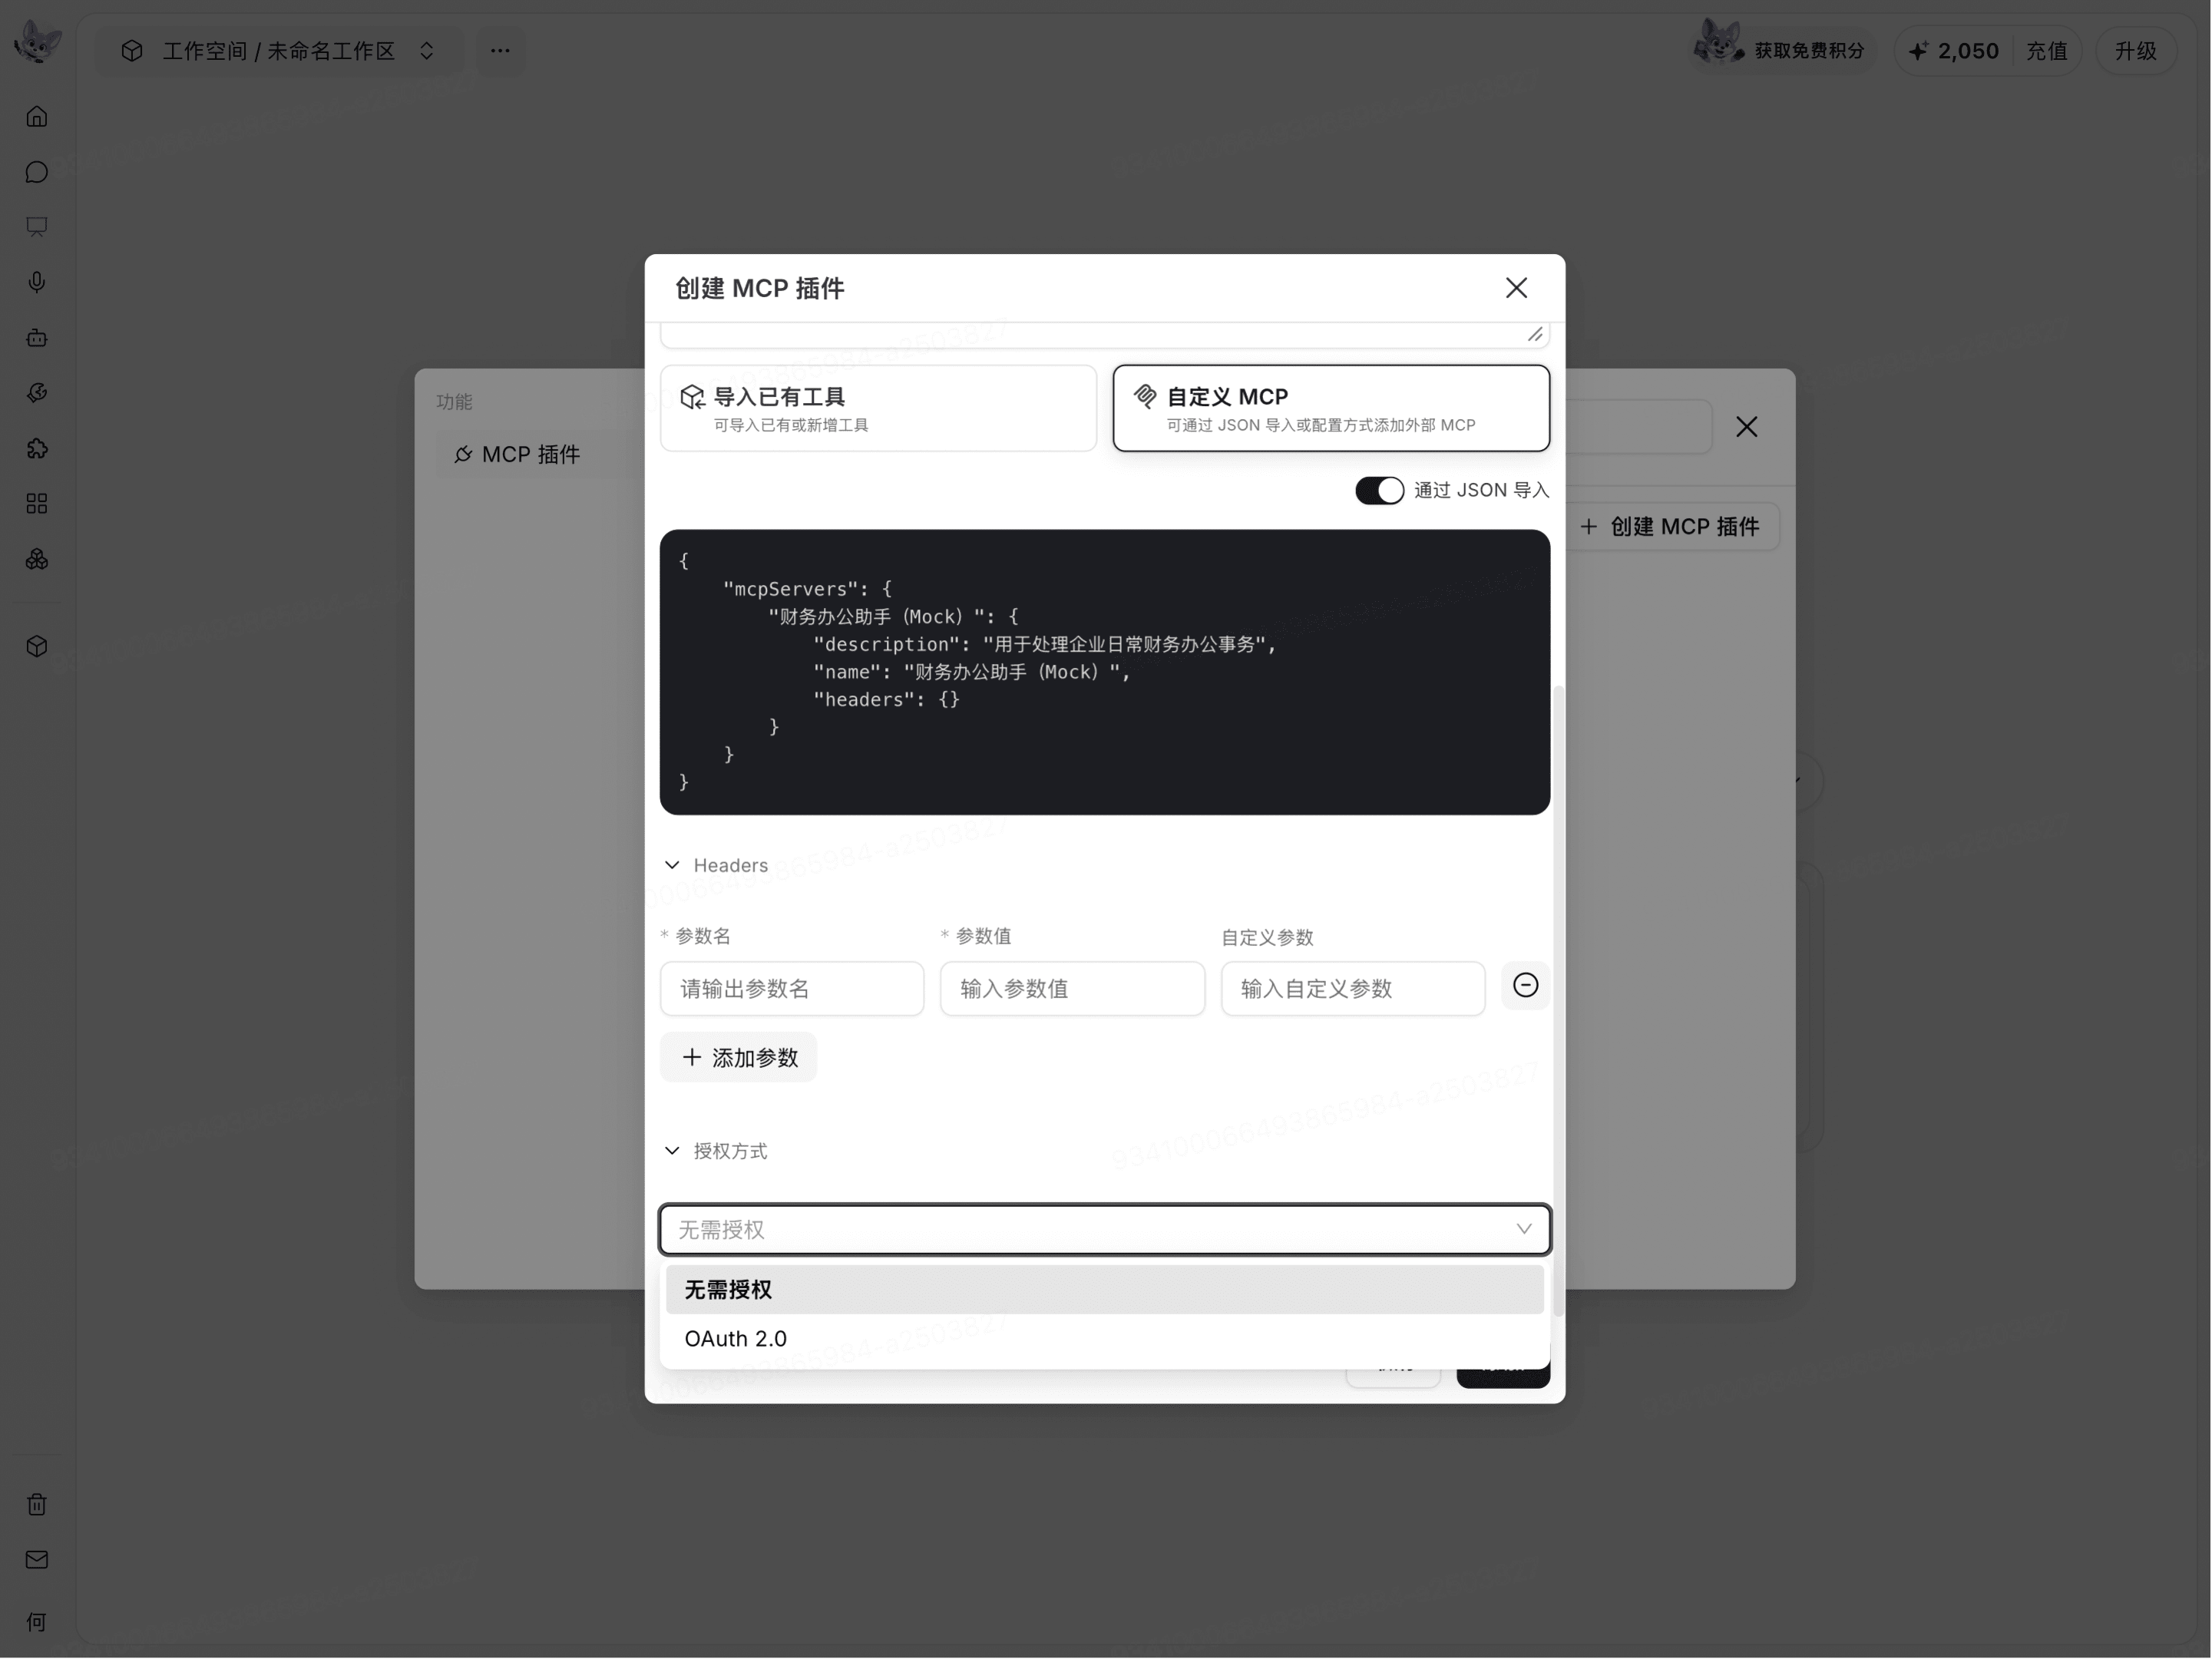
The fields and values in the JSON configuration should comply with the requirements of the MCP service you need to connect to. Before submitting, check the JSON format and remove access credentials that do not need to be made public.
Select an authorization method
After expanding Authorization Method, the current page displays the following options:
No Authorization Required
OAuth 2.0
Select an authorization method based on the actual requirements of the MCP service. The current screenshot does not show the subsequent OAuth 2.0 authorization process. After selecting it, continue by following the prompts displayed on the page.
Complete creation and check the MCP
After completing the basic information and capability configuration, check the plugin name, description, imported tools, JSON configuration, Headers, and authorization method.
Click Add at the bottom of the form.
Return to the Custom Plugins list.
Check whether the newly created MCP is displayed.
After creation is complete, the list displays the MCP name and description, as well as the Configure, Manage Permissions, and Add entry points.
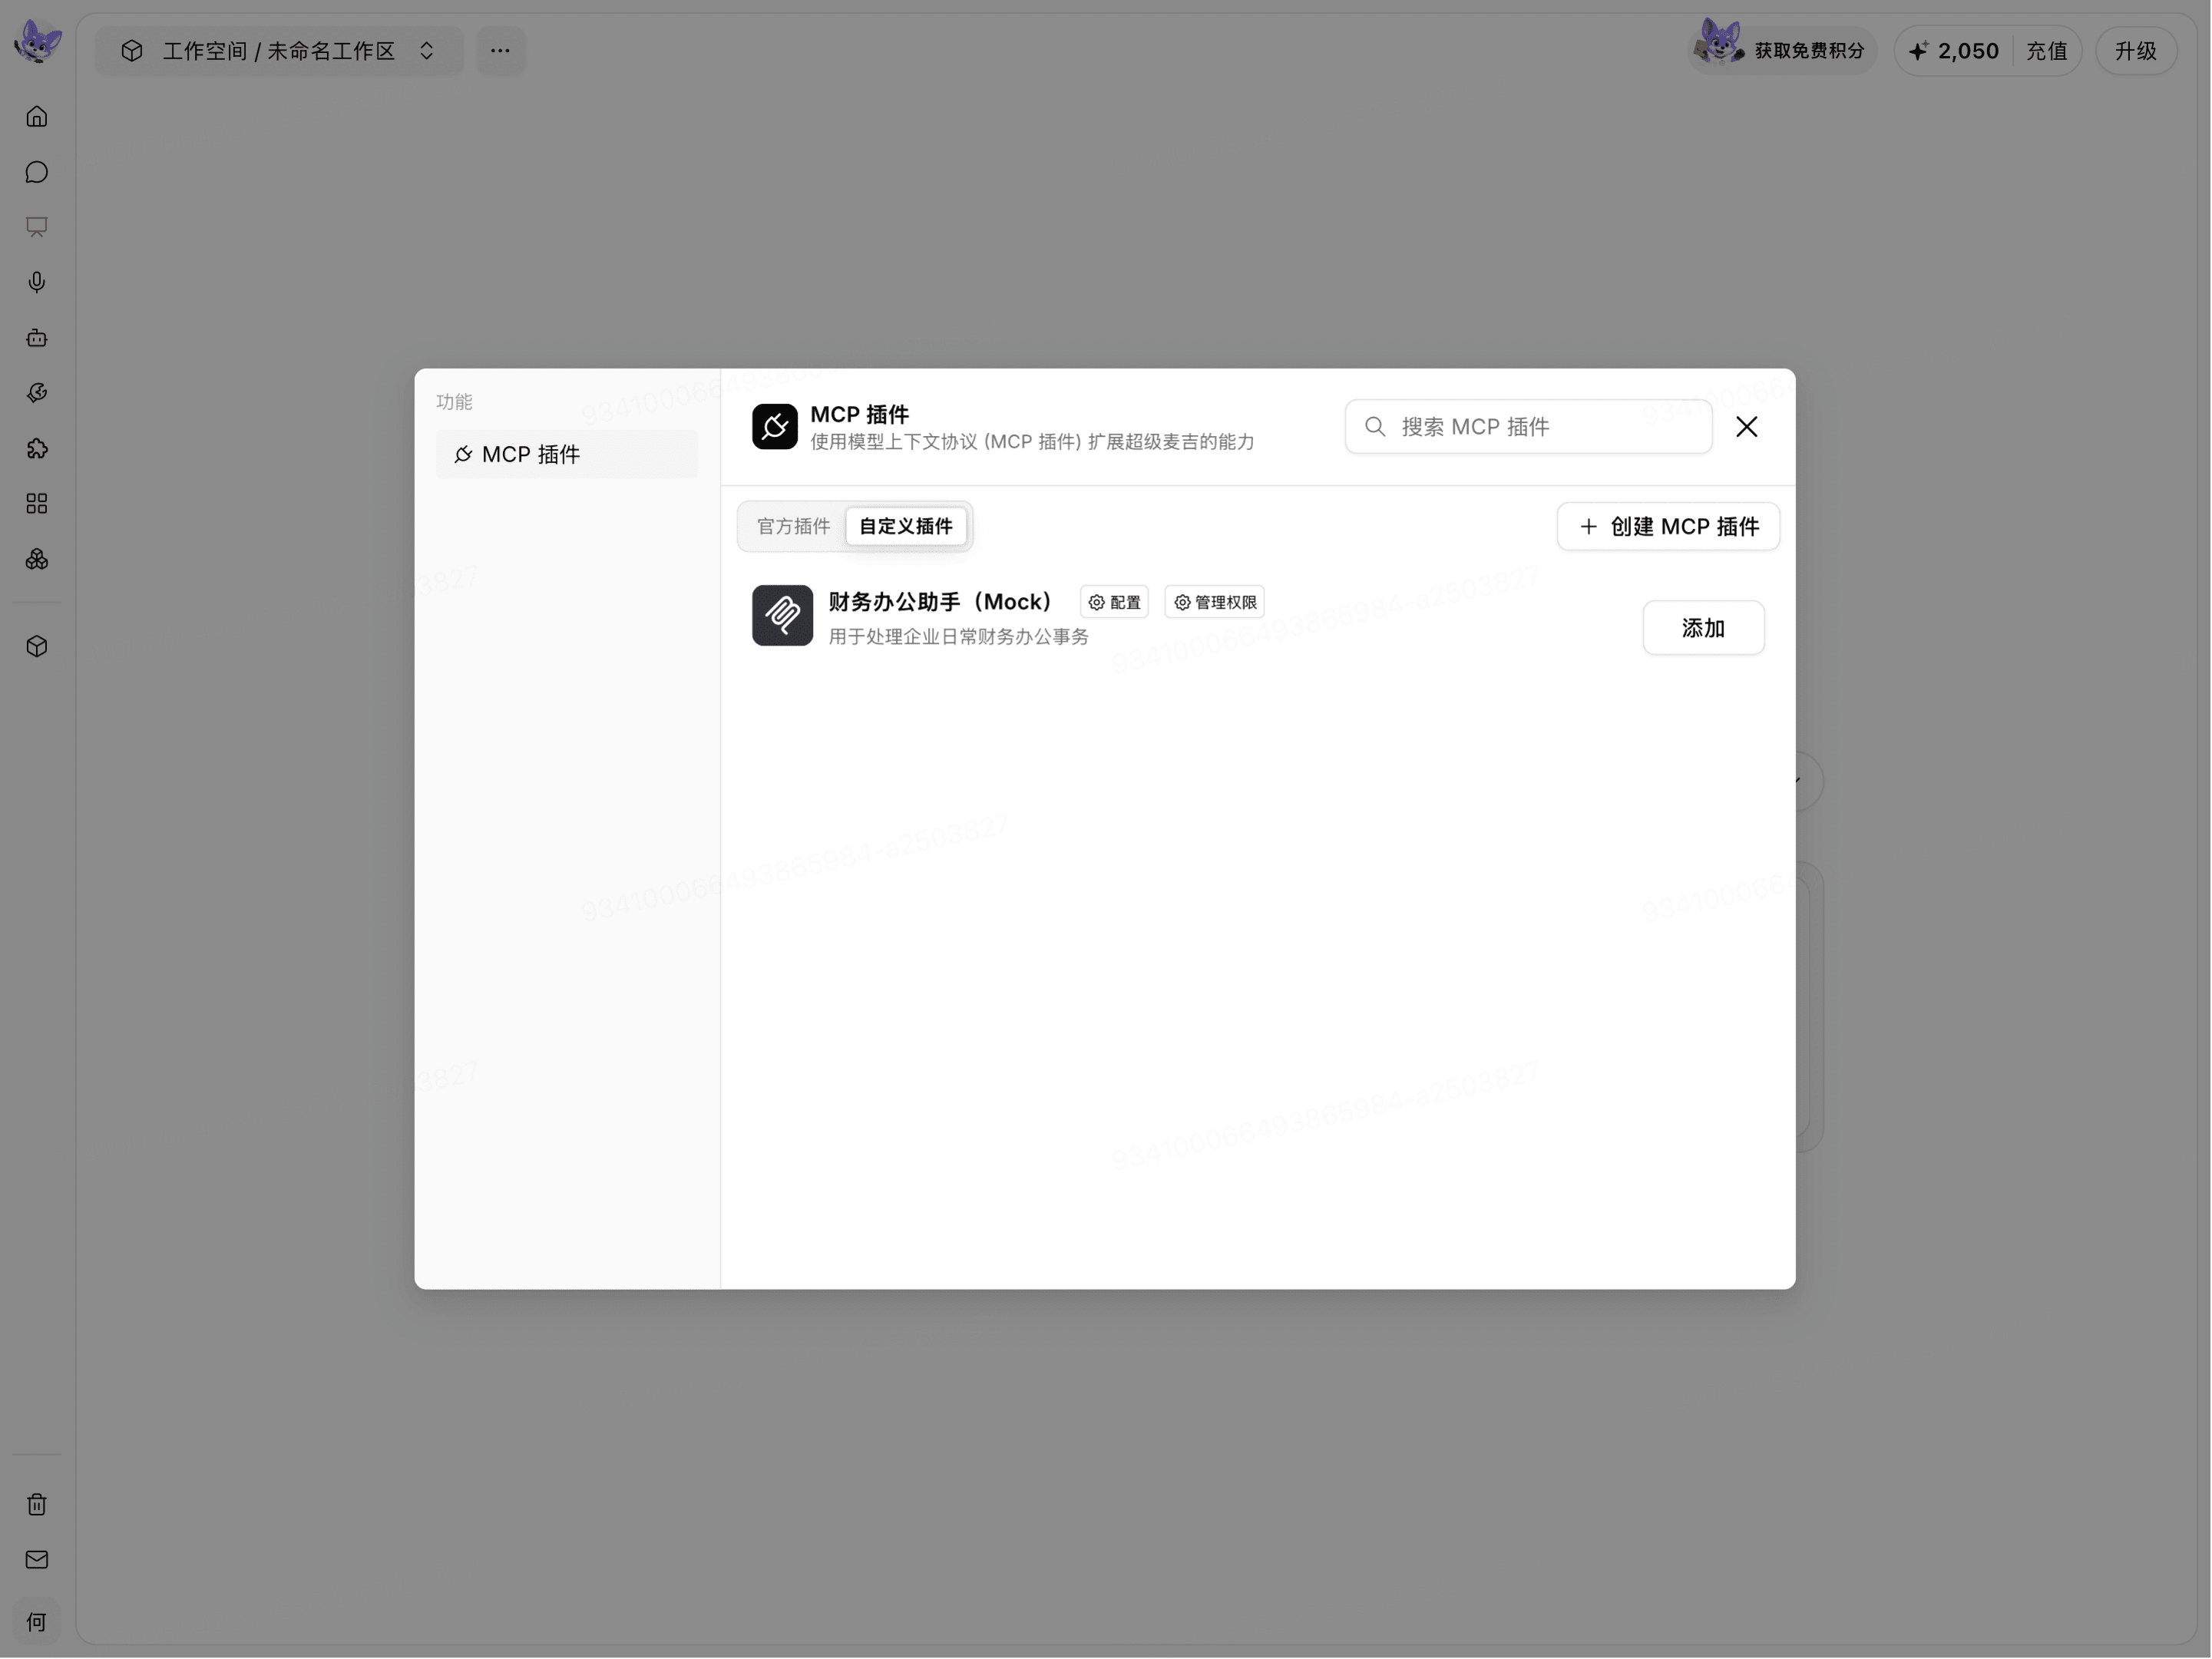
On the current page, the MCP you create is visible only to you, the creator. The Manage Permissions entry in the list does not indicate that you can assign the MCP to other organization members.
Modify or delete an MCP
Find the target MCP in the Custom Plugins list.
Click Configure.
Modify the plugin's basic information or capability configuration.
Click Save.
After saving, return to the list and check whether the name, description, and configuration meet your expectations.
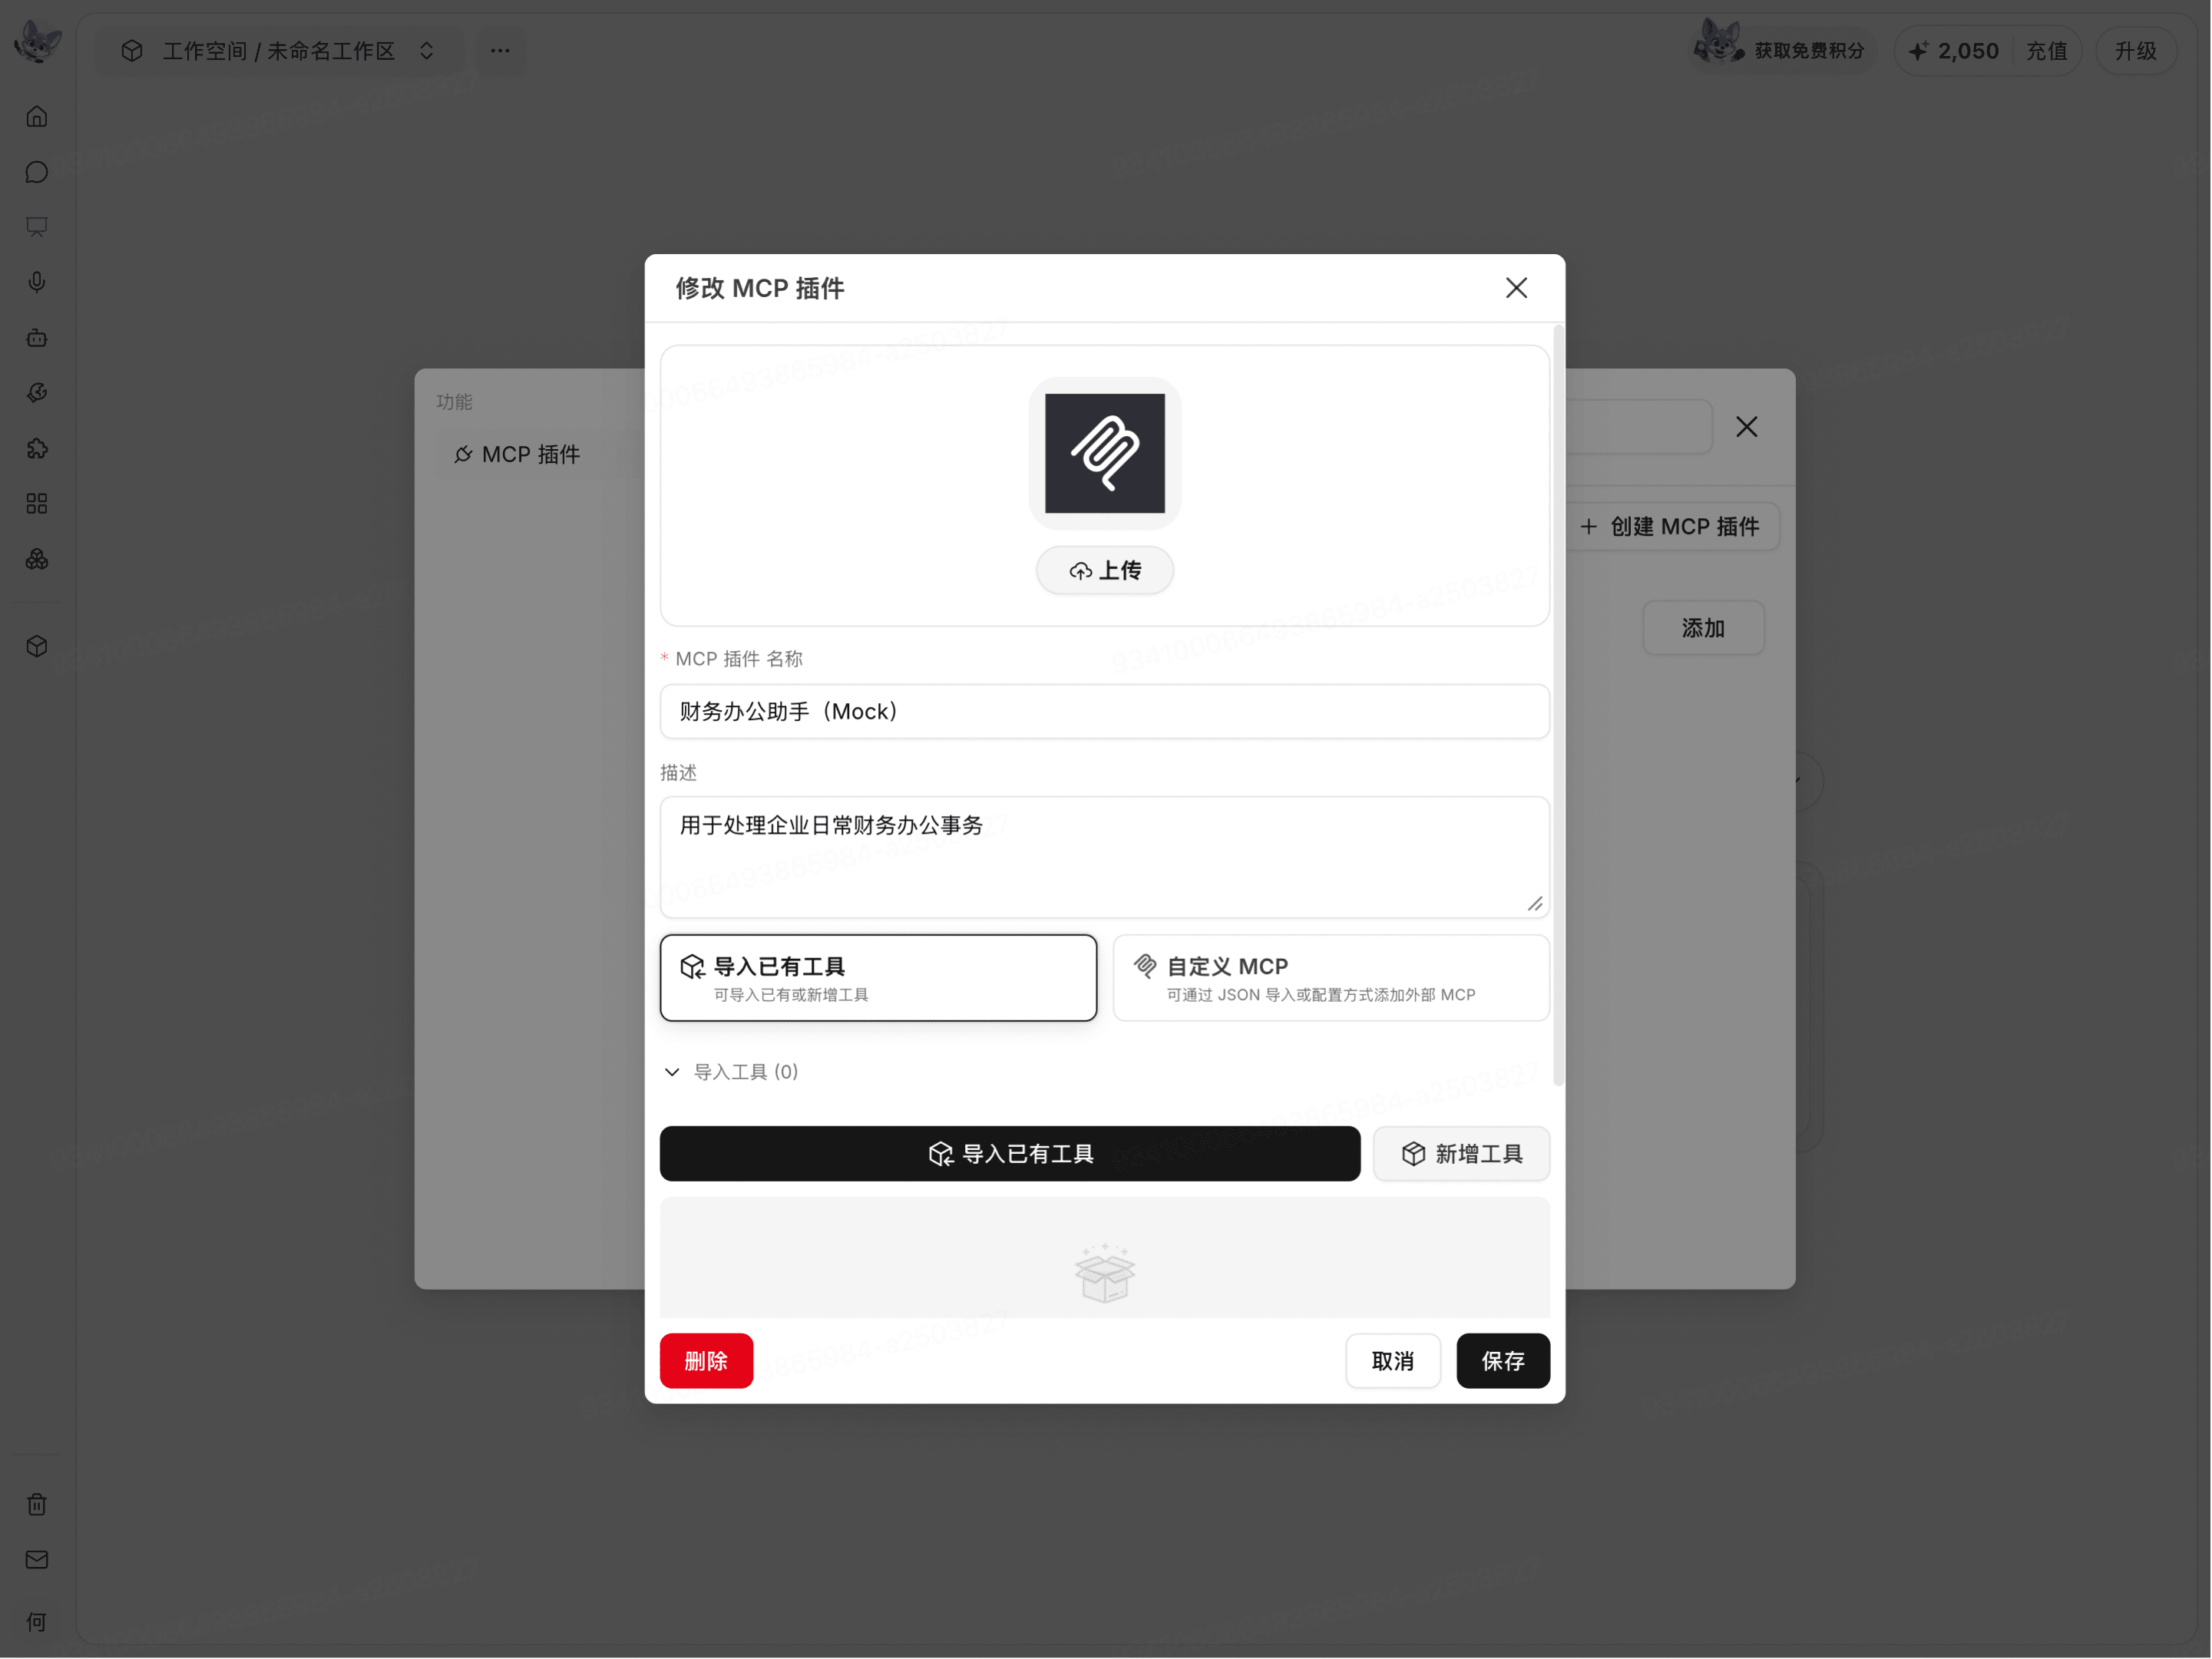
The modification page also provides a Delete entry point. The current screenshot does not show the deletion confirmation, deletion result, or the impact on loaded conversations. Before deleting, confirm that the MCP is no longer needed, and complete the operation according to the prompts displayed on the page.