
Use MCP in a Conversation
Add an available MCP to the current conversation, select the MCP with @, send a request, and view the MCP call process and returned results.
Add an available MCP to the current conversation, select the MCP with @, send a request, and view the MCP call process and returned results.
Before You Begin
Before you begin, make sure the following requirements are met:
The target MCP appears in the Official Plugins or Custom Plugins list.
You have prepared the request for the MCP to process.
If the request involves real business operations, you have confirmed that it will not accidentally modify data or submit a real application.
An MCP appearing in the plugin list does not mean it has been loaded into the current conversation. You still need to add it before use.
Official Plugins and Custom Plugins are tab names on the MCP Plugins page. Locate the target MCP under the tab where it currently appears.
Add an MCP to the Current Conversation
On the conversation page, open MCP Plugins.
Switch to the tab where the target MCP currently appears.
Find the target MCP in the list.
Click Add to the right of the target MCP.
Check whether the button changes to a checkmark.
When the button displays a checkmark, the MCP has been added to the current conversation.
The MCP in the screenshot example is under the Custom Plugins tab.
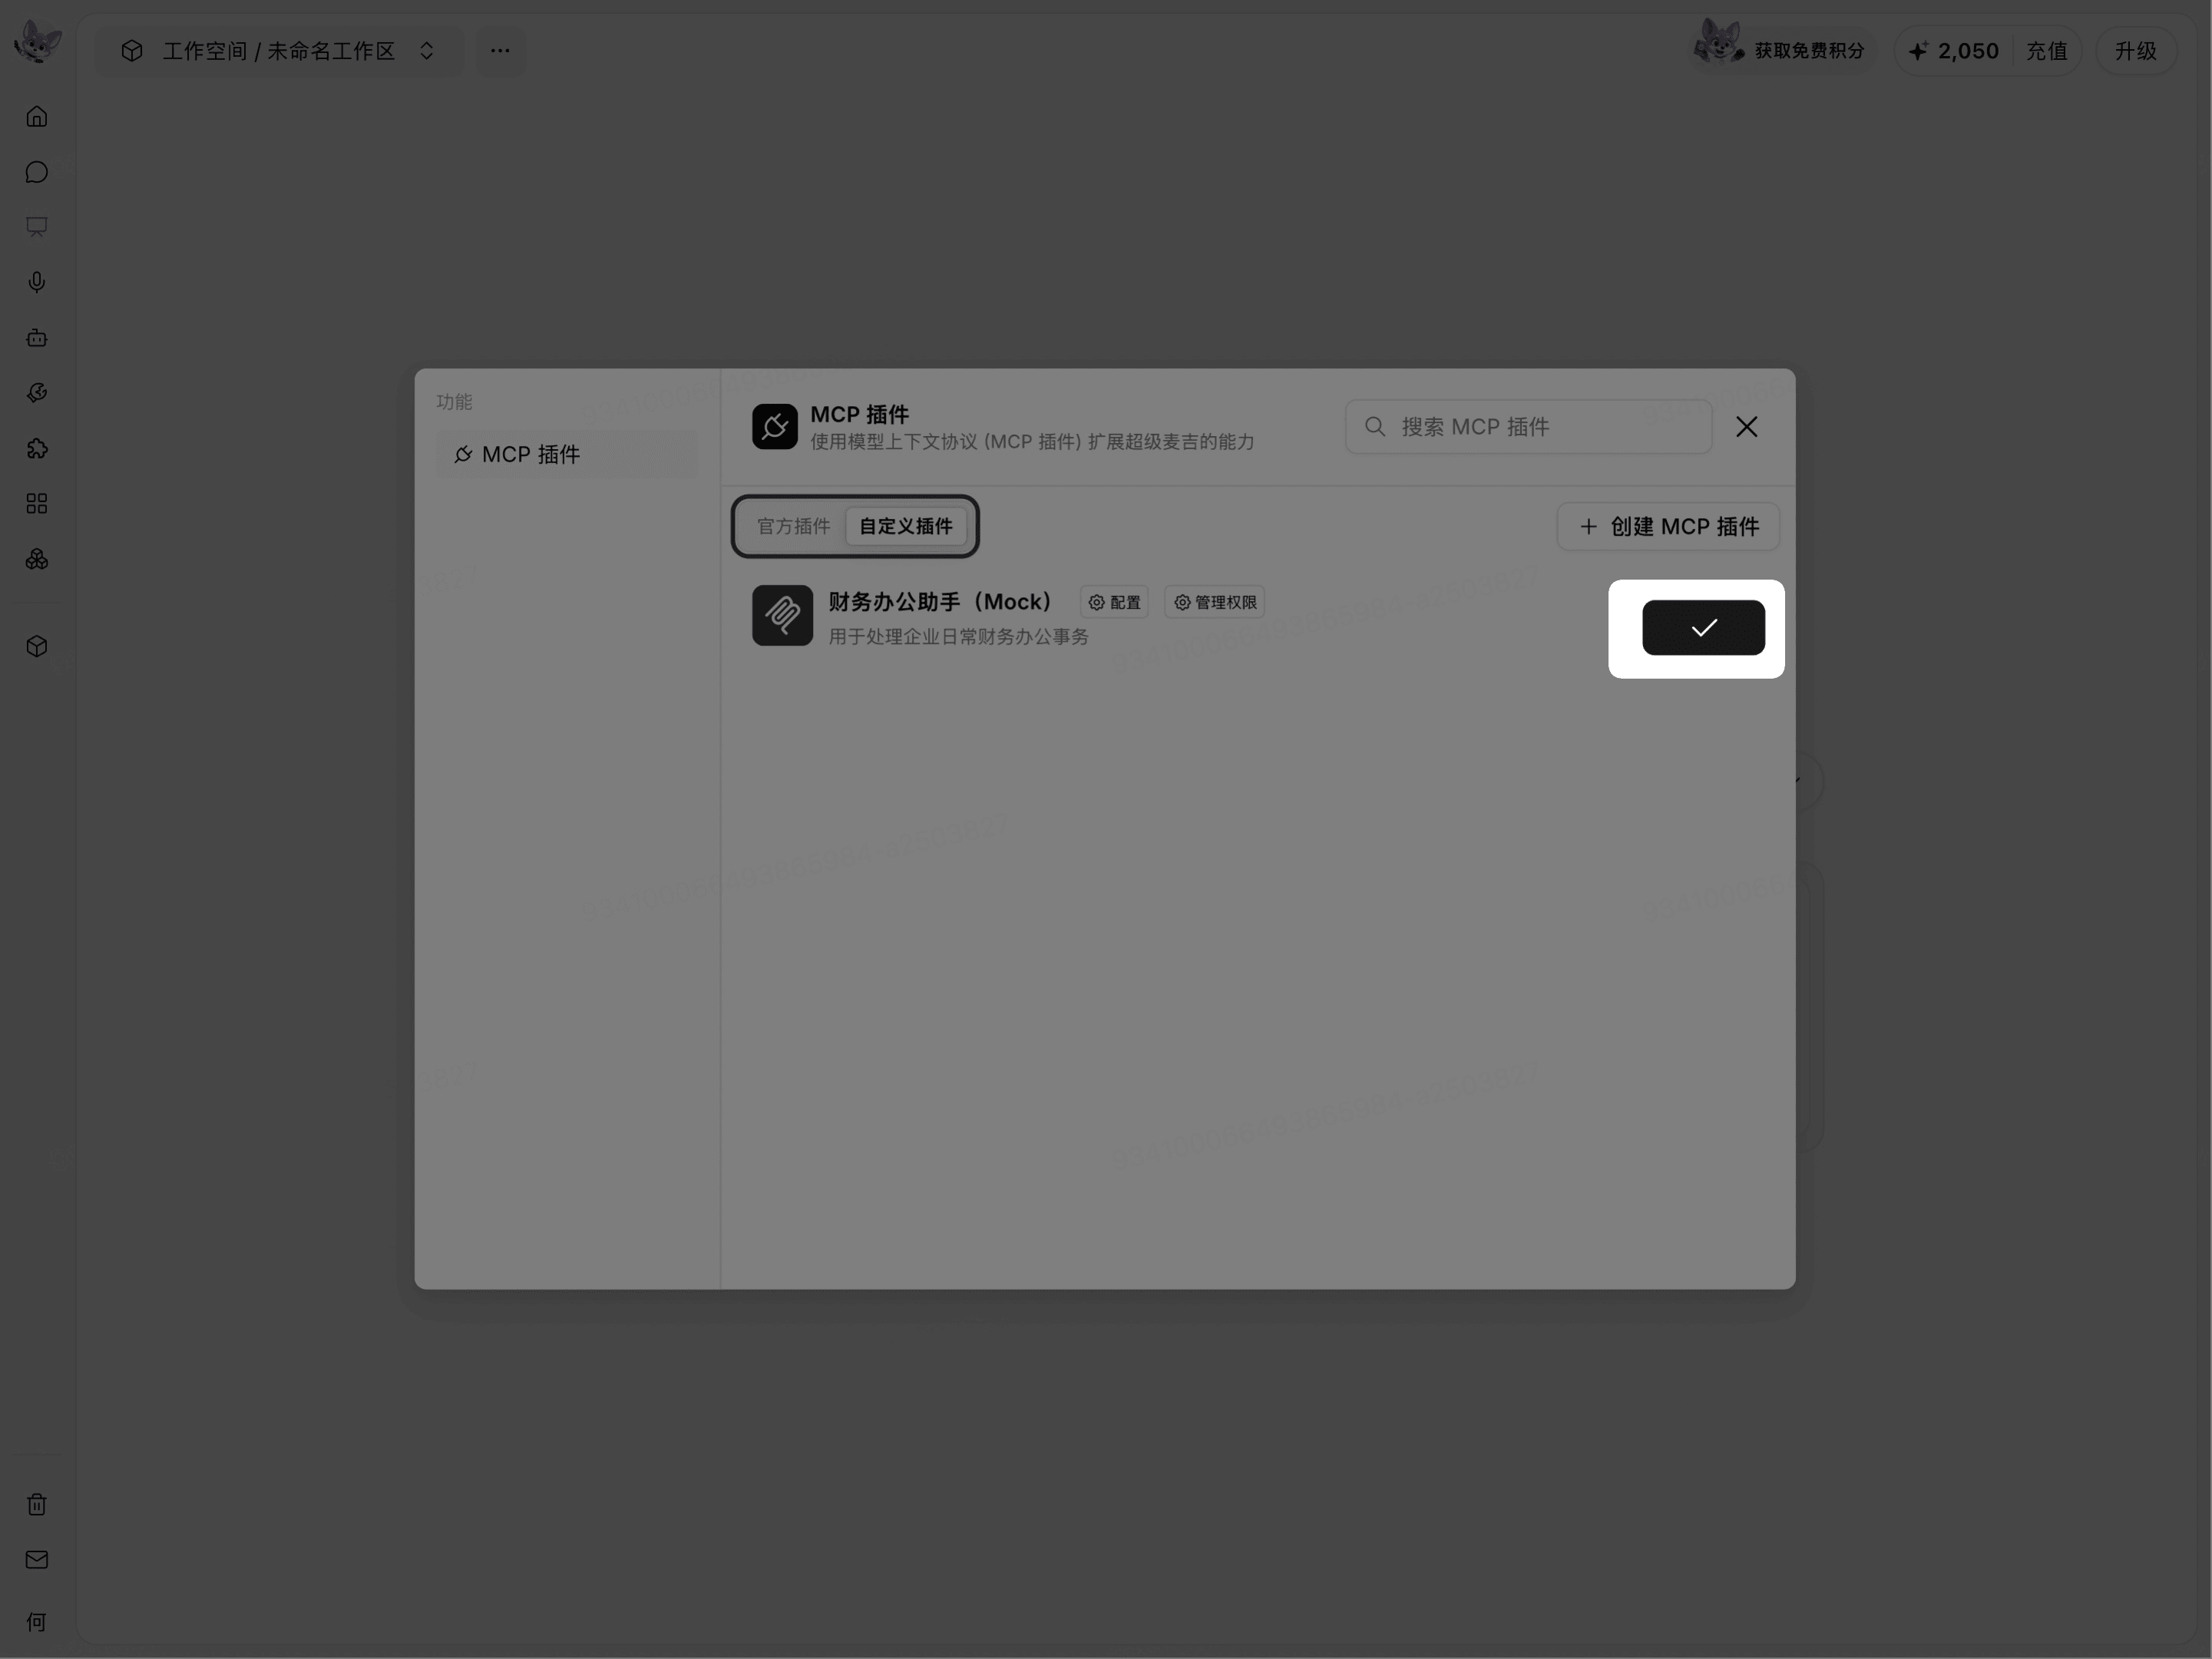
View or Remove Loaded MCPs
Return to the conversation input area.
Click the plugin count indicator in the lower-right corner of the input box.
Under Loaded Plugins, view the MCPs currently loaded in the conversation.
The pop-up area displays each MCP's name and description and provides an Add MCP option.
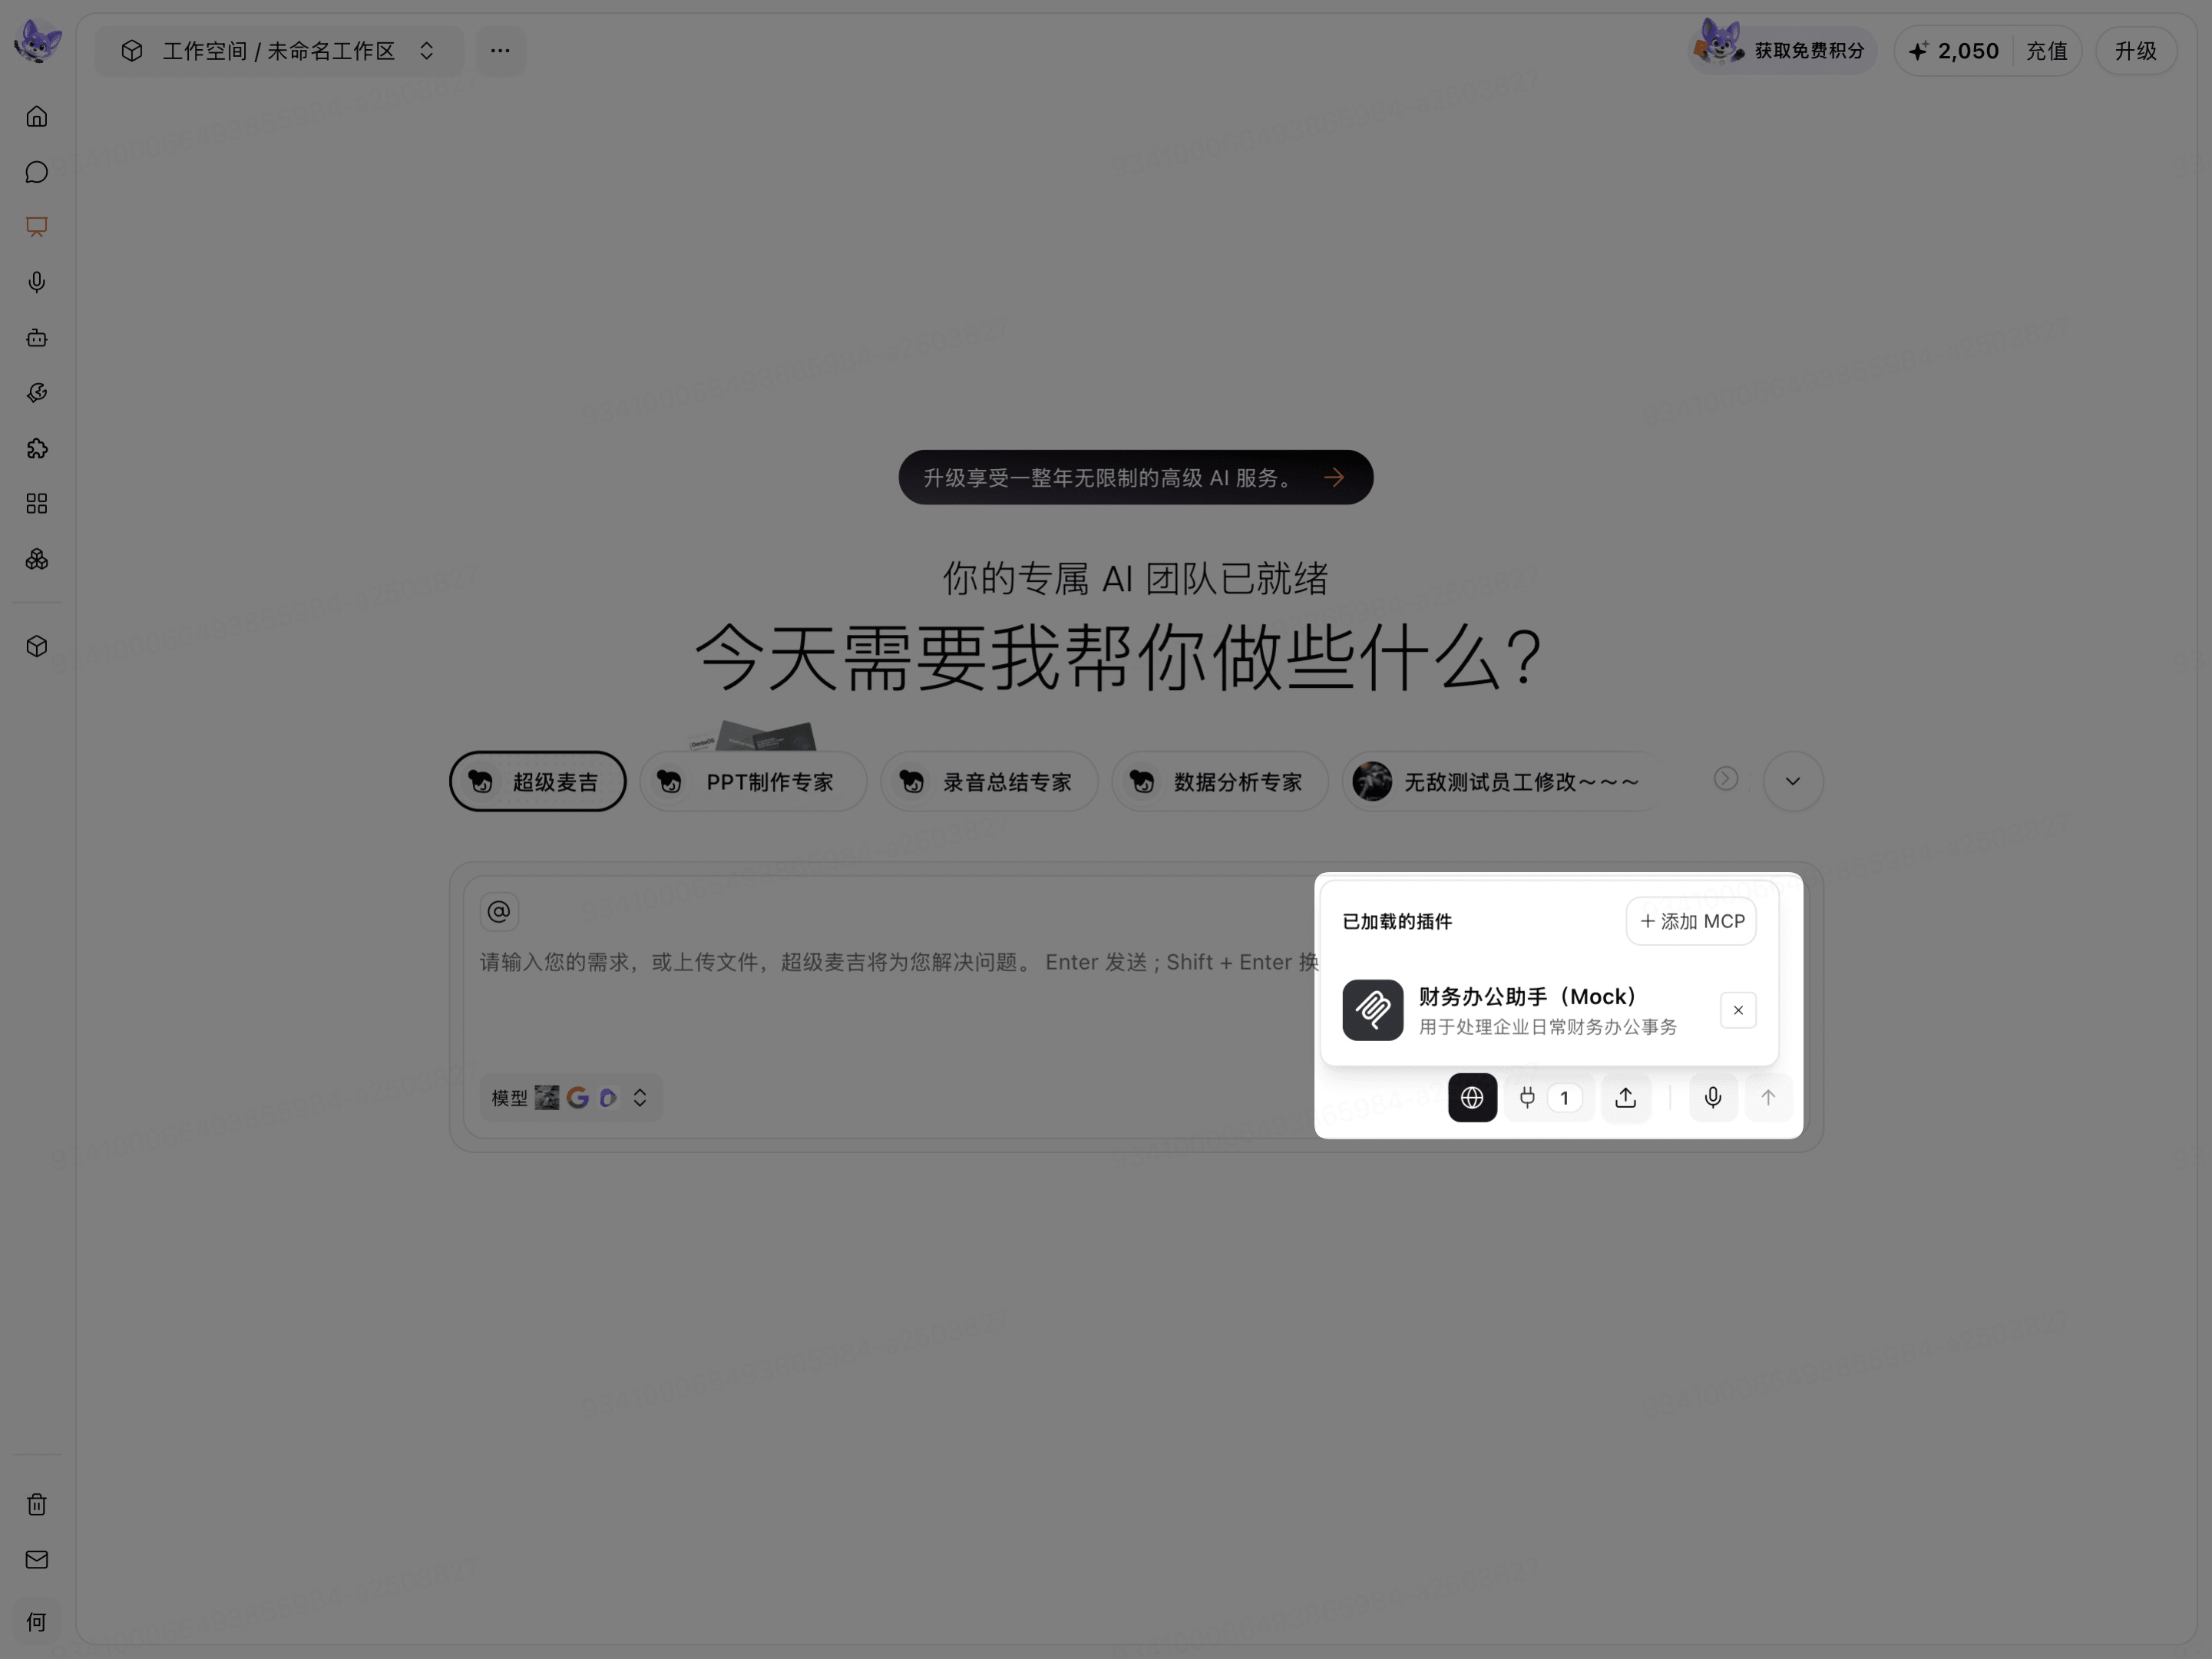
When you no longer need to use an MCP in the current conversation, click the close button to the right of the MCP. This only removes the loaded MCP from the current conversation; it is not the Delete action on the configuration page.
Select an MCP in a Conversation
Click the conversation input box.
Enter
@.Select the MCP you want to call from the options provided on the page.
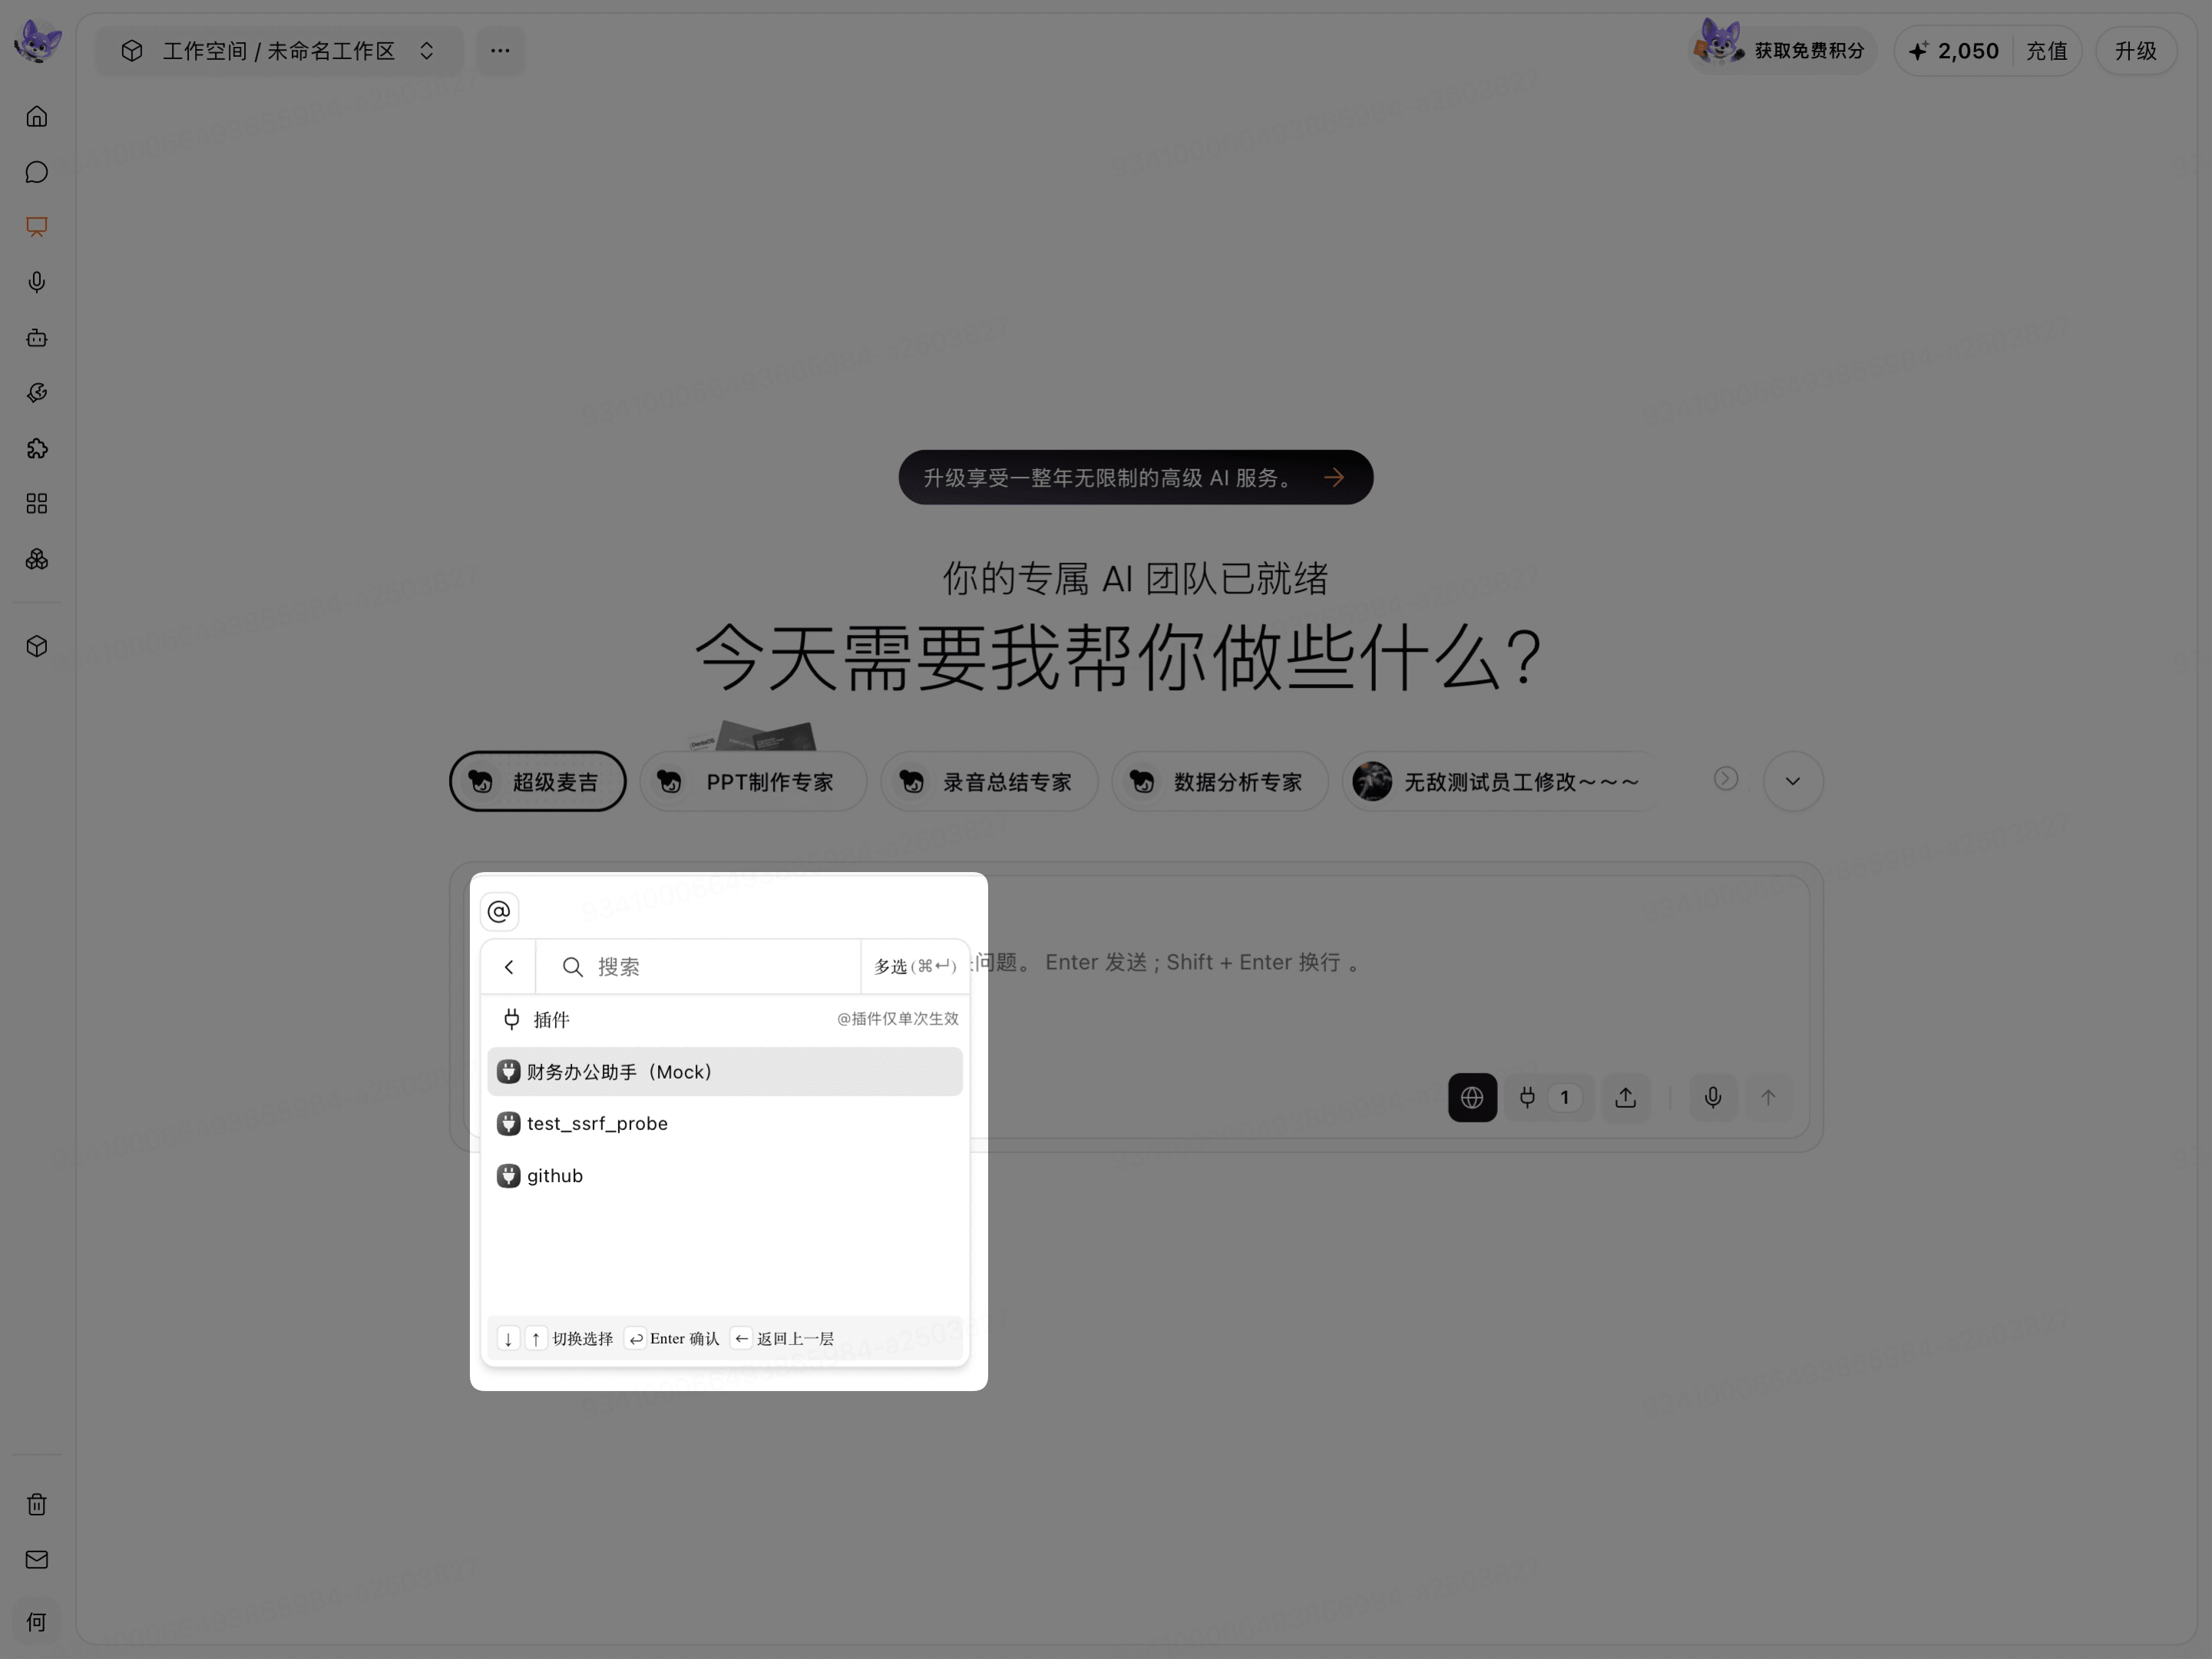
After you make a selection, the MCP name preceded by @ appears in the input box. You can then enter the request for the MCP to process.
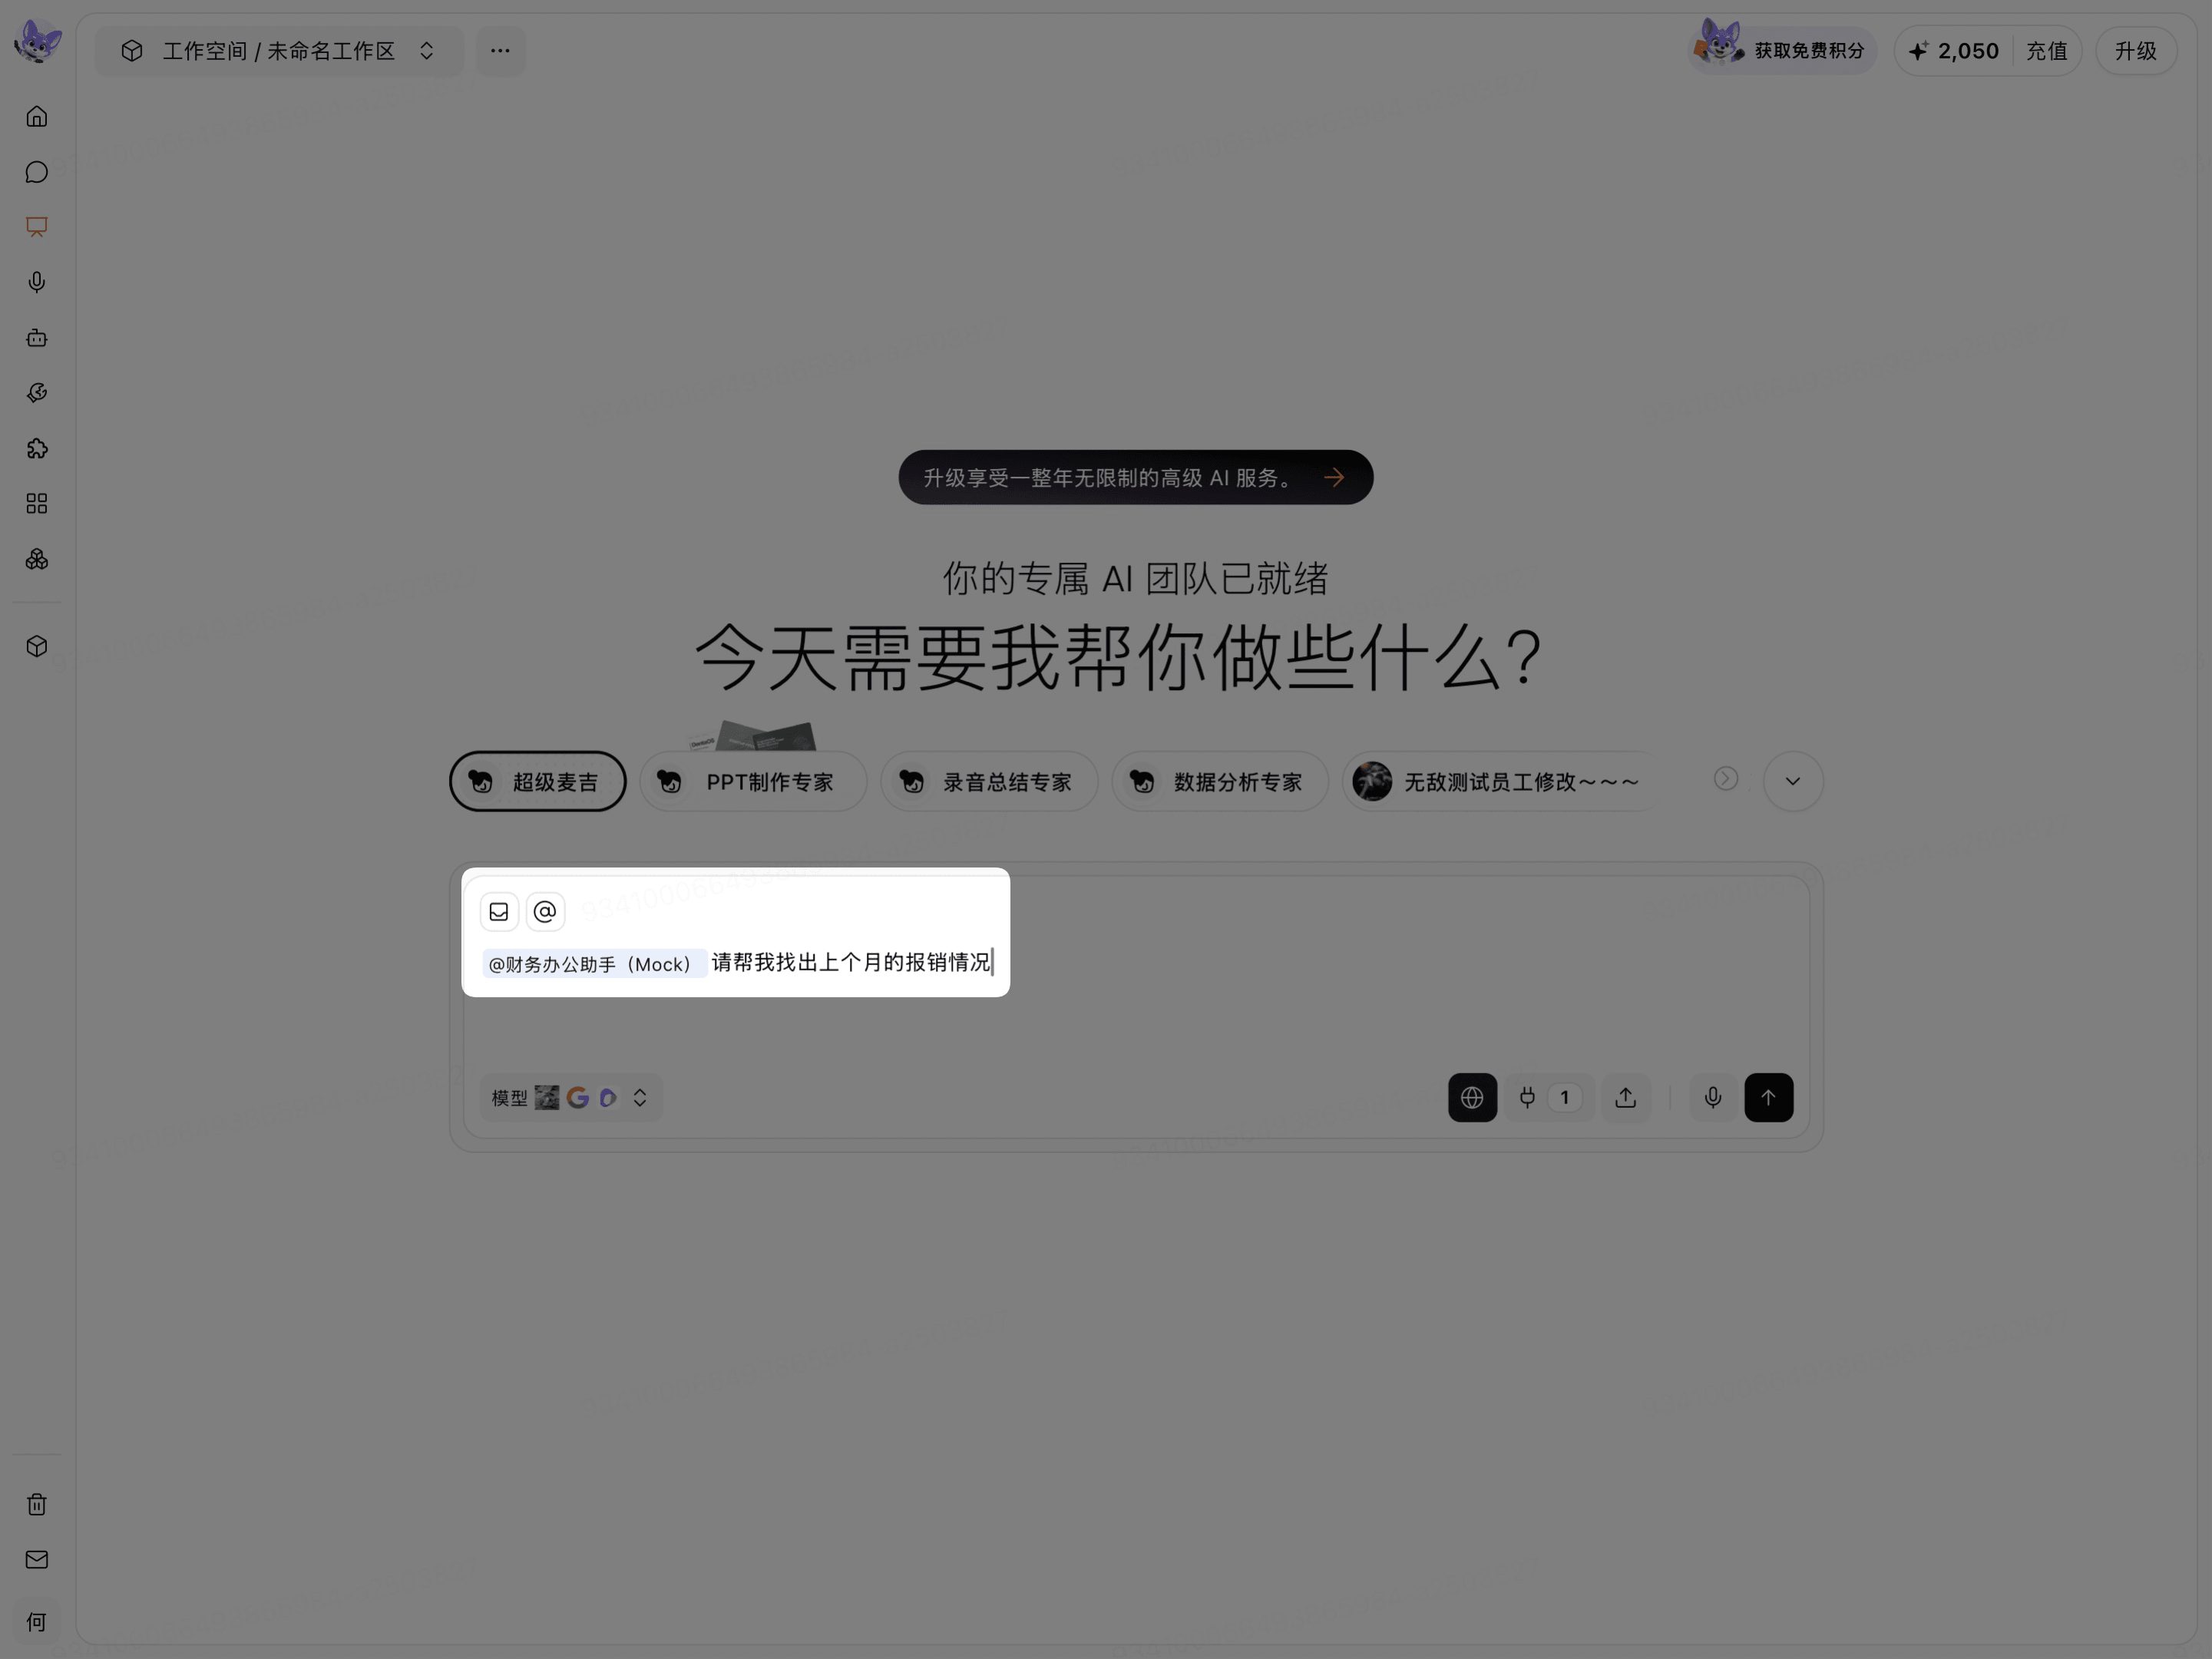
View MCP Call Results
After you send the request, the page displays the MCP execution process. You can review the following stages in order:
Connect to Service: Confirm that the target MCP service is connected and ready.
View Available Tools: Confirm that the system has retrieved the MCP tool list.
Collect Tool Usage Information: Confirm that the system has read the usage instructions for the target tool.
Call Tool: Confirm that the target tool call has been completed.
After the tool call is complete, the page continues to display the returned content. In the screenshot example, Financial Office Assistant (Mock) completed the query_reimbursements call, returned a summary of the number and total amount of reimbursements from the previous month, and displayed Task completed. You can submit a new request at any time.
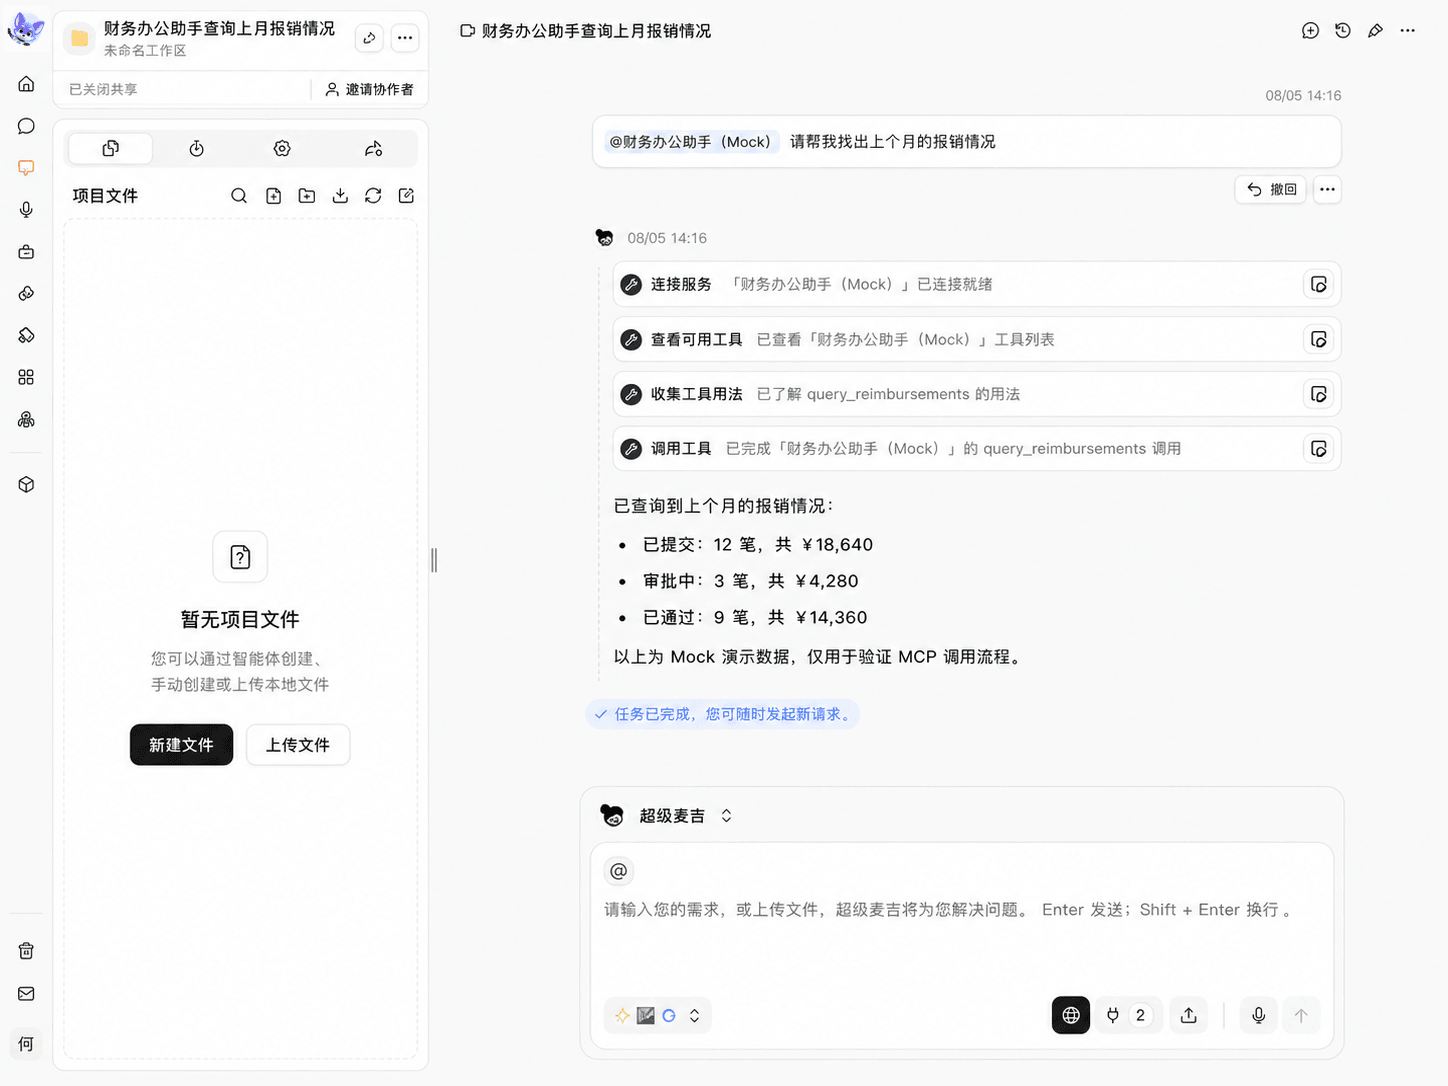
Financial Office Assistant (Mock) uses demo data. The reimbursement count and amount shown in the screenshot are only intended to demonstrate the MCP connection and tool call process and do not represent real financial data.