
Manage Departments and Members
In **Enterprise Features > Organization Structure > Members and Departments**, you can maintain the current organization’s department structure, member accounts, and member status.
In Enterprise Features > Organization Structure > Members and Departments, you can maintain the current organization’s department structure, member accounts, and member status.
Before you start
Sign in to SuperMagic and open the admin console.
Confirm the current organization and that your account has organization management permissions.
Prepare the name, mobile phone number, and department of the member you want to add.
Before modifying a department or member status, confirm the target to avoid affecting the member’s ability to sign in or use organization features.
Open the Members and Departments page
Click Enterprise Features at the top of the admin console.
Expand Organization Structure in the left navigation.
Click Members and Departments.
The page displays four tabs: Members, Departments, Pending Activation, and Departed Members.
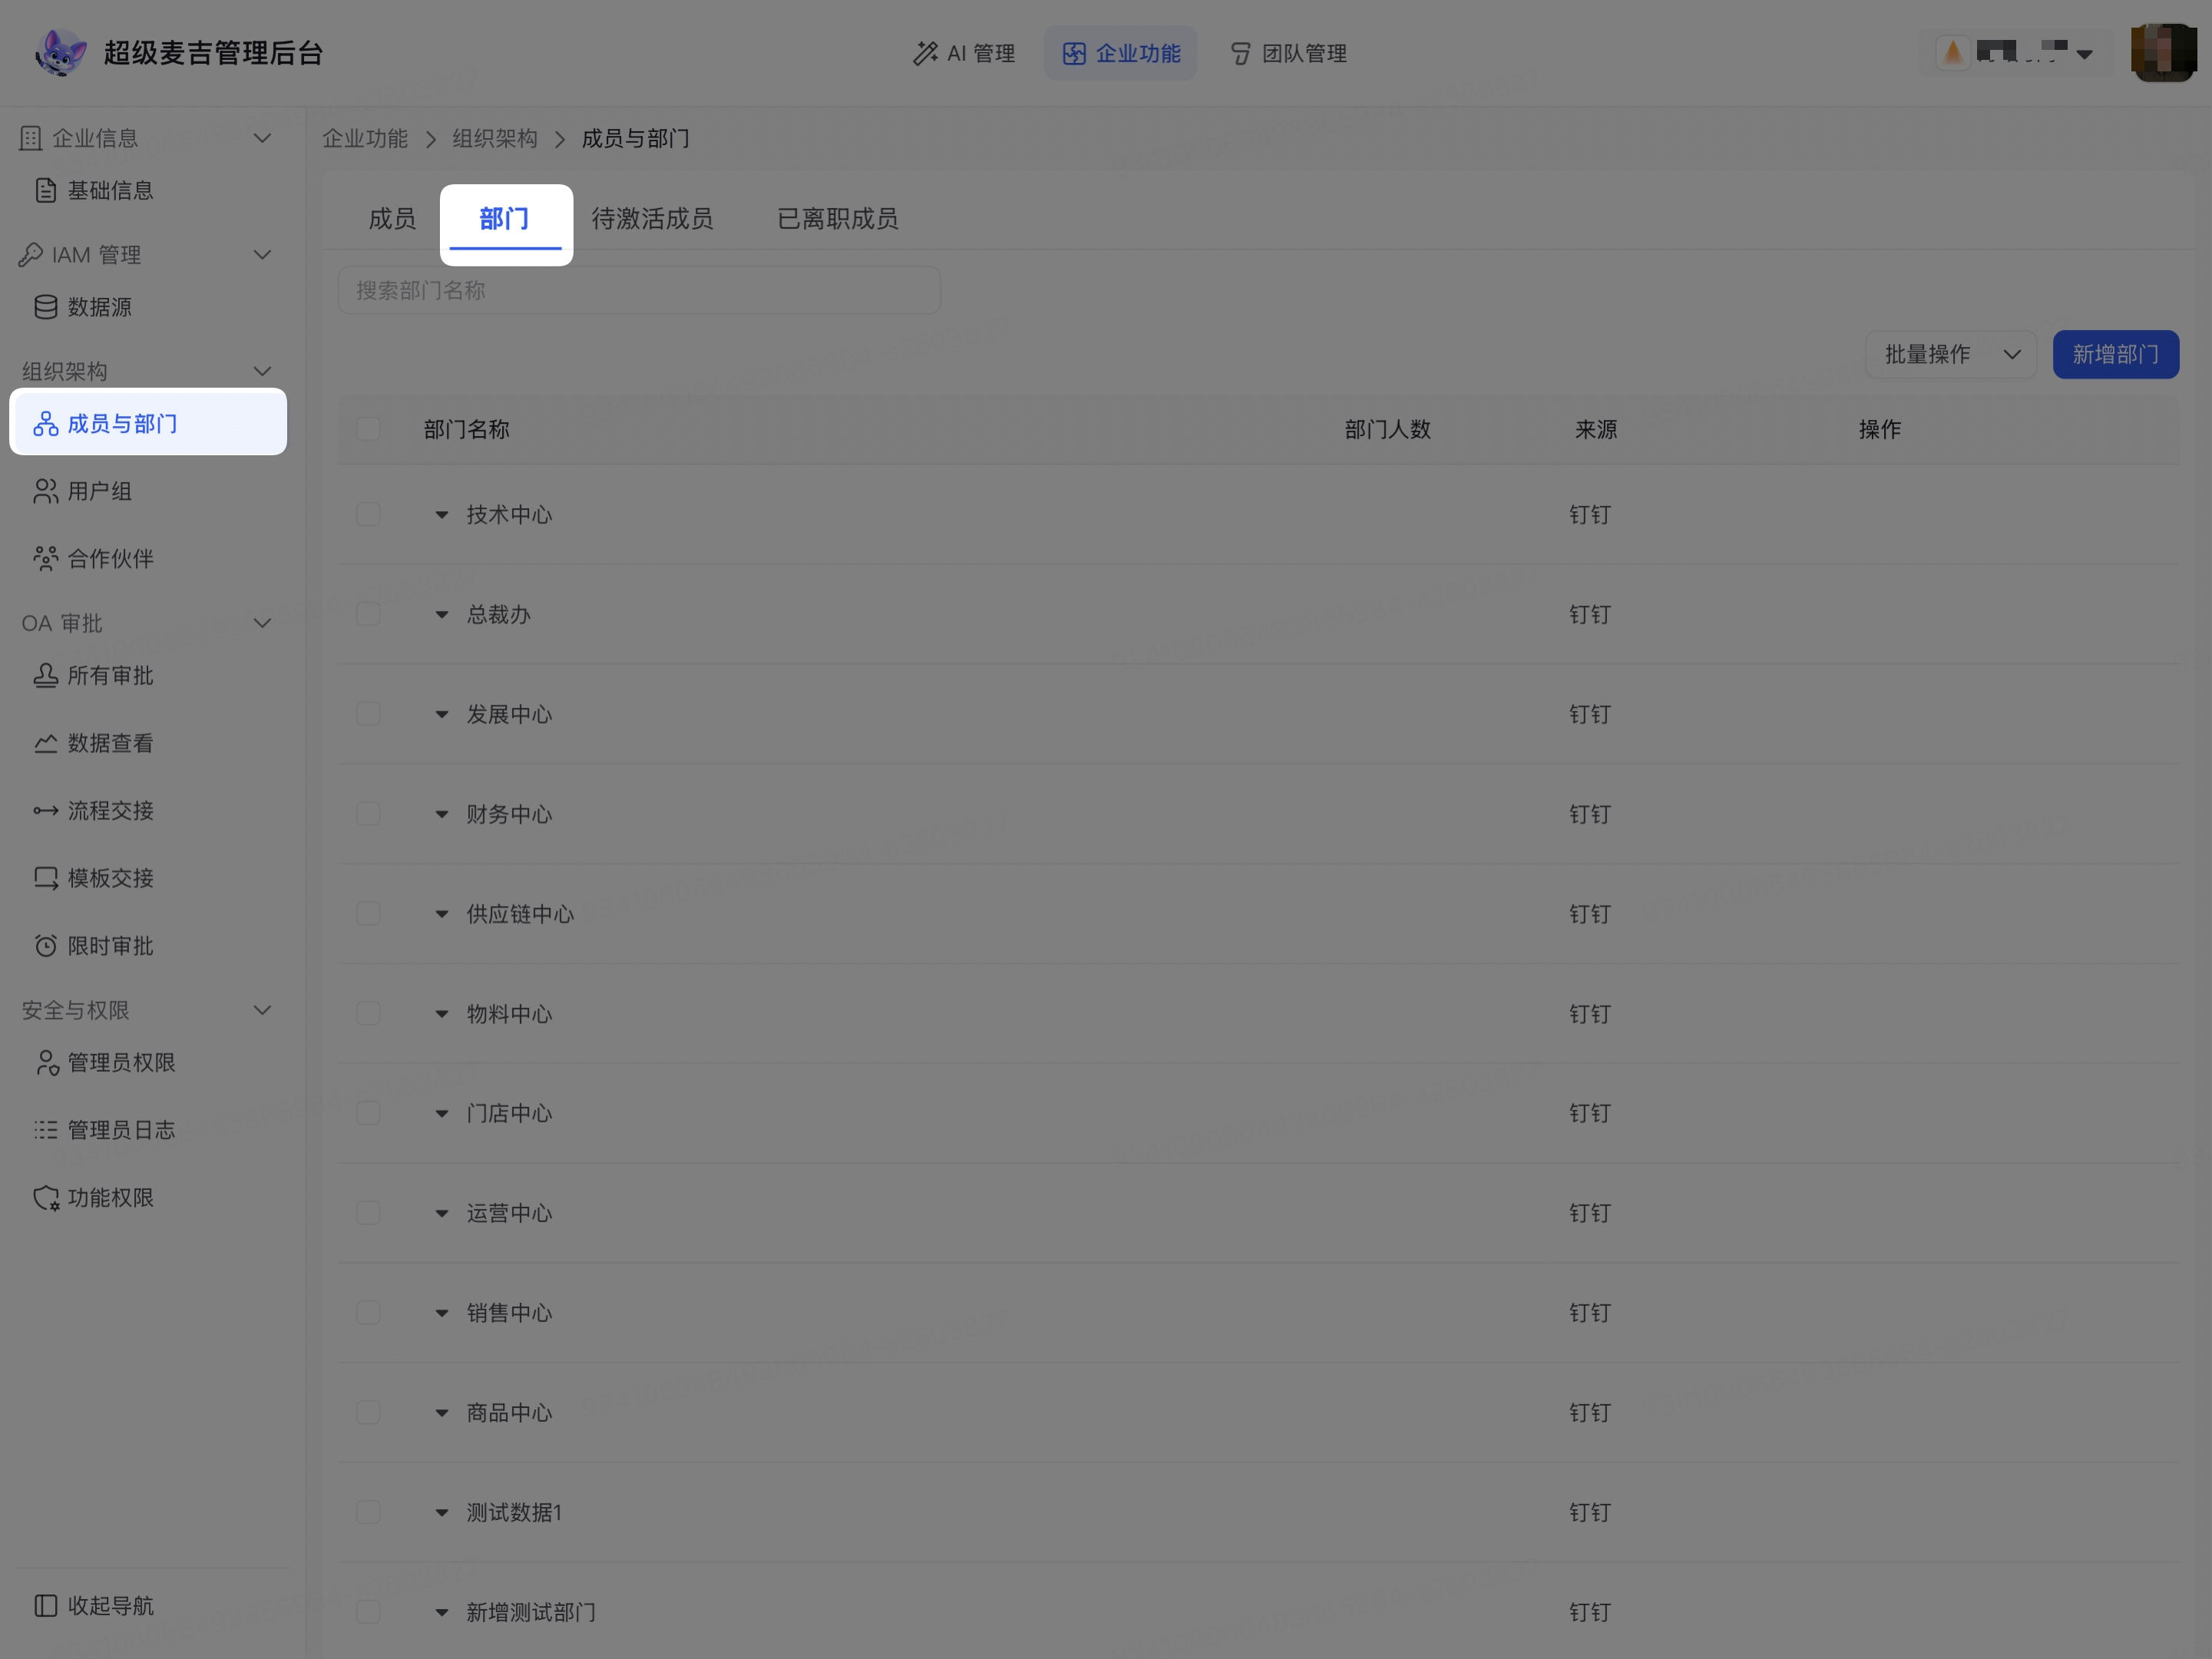
Manage departments
Source in the department list indicates whether a department comes from the admin console or a third-party platform. Departments synchronized from a third-party platform must be modified on the source platform and cannot be edited or have subdepartments added directly here.
Create a department
Click the Departments tab.
Click Add Department in the upper-right corner.
Enter the new department name in Department Name.
Select the department’s parent organization in Parent Department.
When Create Department Group is displayed and available, select it as needed.
Click Confirm.
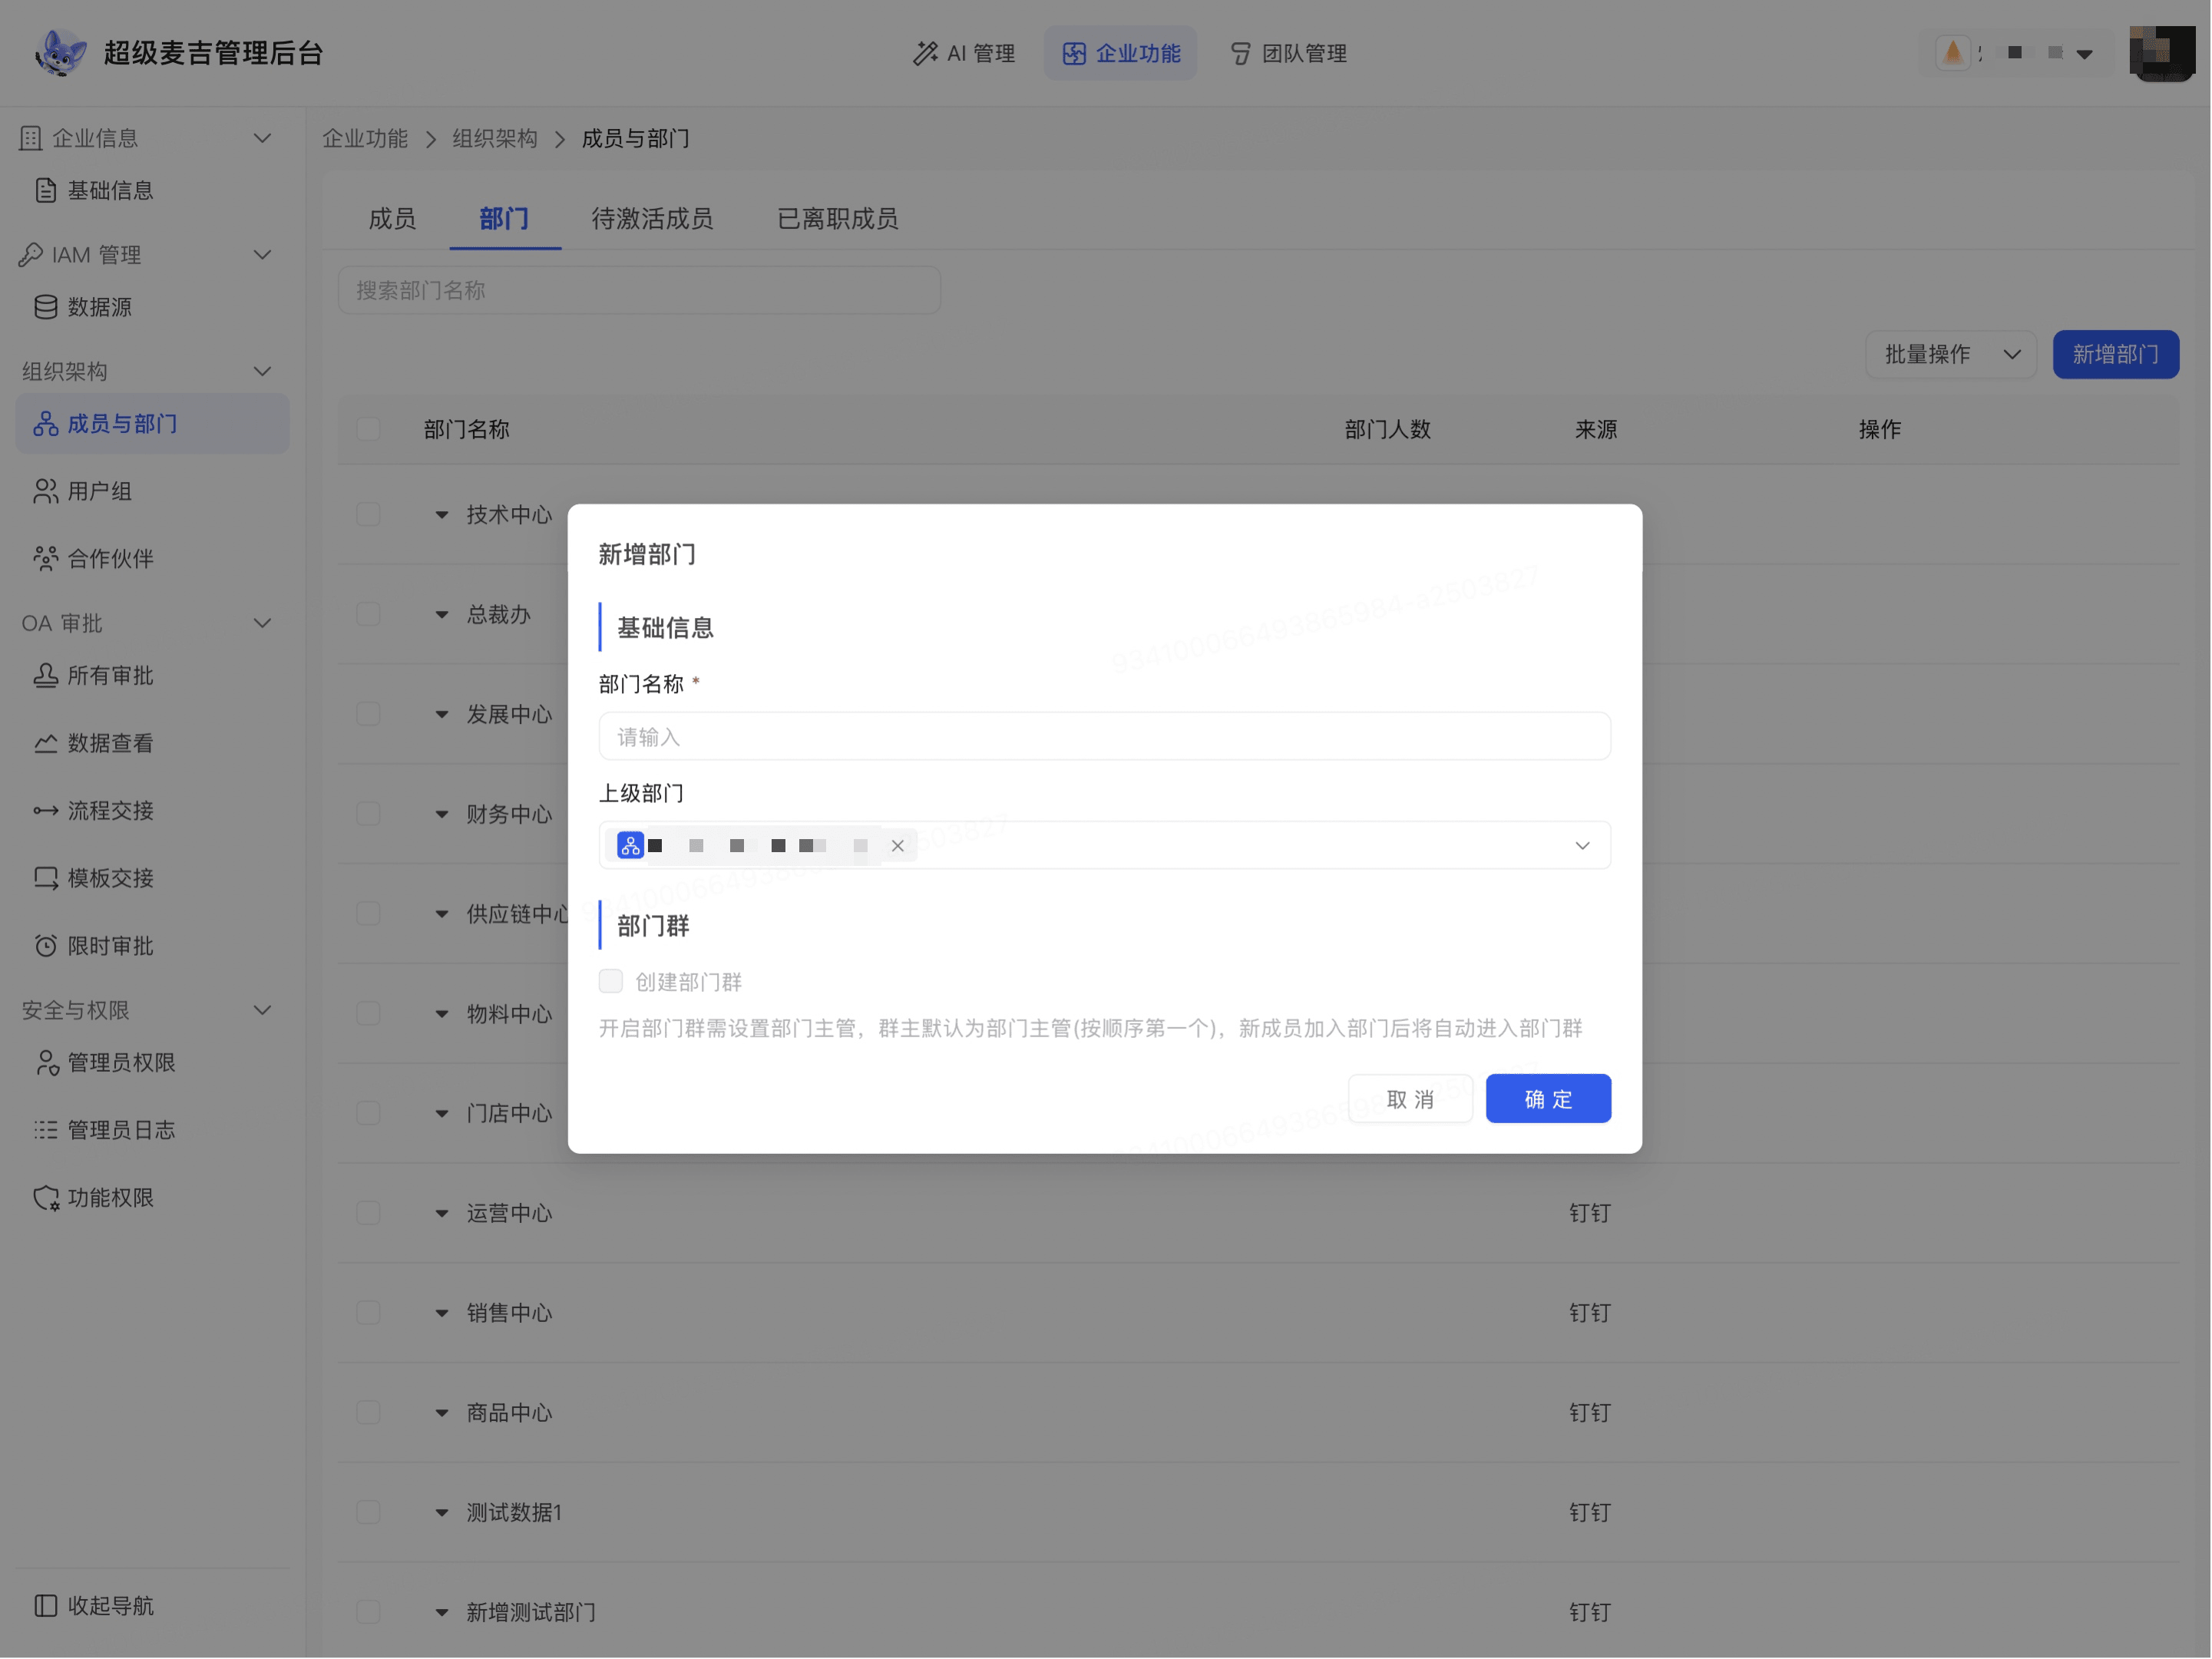
The new department appears in the current organization’s department list. When subdepartments exist, click the arrow to the left of the department name to expand or collapse the organization structure.
If you create a department group, set the department manager as prompted on the page. Whether new members who join the department are added to the department group depends on the instructions displayed on the current page.
Edit a department
Find the department you want to modify on the Departments tab.
Click the edit icon to the right of the department.
Modify the Department Name.
Modify the Parent Department.
Click Confirm.
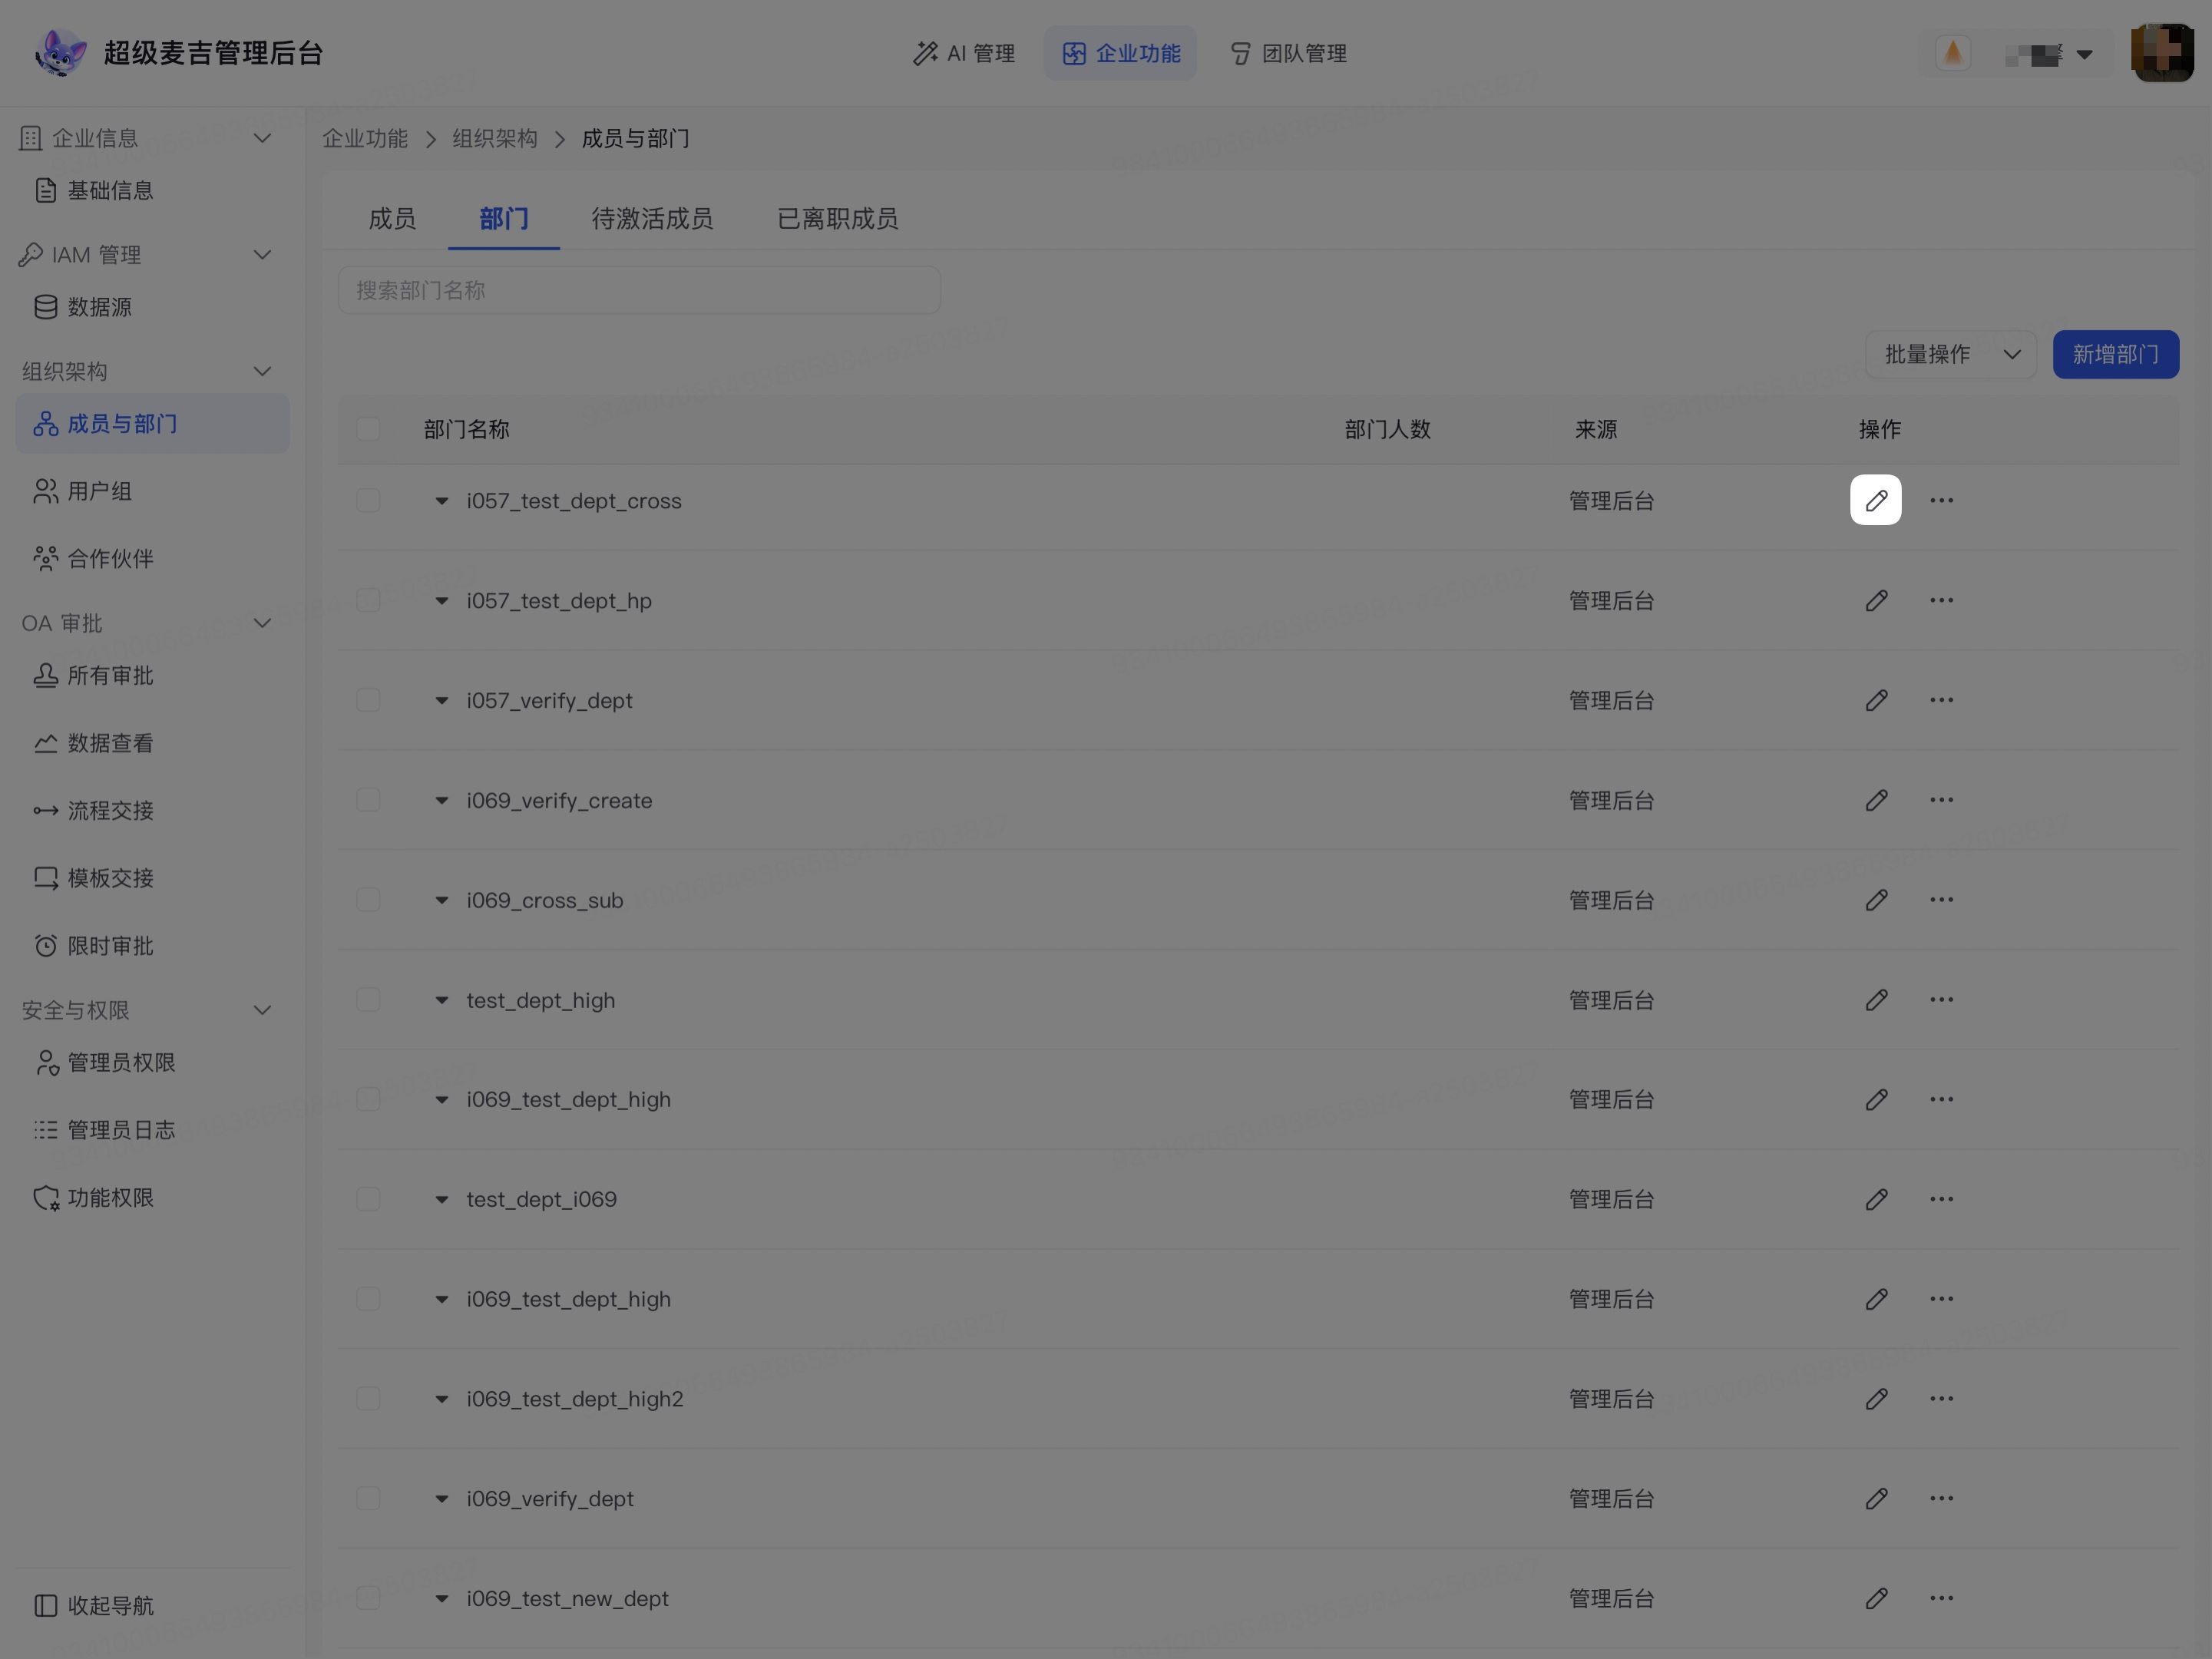
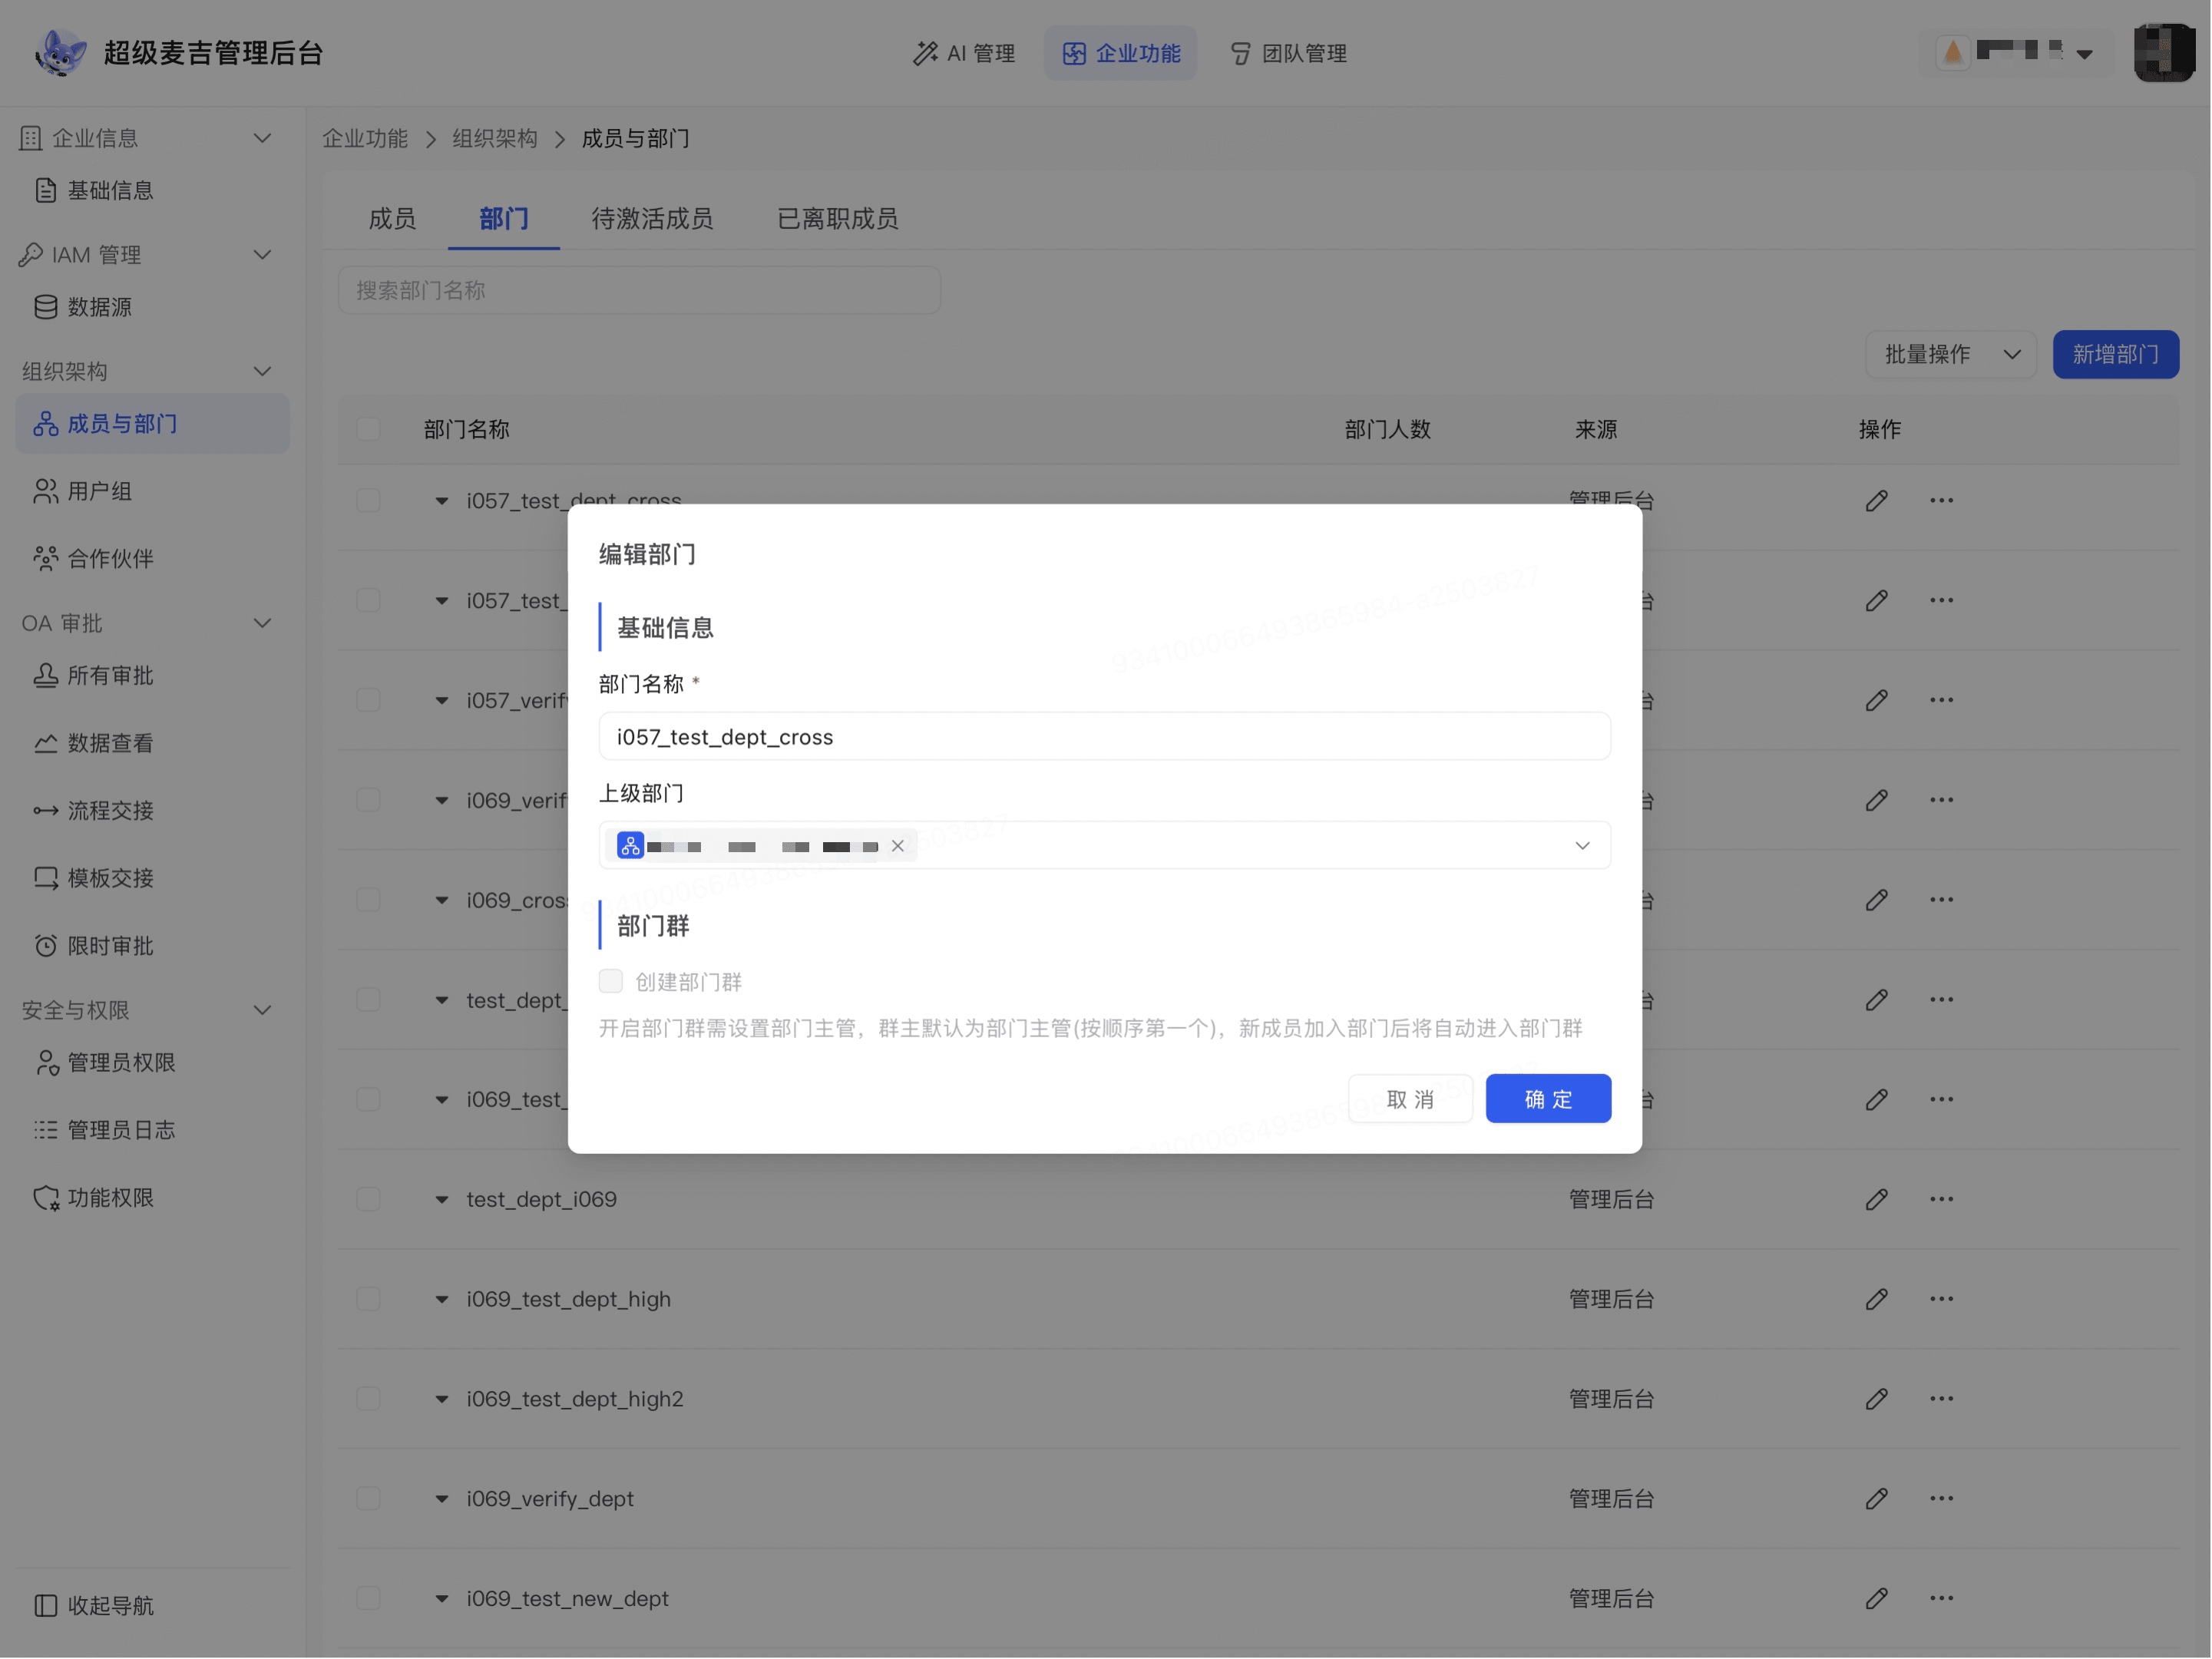
The department list displays the updated name or organization hierarchy. Only manage departments whose Source is Admin Console and for which the current account has permission to operate.
Delete a single department
Click the More icon to the right of the target department.
Click Delete Department.
Confirm the deletion as prompted on the page.
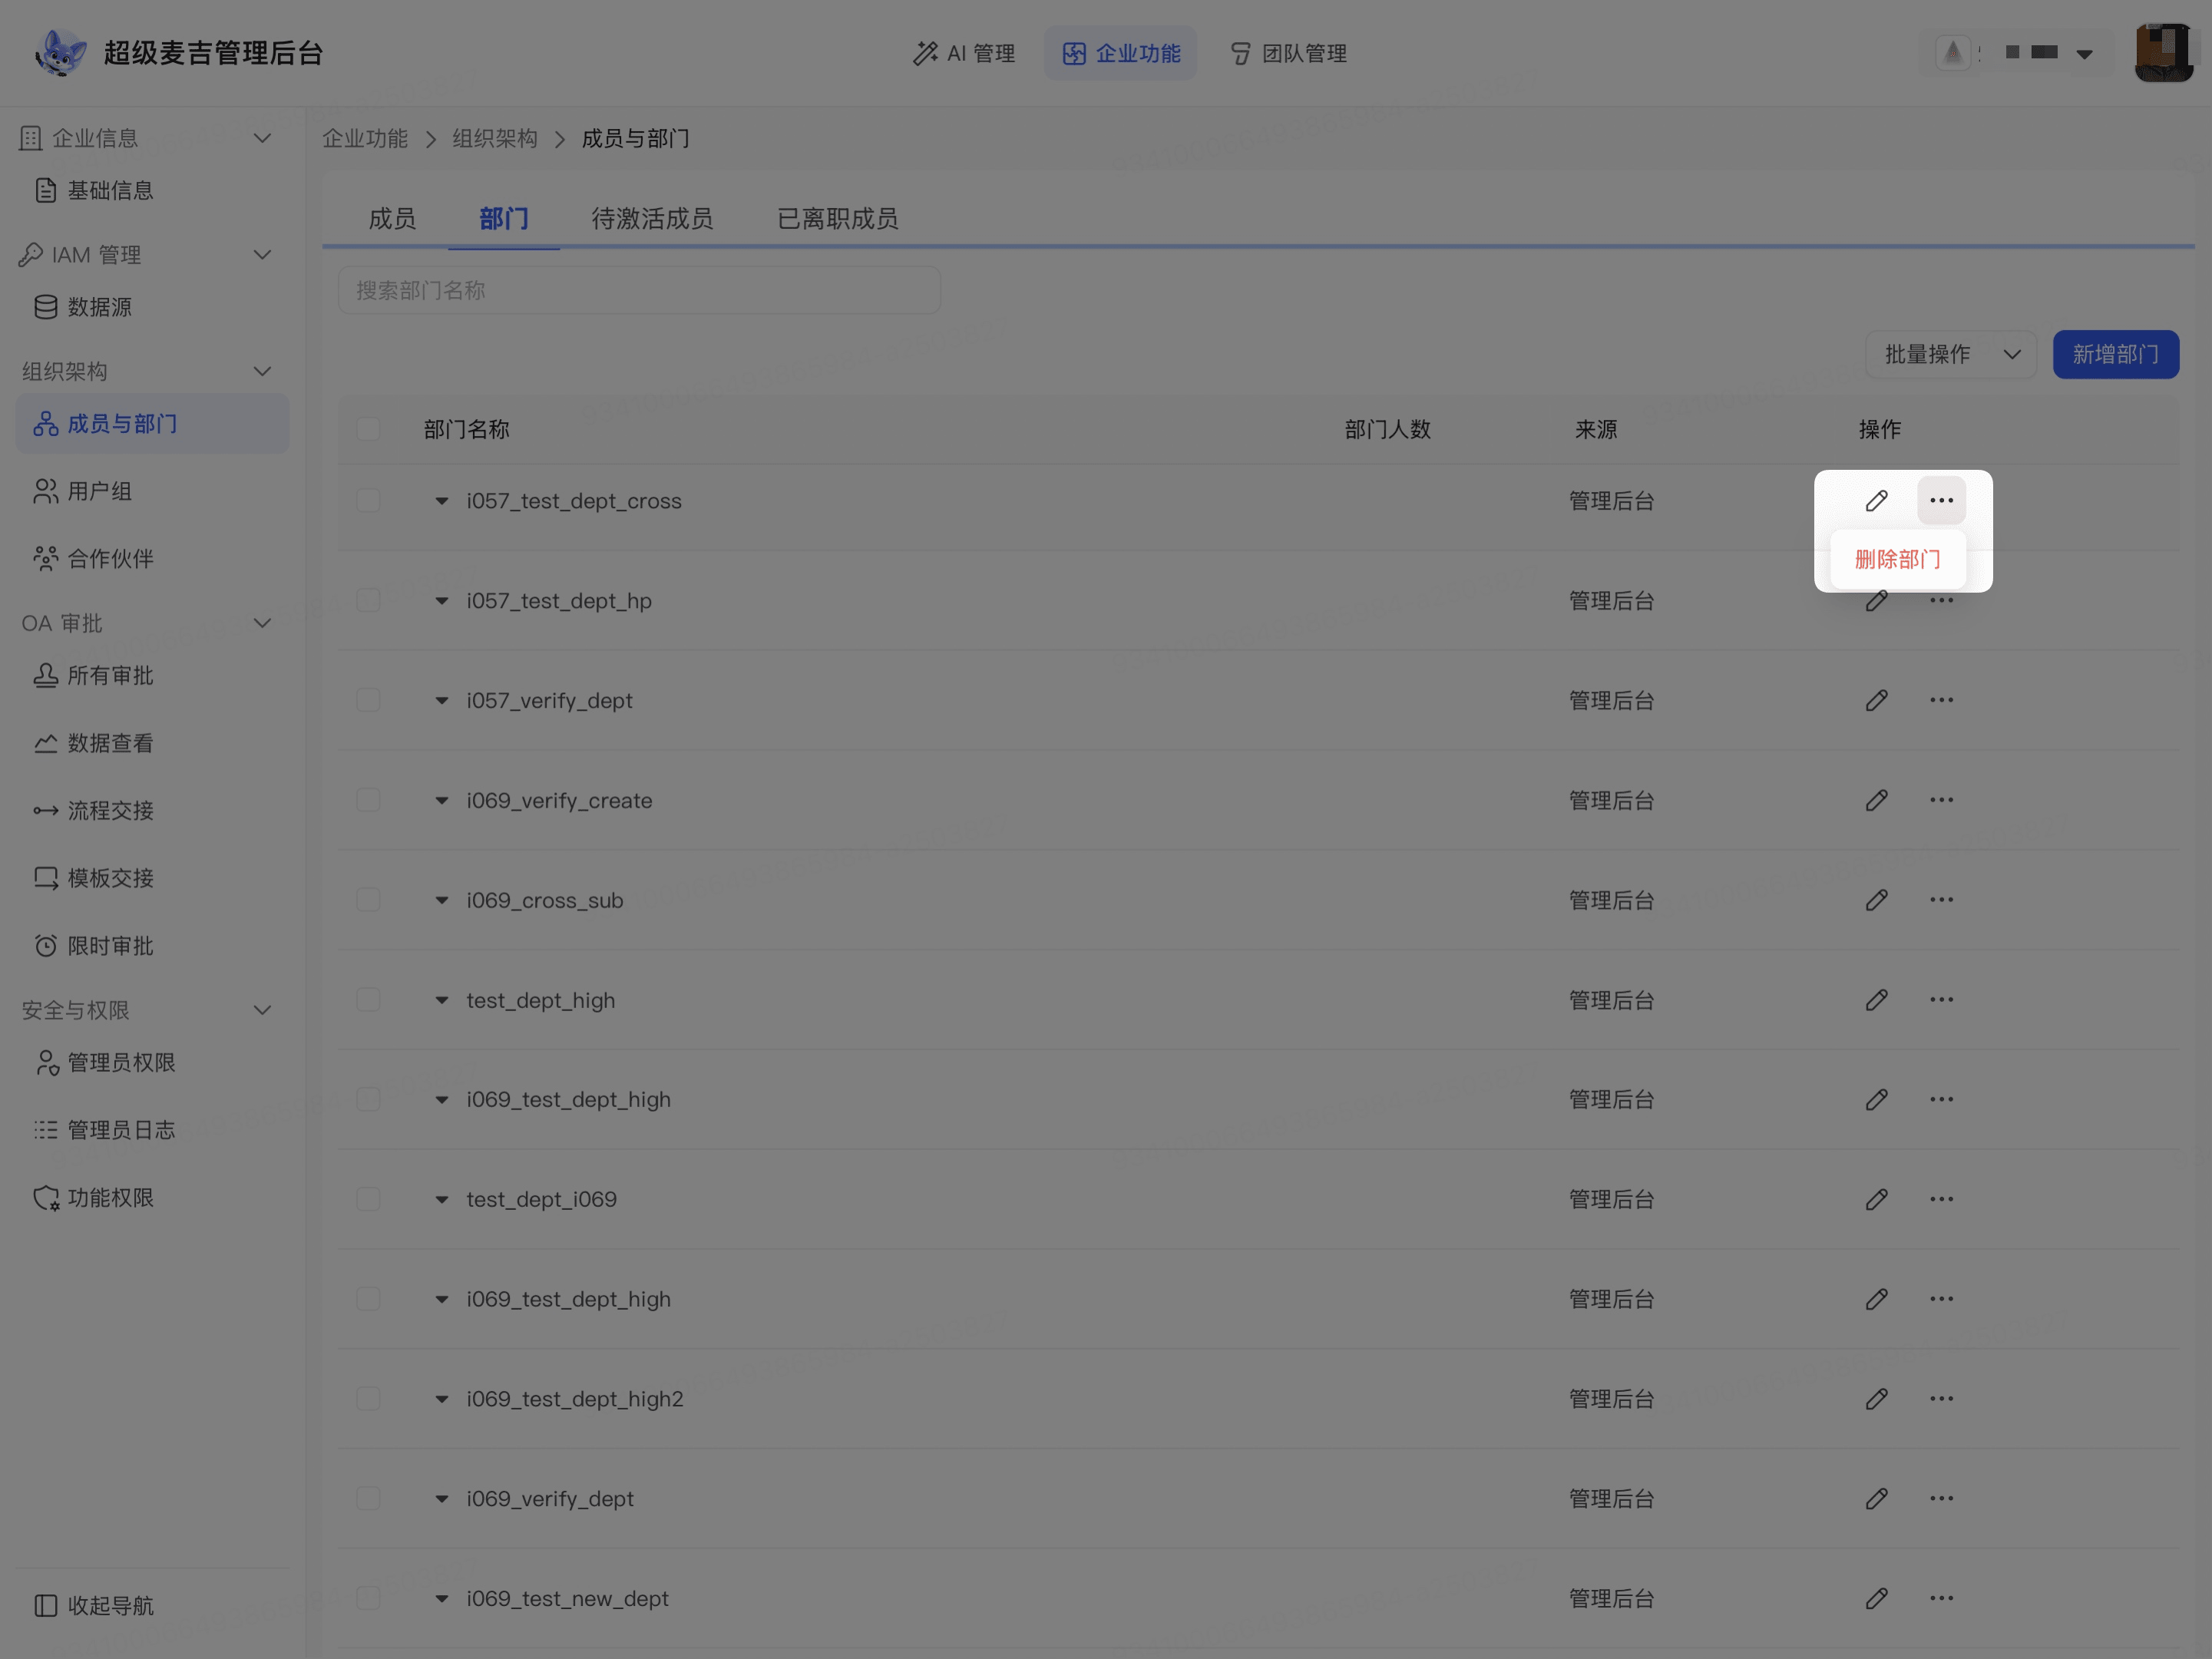
After the deletion succeeds, the target department no longer appears in the department list.
Before deleting a department, confirm that it does not contain members or subdepartments that need to be retained. Whether the department can be deleted and how it is handled after deletion depend on the confirmation prompt displayed on the page.
Delete departments in batches
Select the departments you want to delete on the Departments tab.
Click Bulk Actions in the upper-right corner.
Click Delete Department.
Confirm the deletion as prompted on the page.
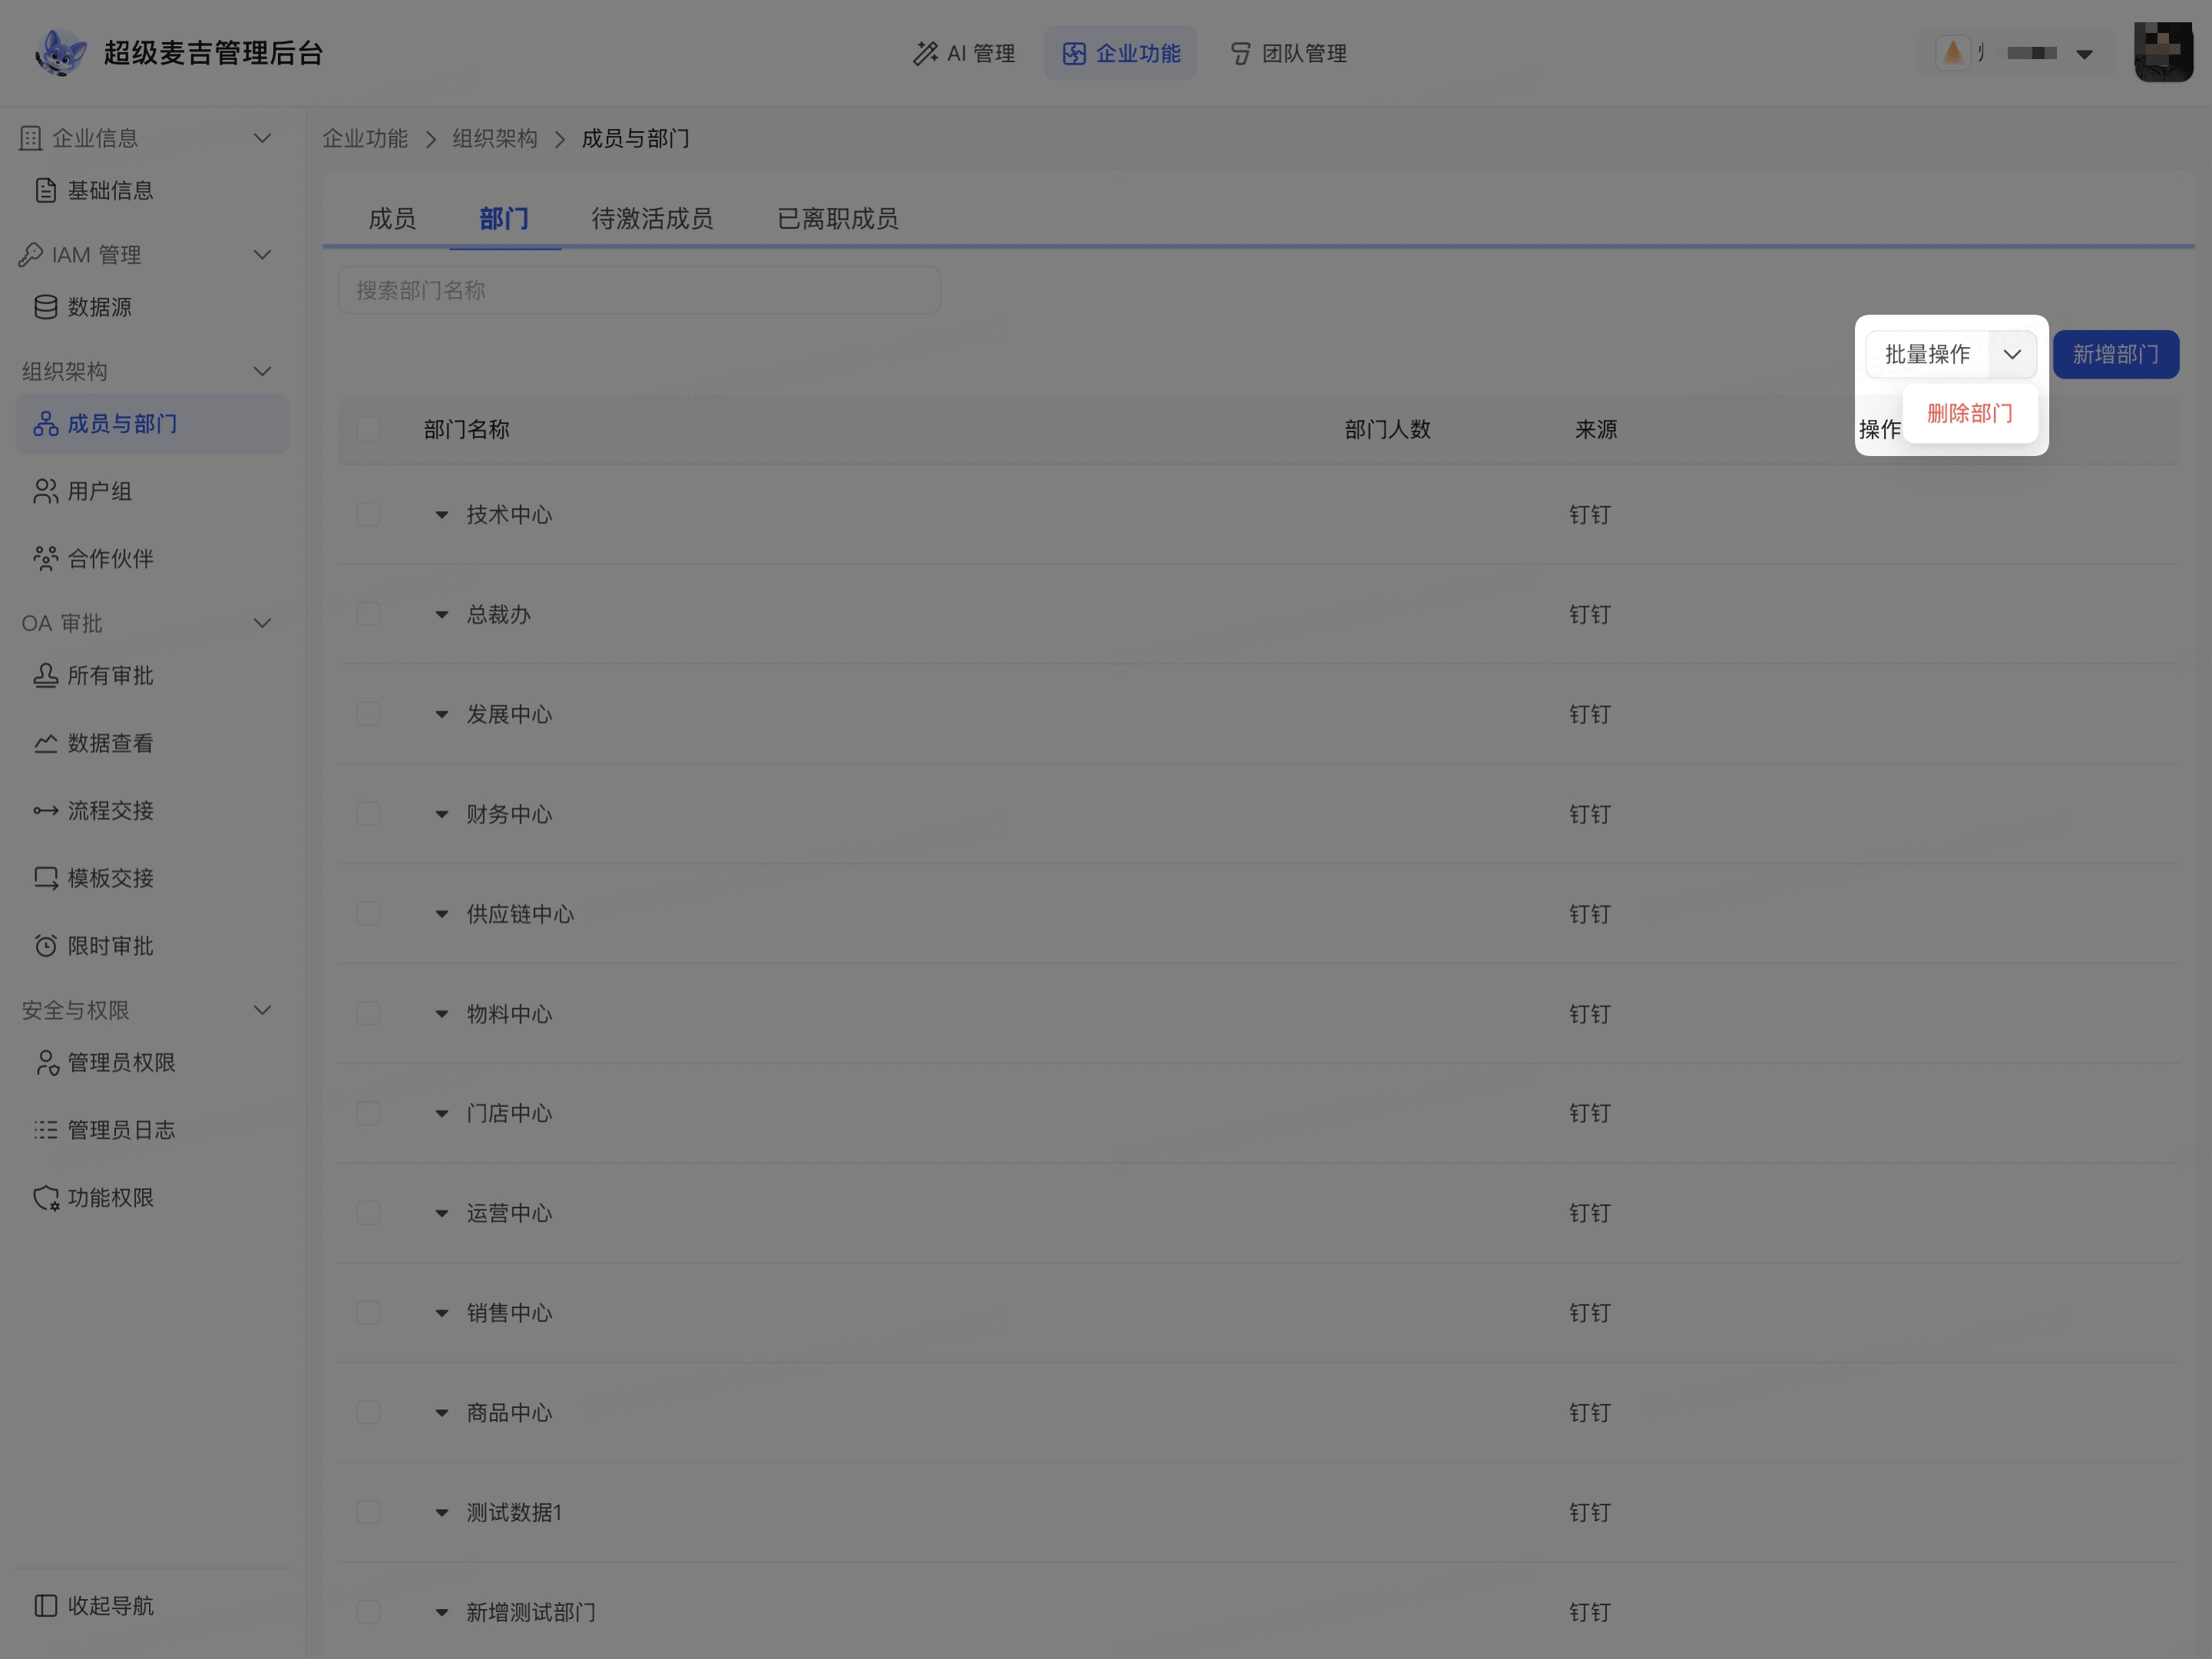
After the deletion succeeds, the selected departments no longer appear in the department list. Check the selection range again before confirming.
Manage members
Enable/Disable indicates whether a member account is currently available; Pending Activation/Activated indicates whether the member has completed account binding and activation. These two types of status are independent of each other.
Add a member
Click the Members tab.
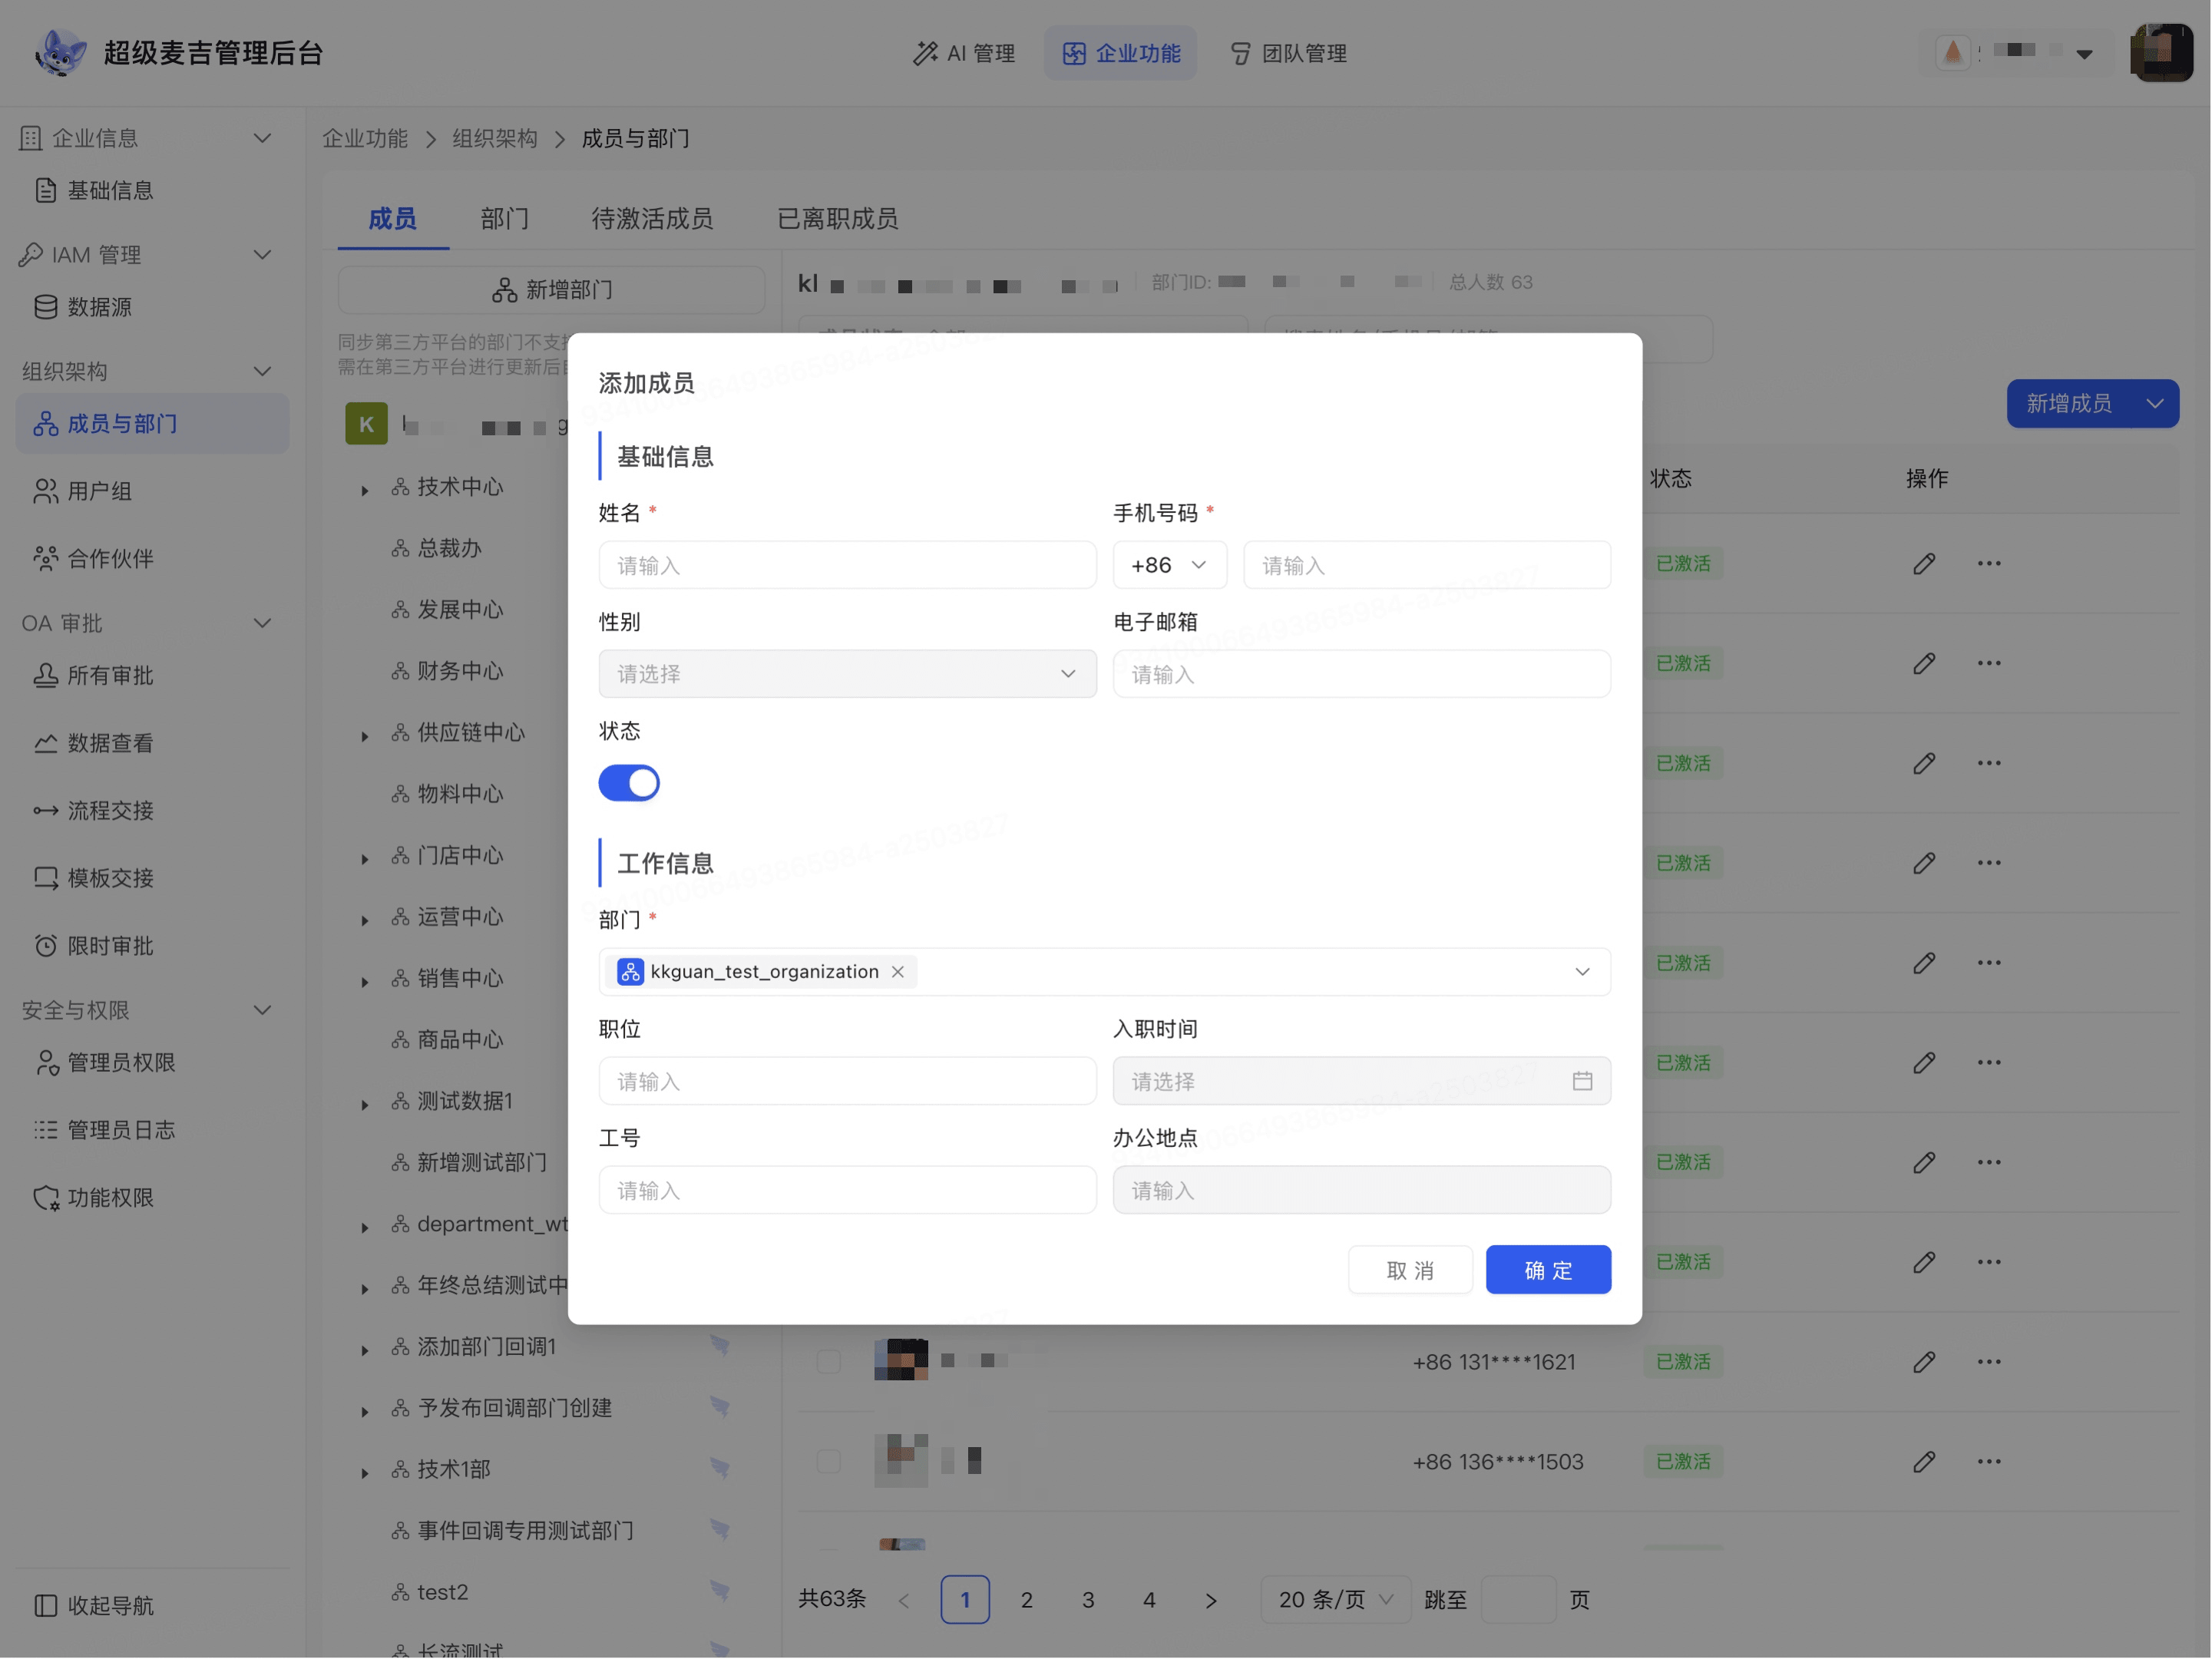
Click Add Member in the upper-right corner of the page.
Enter the member’s name in Name.
Select the mobile phone country or region code.
Enter the member’s valid mobile phone number in Mobile Phone Number.
Select Gender as applicable.
Enter the member’s email address in Email.
Confirm whether the member is enabled under Status.
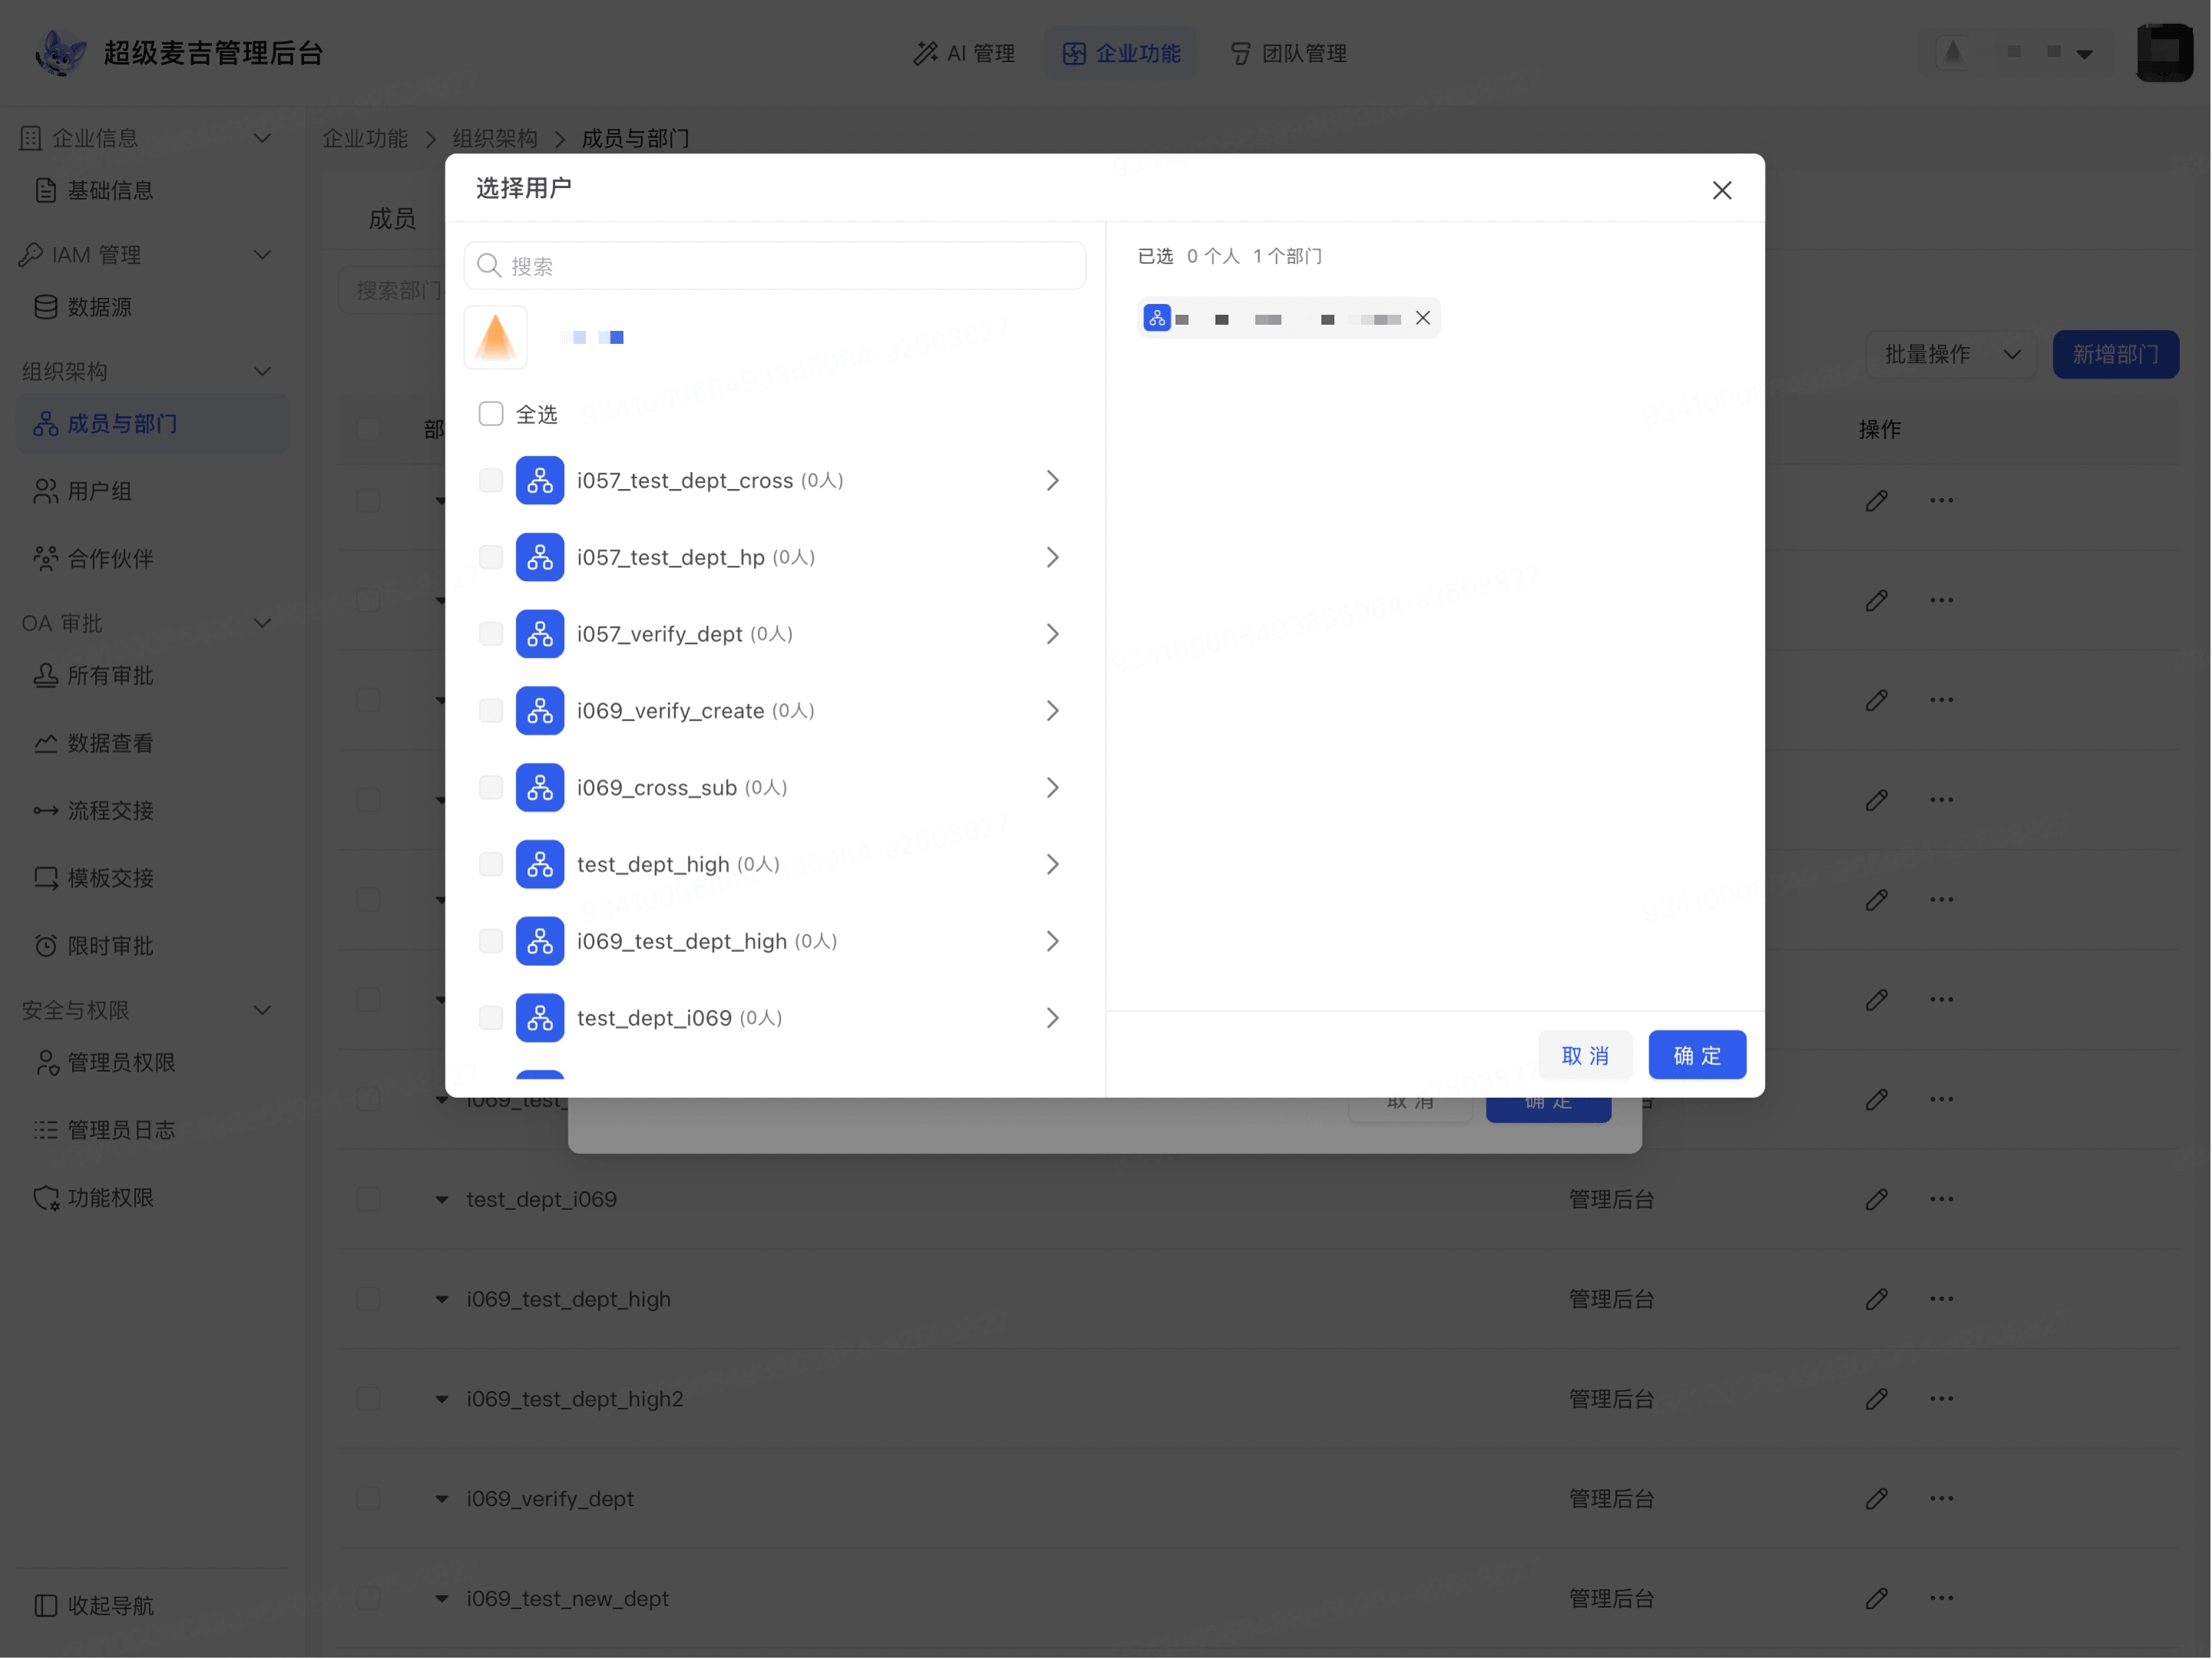
Select the member’s department under Department.
When selecting a department, you can search for the department name or expand departments by organization hierarchy. The selected members and departments are displayed on the right.
Enter the Job Title.
Enter the Start Date.
Enter the Employee ID.
Enter the Office Location.
Click Confirm.
The new member appears in the member list. Whether the member is displayed as activated immediately depends on the account binding and activation status. Members who have not completed activation can be processed further on the Pending Activation tab.
Edit member information
Find the member you want to modify on the Members tab.
Click the edit icon to the right of the member.
Modify the member’s basic information.
Modify the member’s department or work information.
Click Confirm.
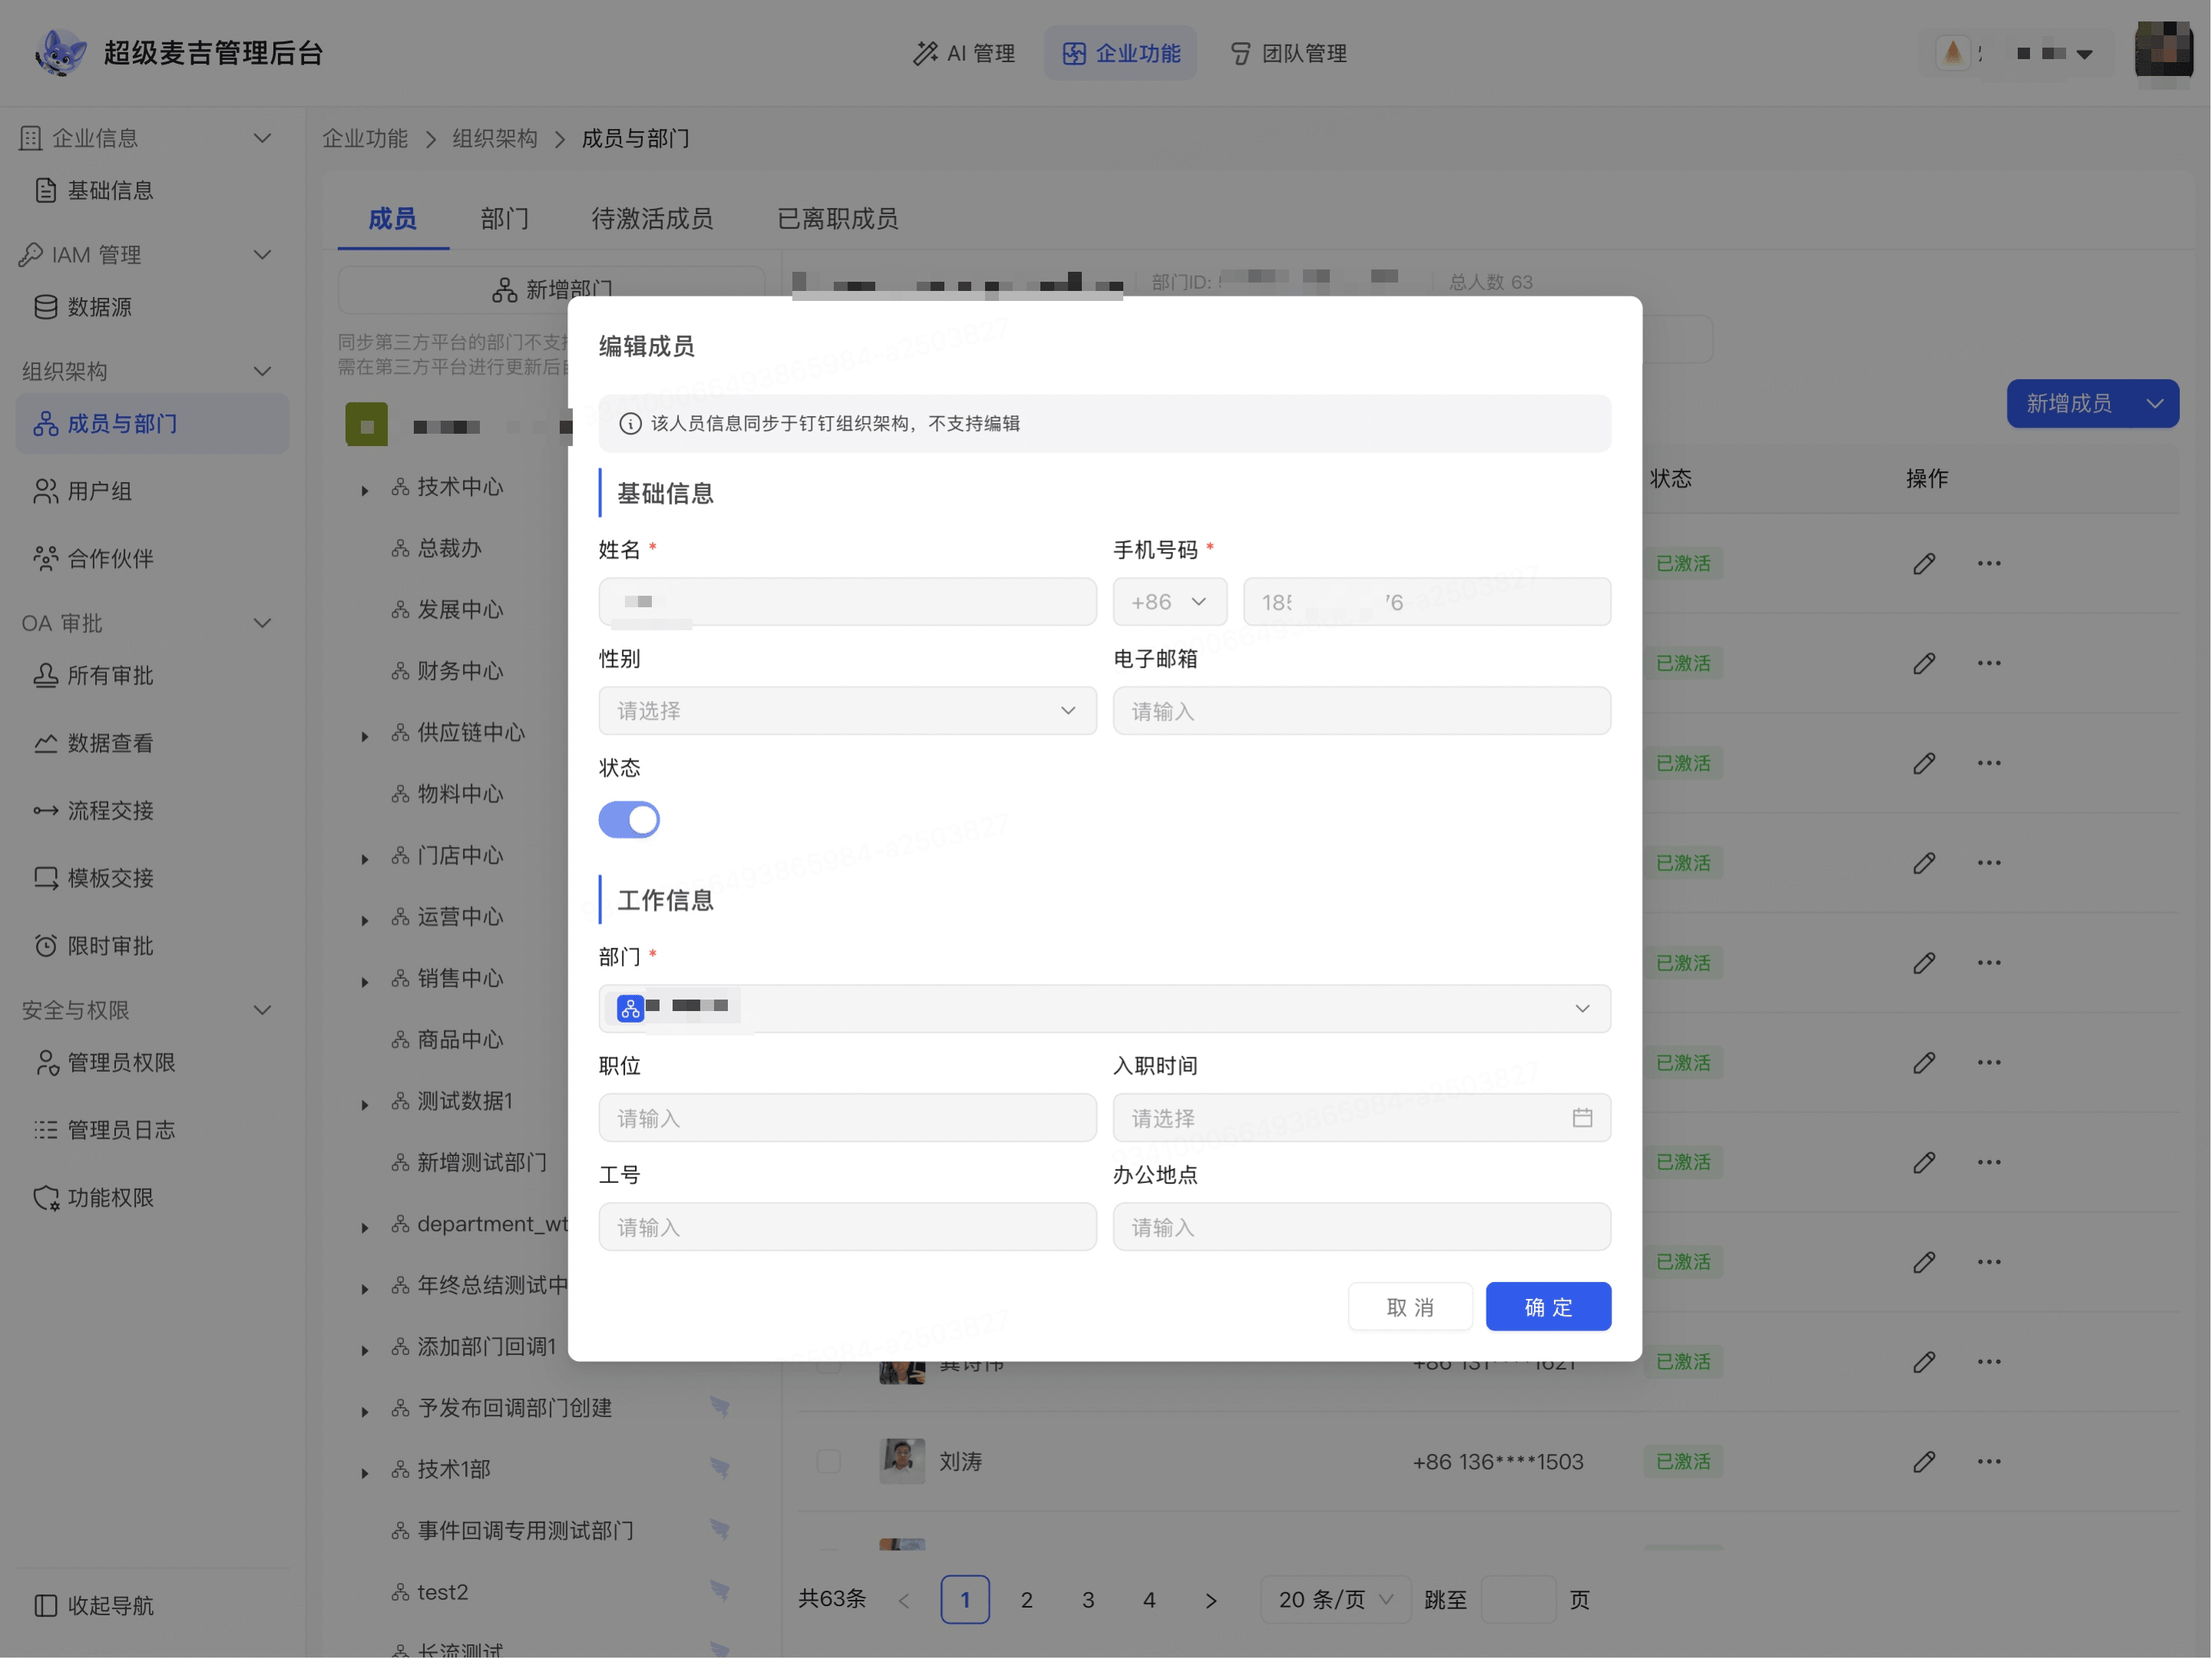
The member list displays the updated member information.
Enable or disable a member
Find the target member on the Members tab.
Click the More icon to the right of the member.
Based on the member’s current status, select Disable or the corresponding enable option.
Confirm as prompted on the page.
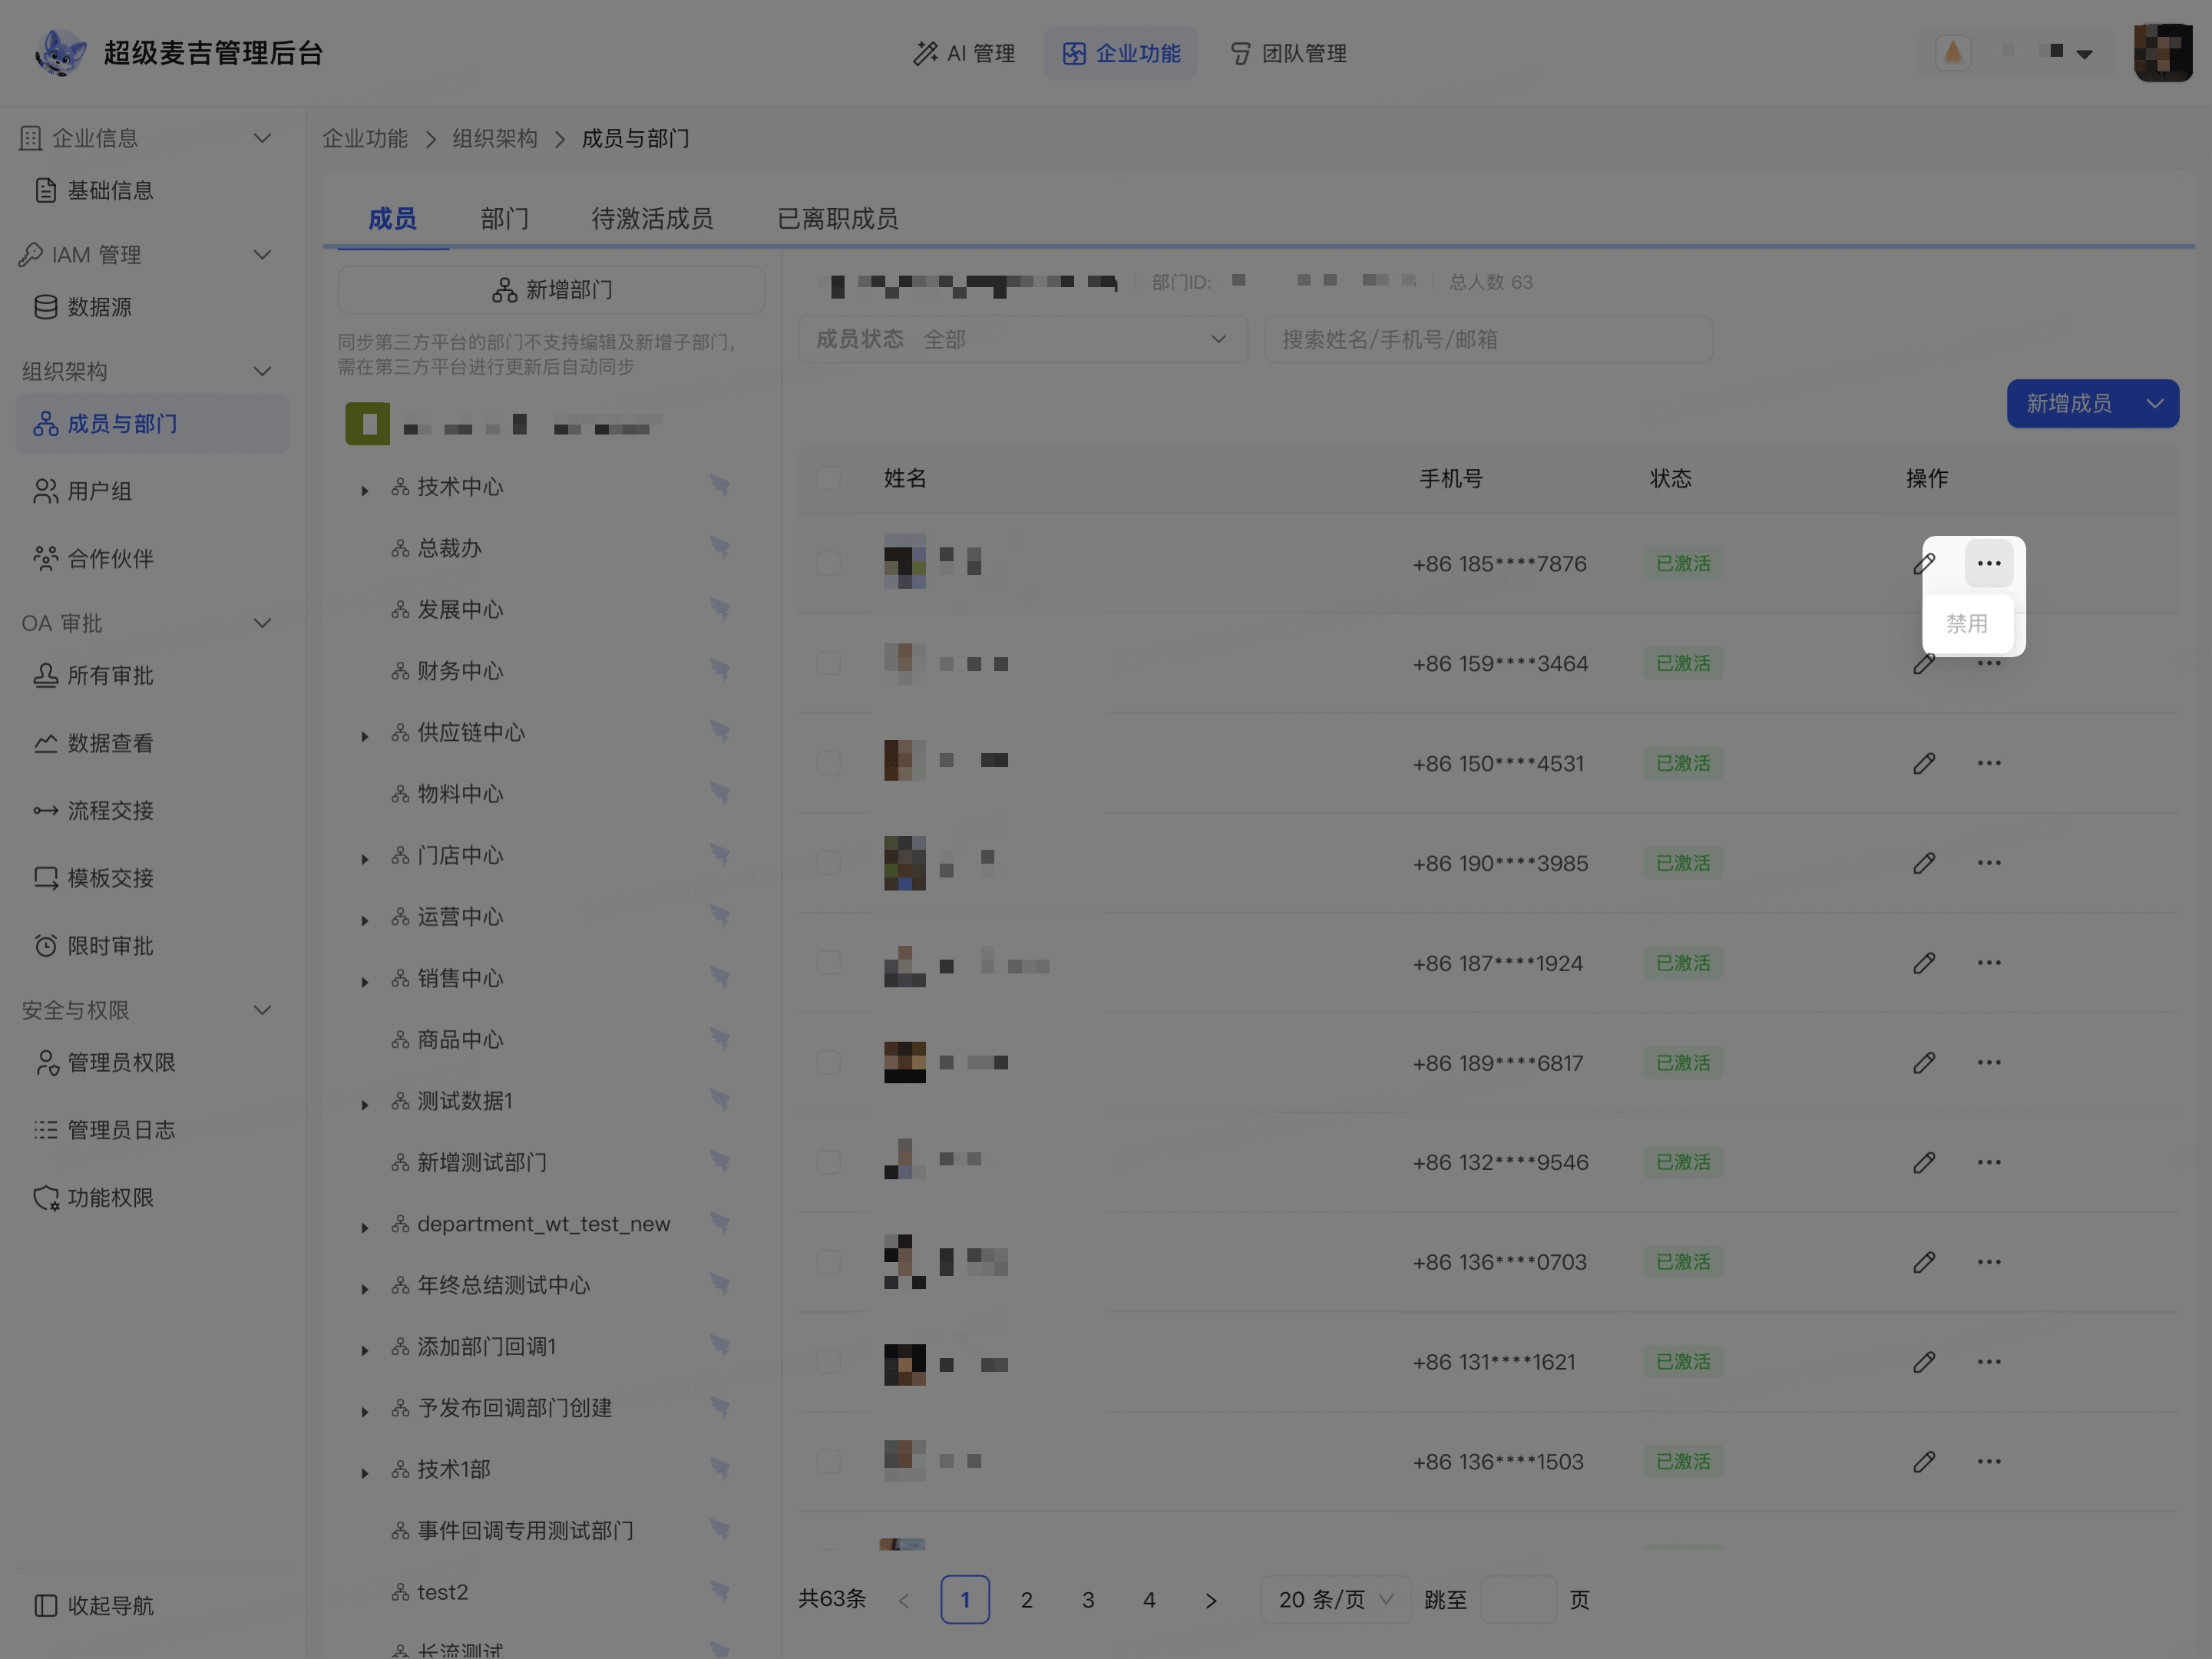
The member’s Status column displays the latest status. Before disabling a member, confirm whether the member still needs to sign in or use enterprise resources.
Manage member activation and departure status
Send activation information
Click the Pending Activation tab.
Find the member who needs to be activated.
Click the envelope icon to send an activation SMS.
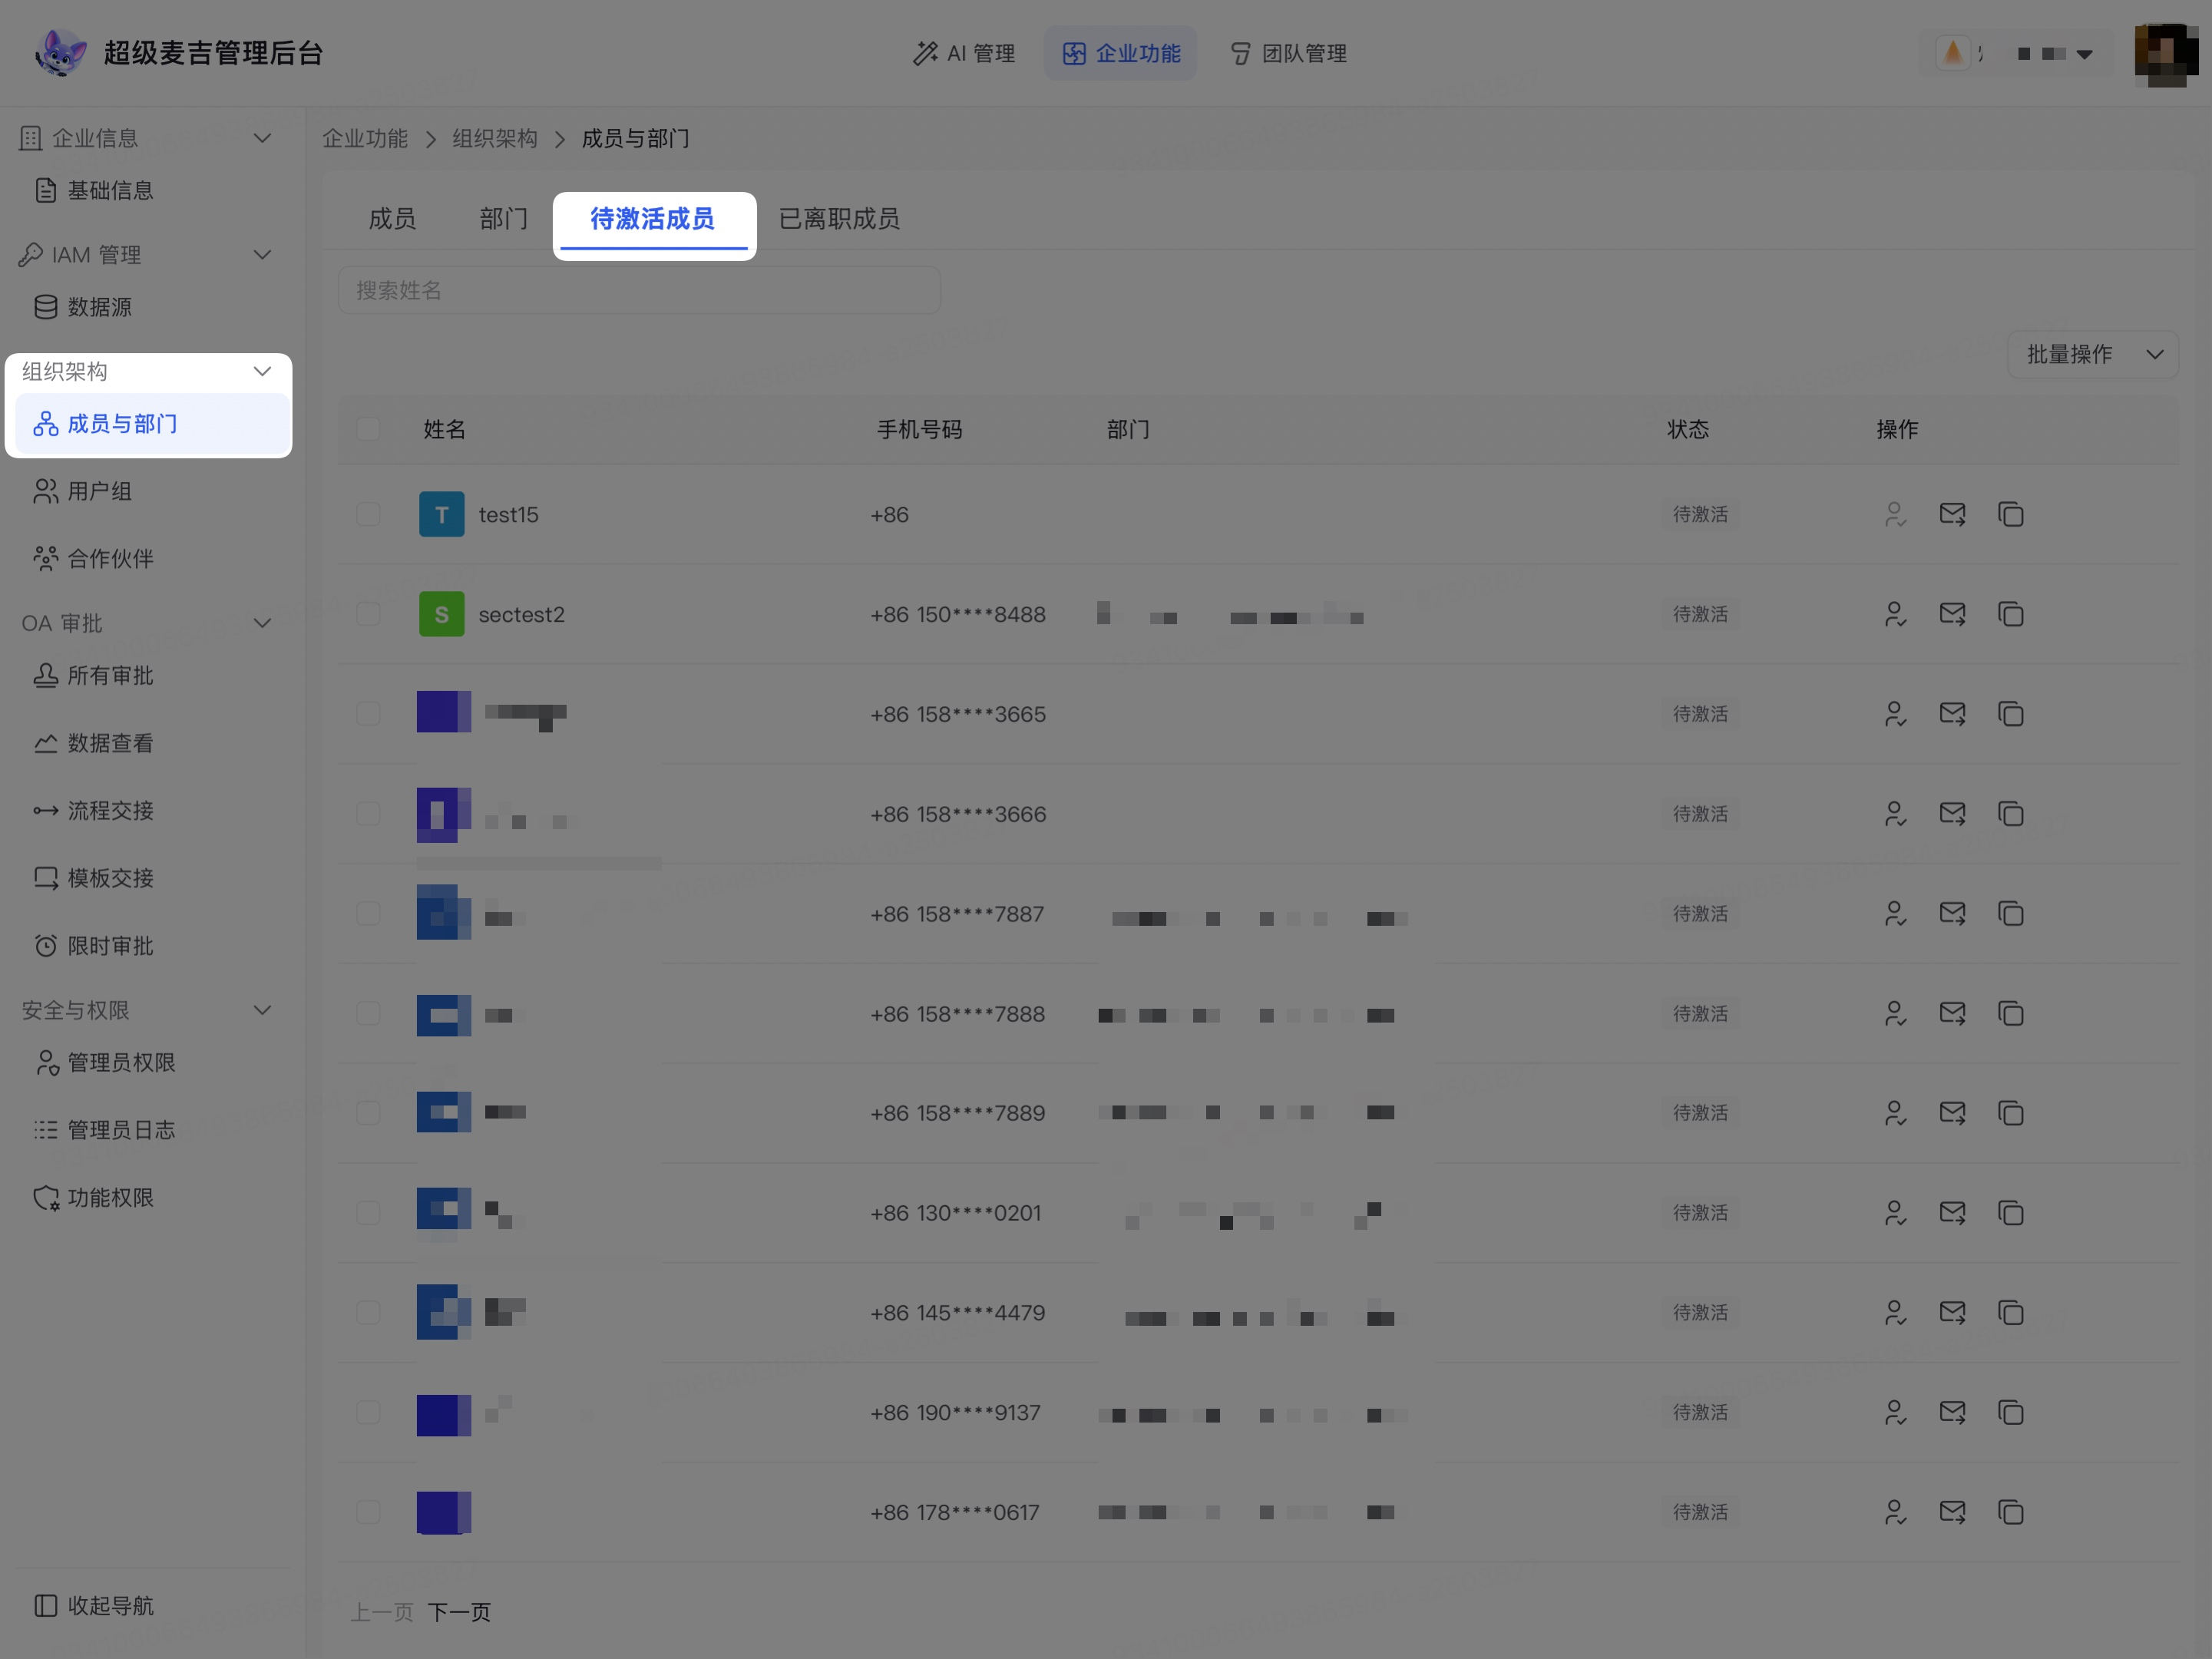
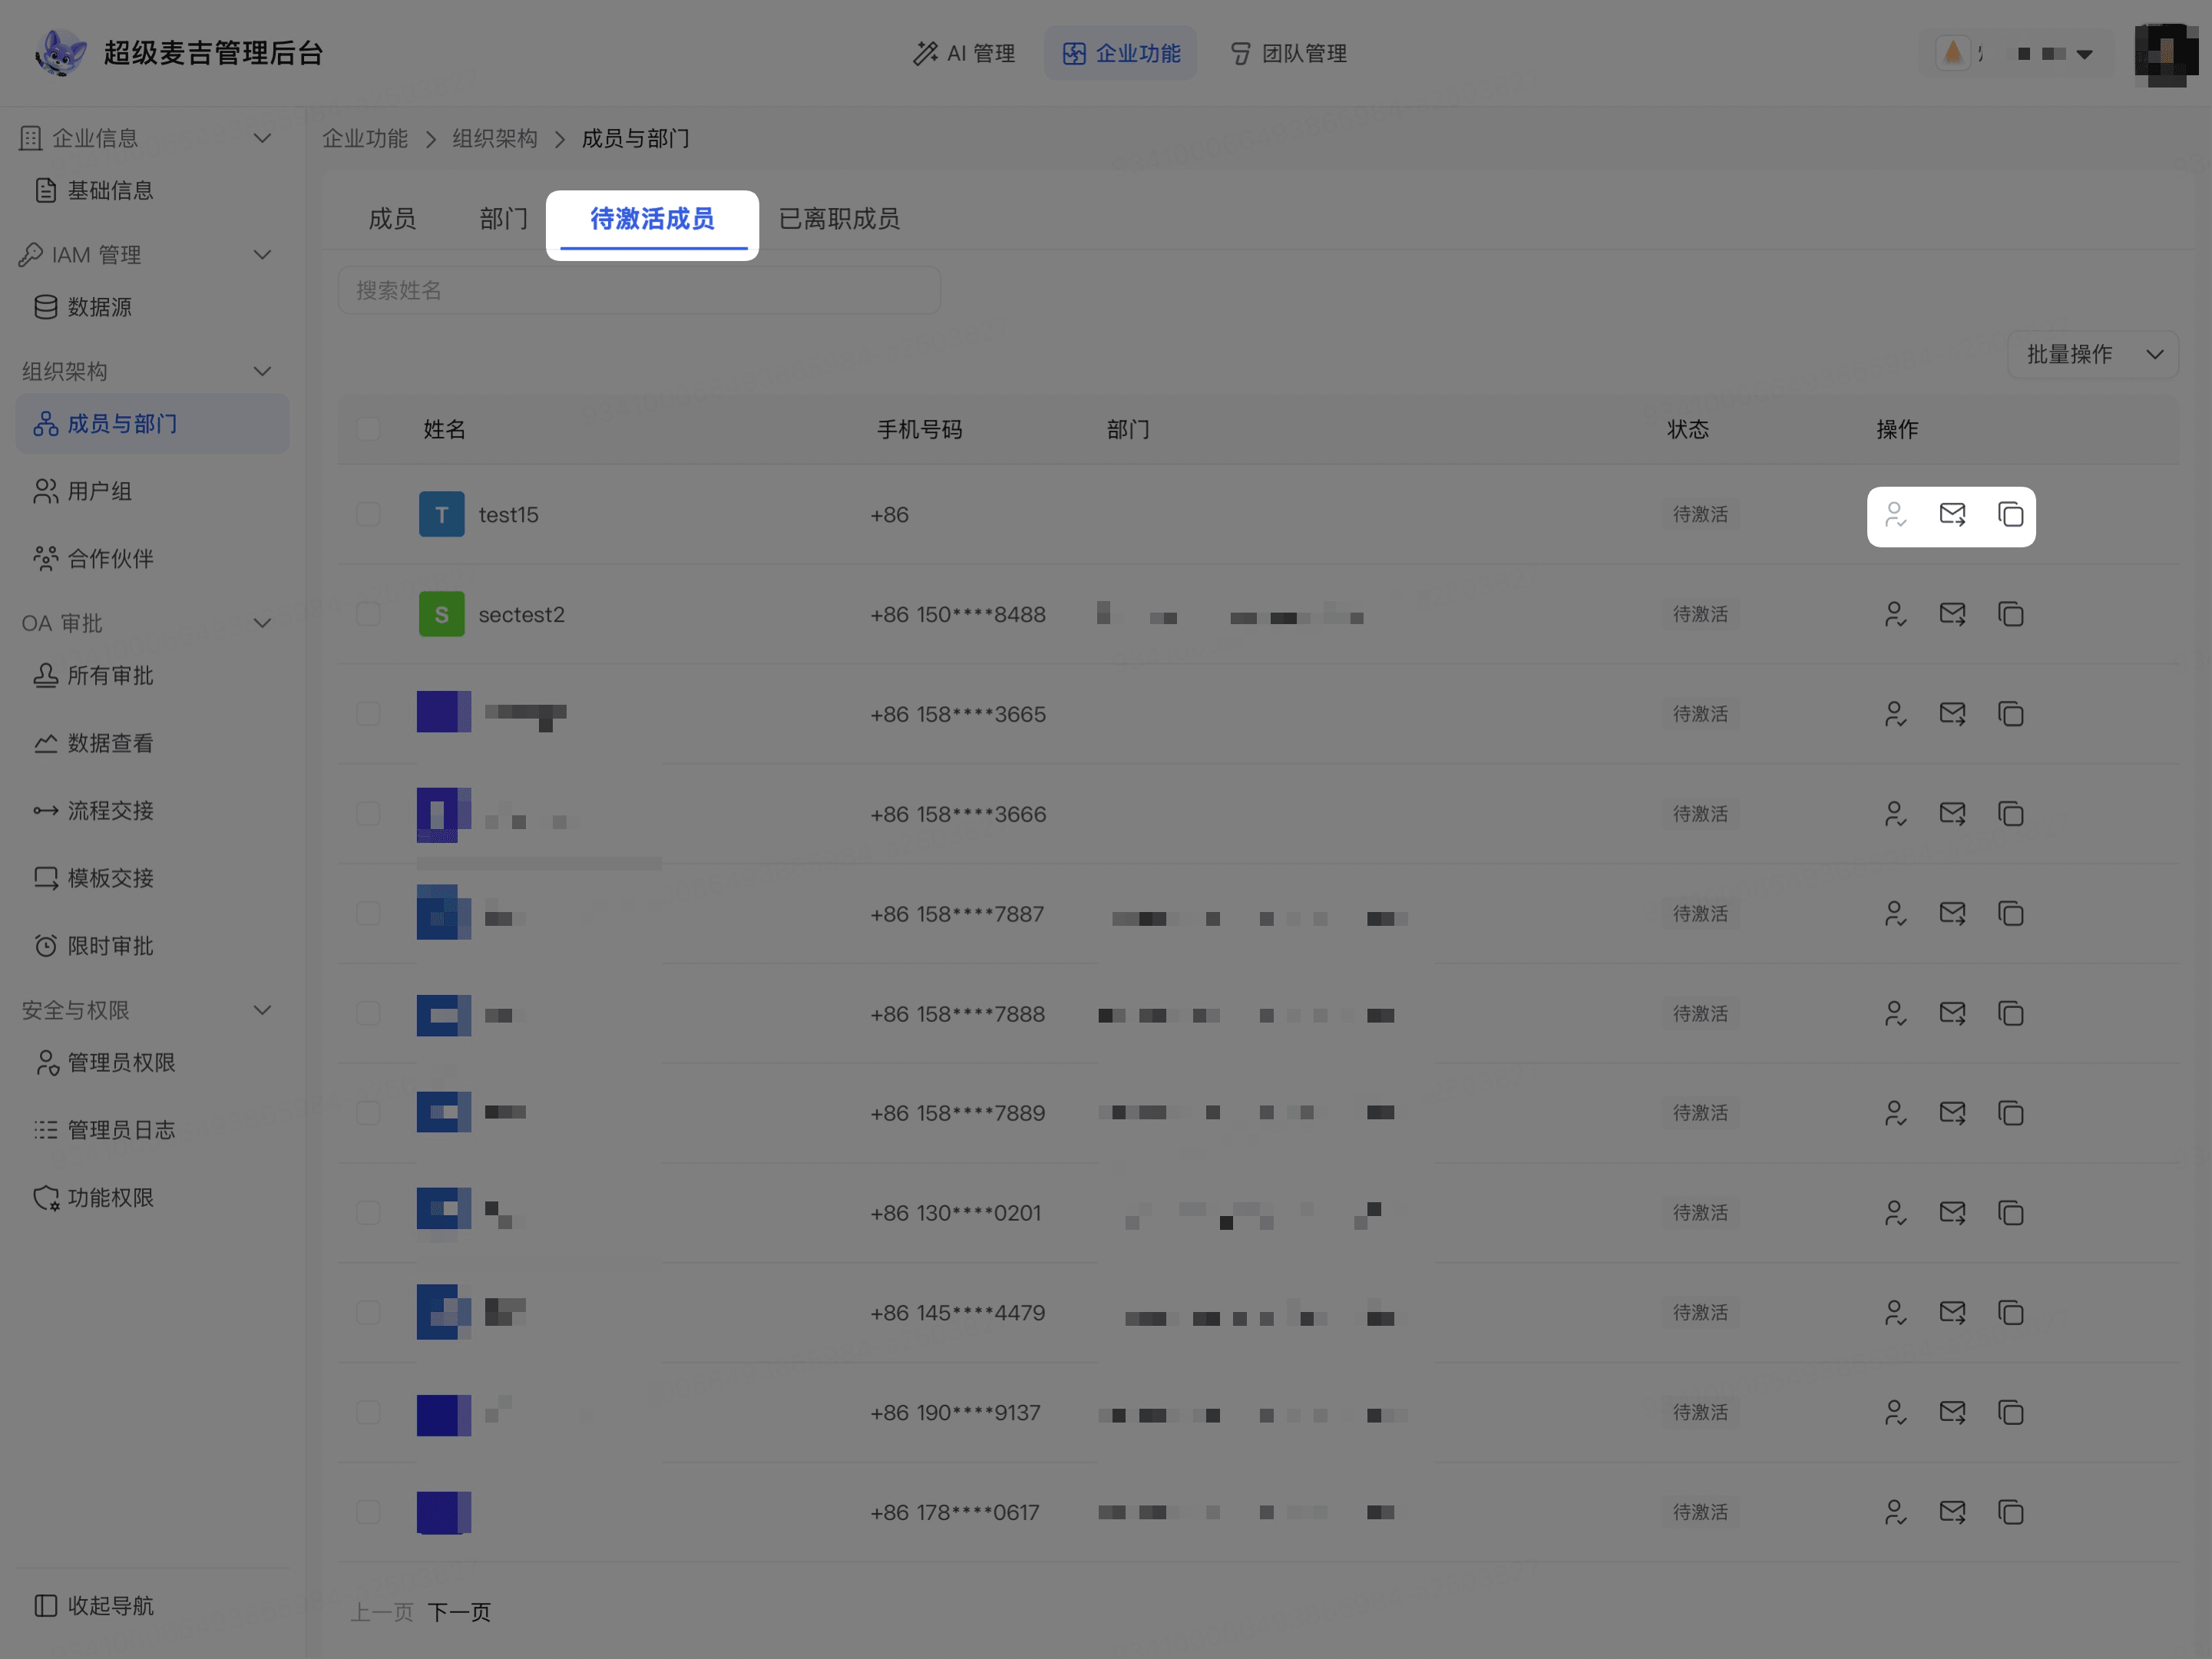
After receiving the SMS, the member can complete account binding and activation as prompted.
Copy the activation link
Click the copy icon in the row of the target member.
Send the activation link copied from the current page to the member.
Use the link copied during the current operation. Do not manually reuse an invitation link from another member.
Activate members or send notifications in batches
Select the members you want to process.
Click Bulk Actions in the upper-right corner.
Select Activate Members in Bulk or Send Notification.
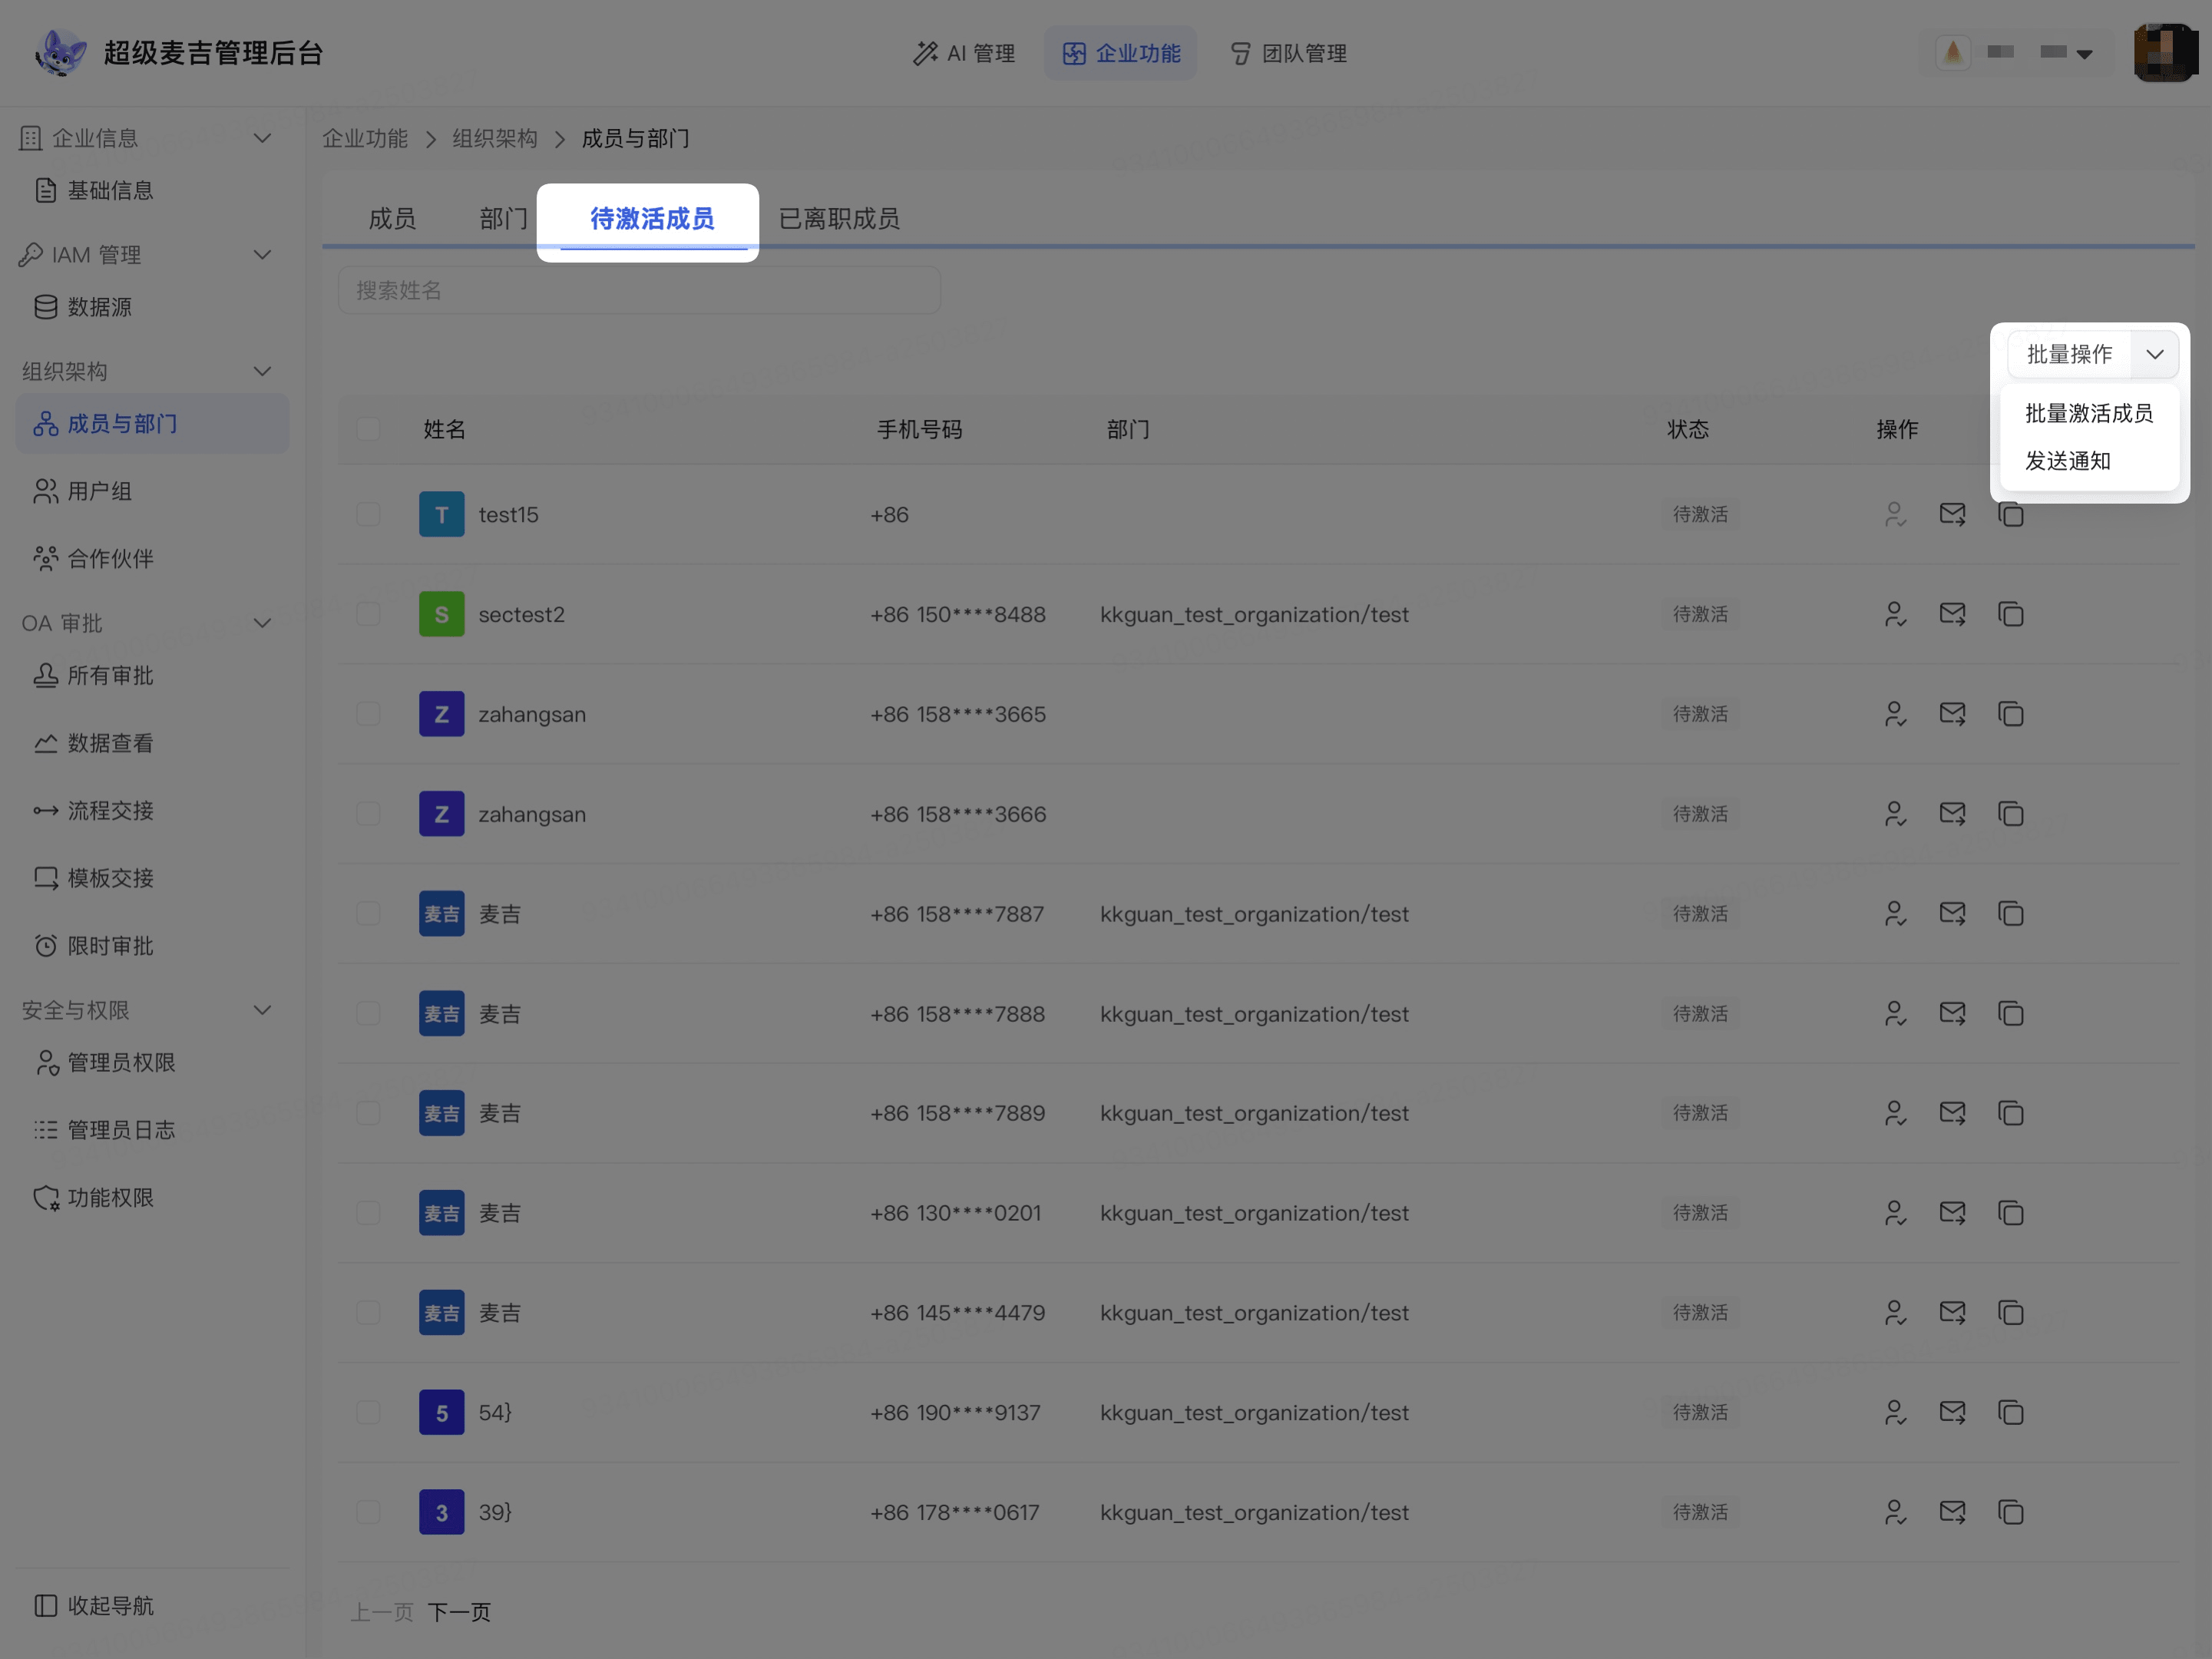
The system performs the selected action on the selected members. Before activating members in bulk, check the selected members and their mobile phone numbers again.
View departed members
Click the Departed Members tab.
Enter a name in the search box.
View the departed members who match the criteria.
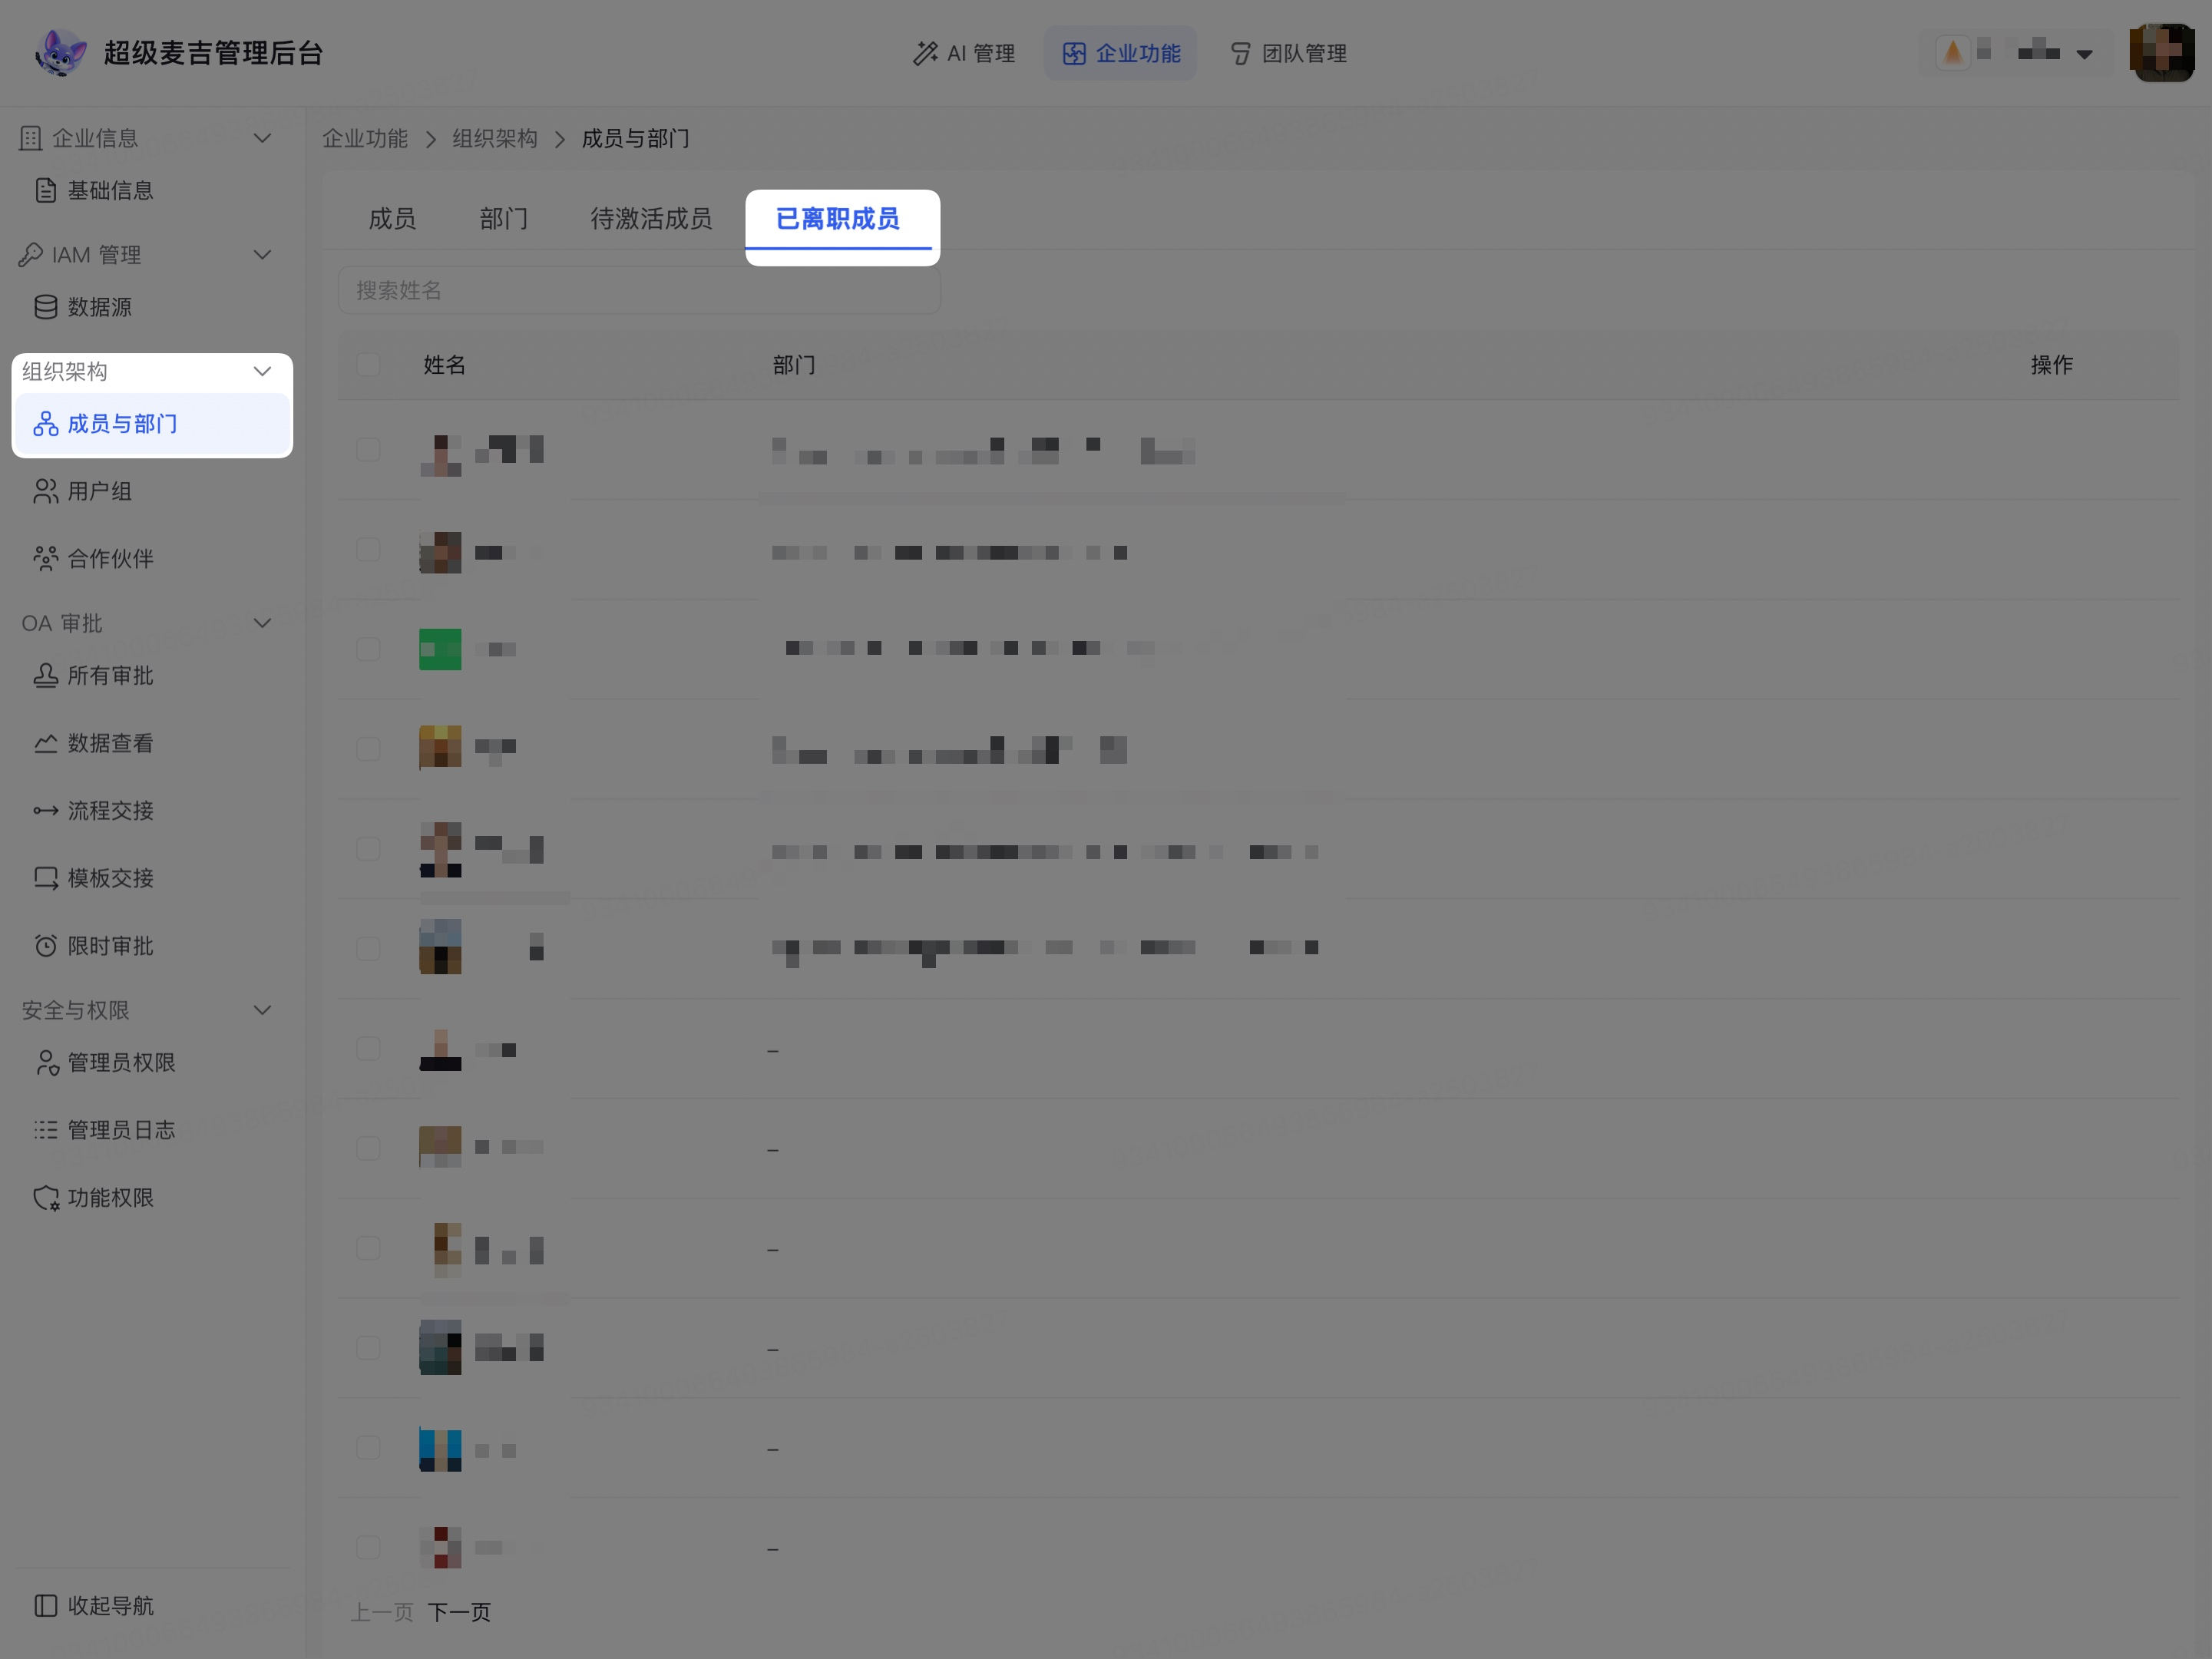
The page displays the departed members who match the criteria and their departments. The available follow-up actions depend on the buttons displayed on the right side of the list and the permissions of the current account.