
Manage Enterprise User Groups
Create and maintain user groups for the current enterprise in the admin console, and add enterprise members to or remove them from designated user groups.
Create and maintain user groups for the current enterprise in the admin console, and add enterprise members to or remove them from designated user groups.
Before you start
Log in to SuperMagic and open the admin console for the enterprise you need to manage.
Confirm that the correct enterprise is selected in the upper-right corner.
This feature is available for the Enterprise plan. Visibility depends on enterprise settings and account permissions.
Confirm that your current account has organization management permissions.
Before creating a user group, prepare the user group name and list of members to add.
User groups are used to organize current enterprise members by project, function, or scope of collaboration. Adding or removing a member from a user group does not change their department or enterprise member status.
Open the User Groups page
In the admin console header, click Enterprise features.
Expand Organization structure in the left navigation.
Click User groups.
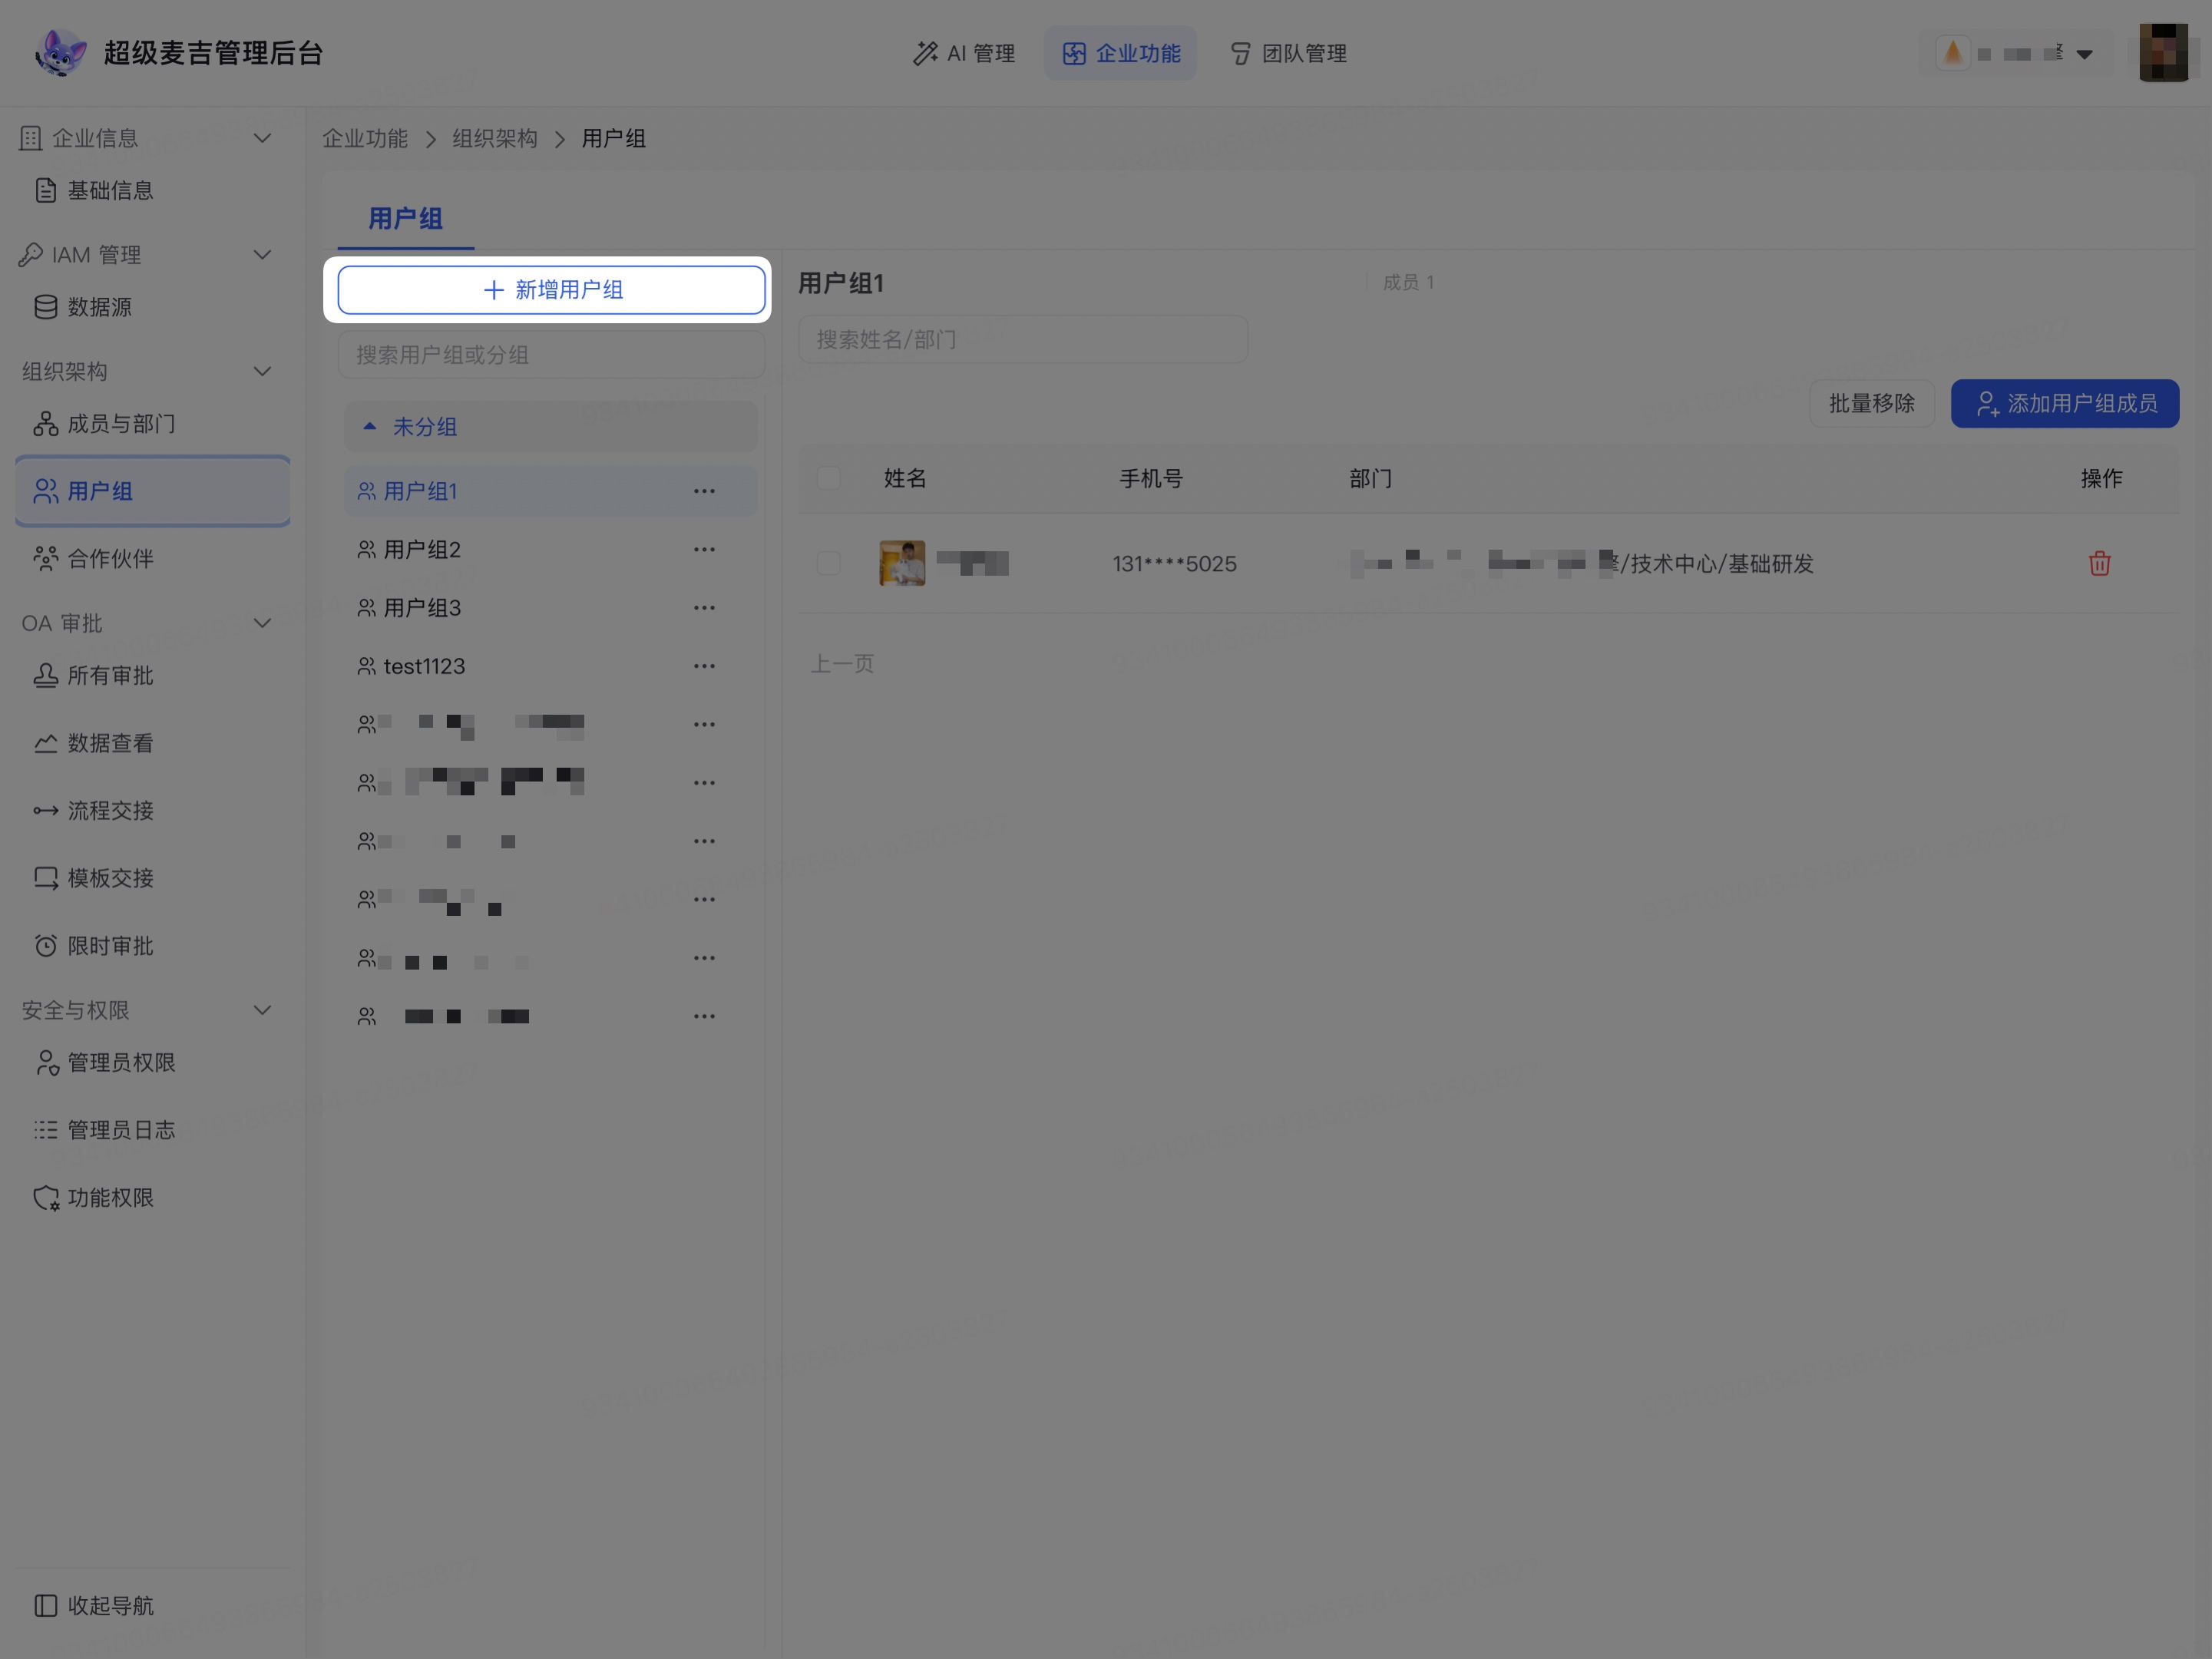
The left side of the page displays the user group list for the current enterprise, and the right side displays the members of the selected user group.
Create a user group
On the left side of the User Groups page, click Add user group.
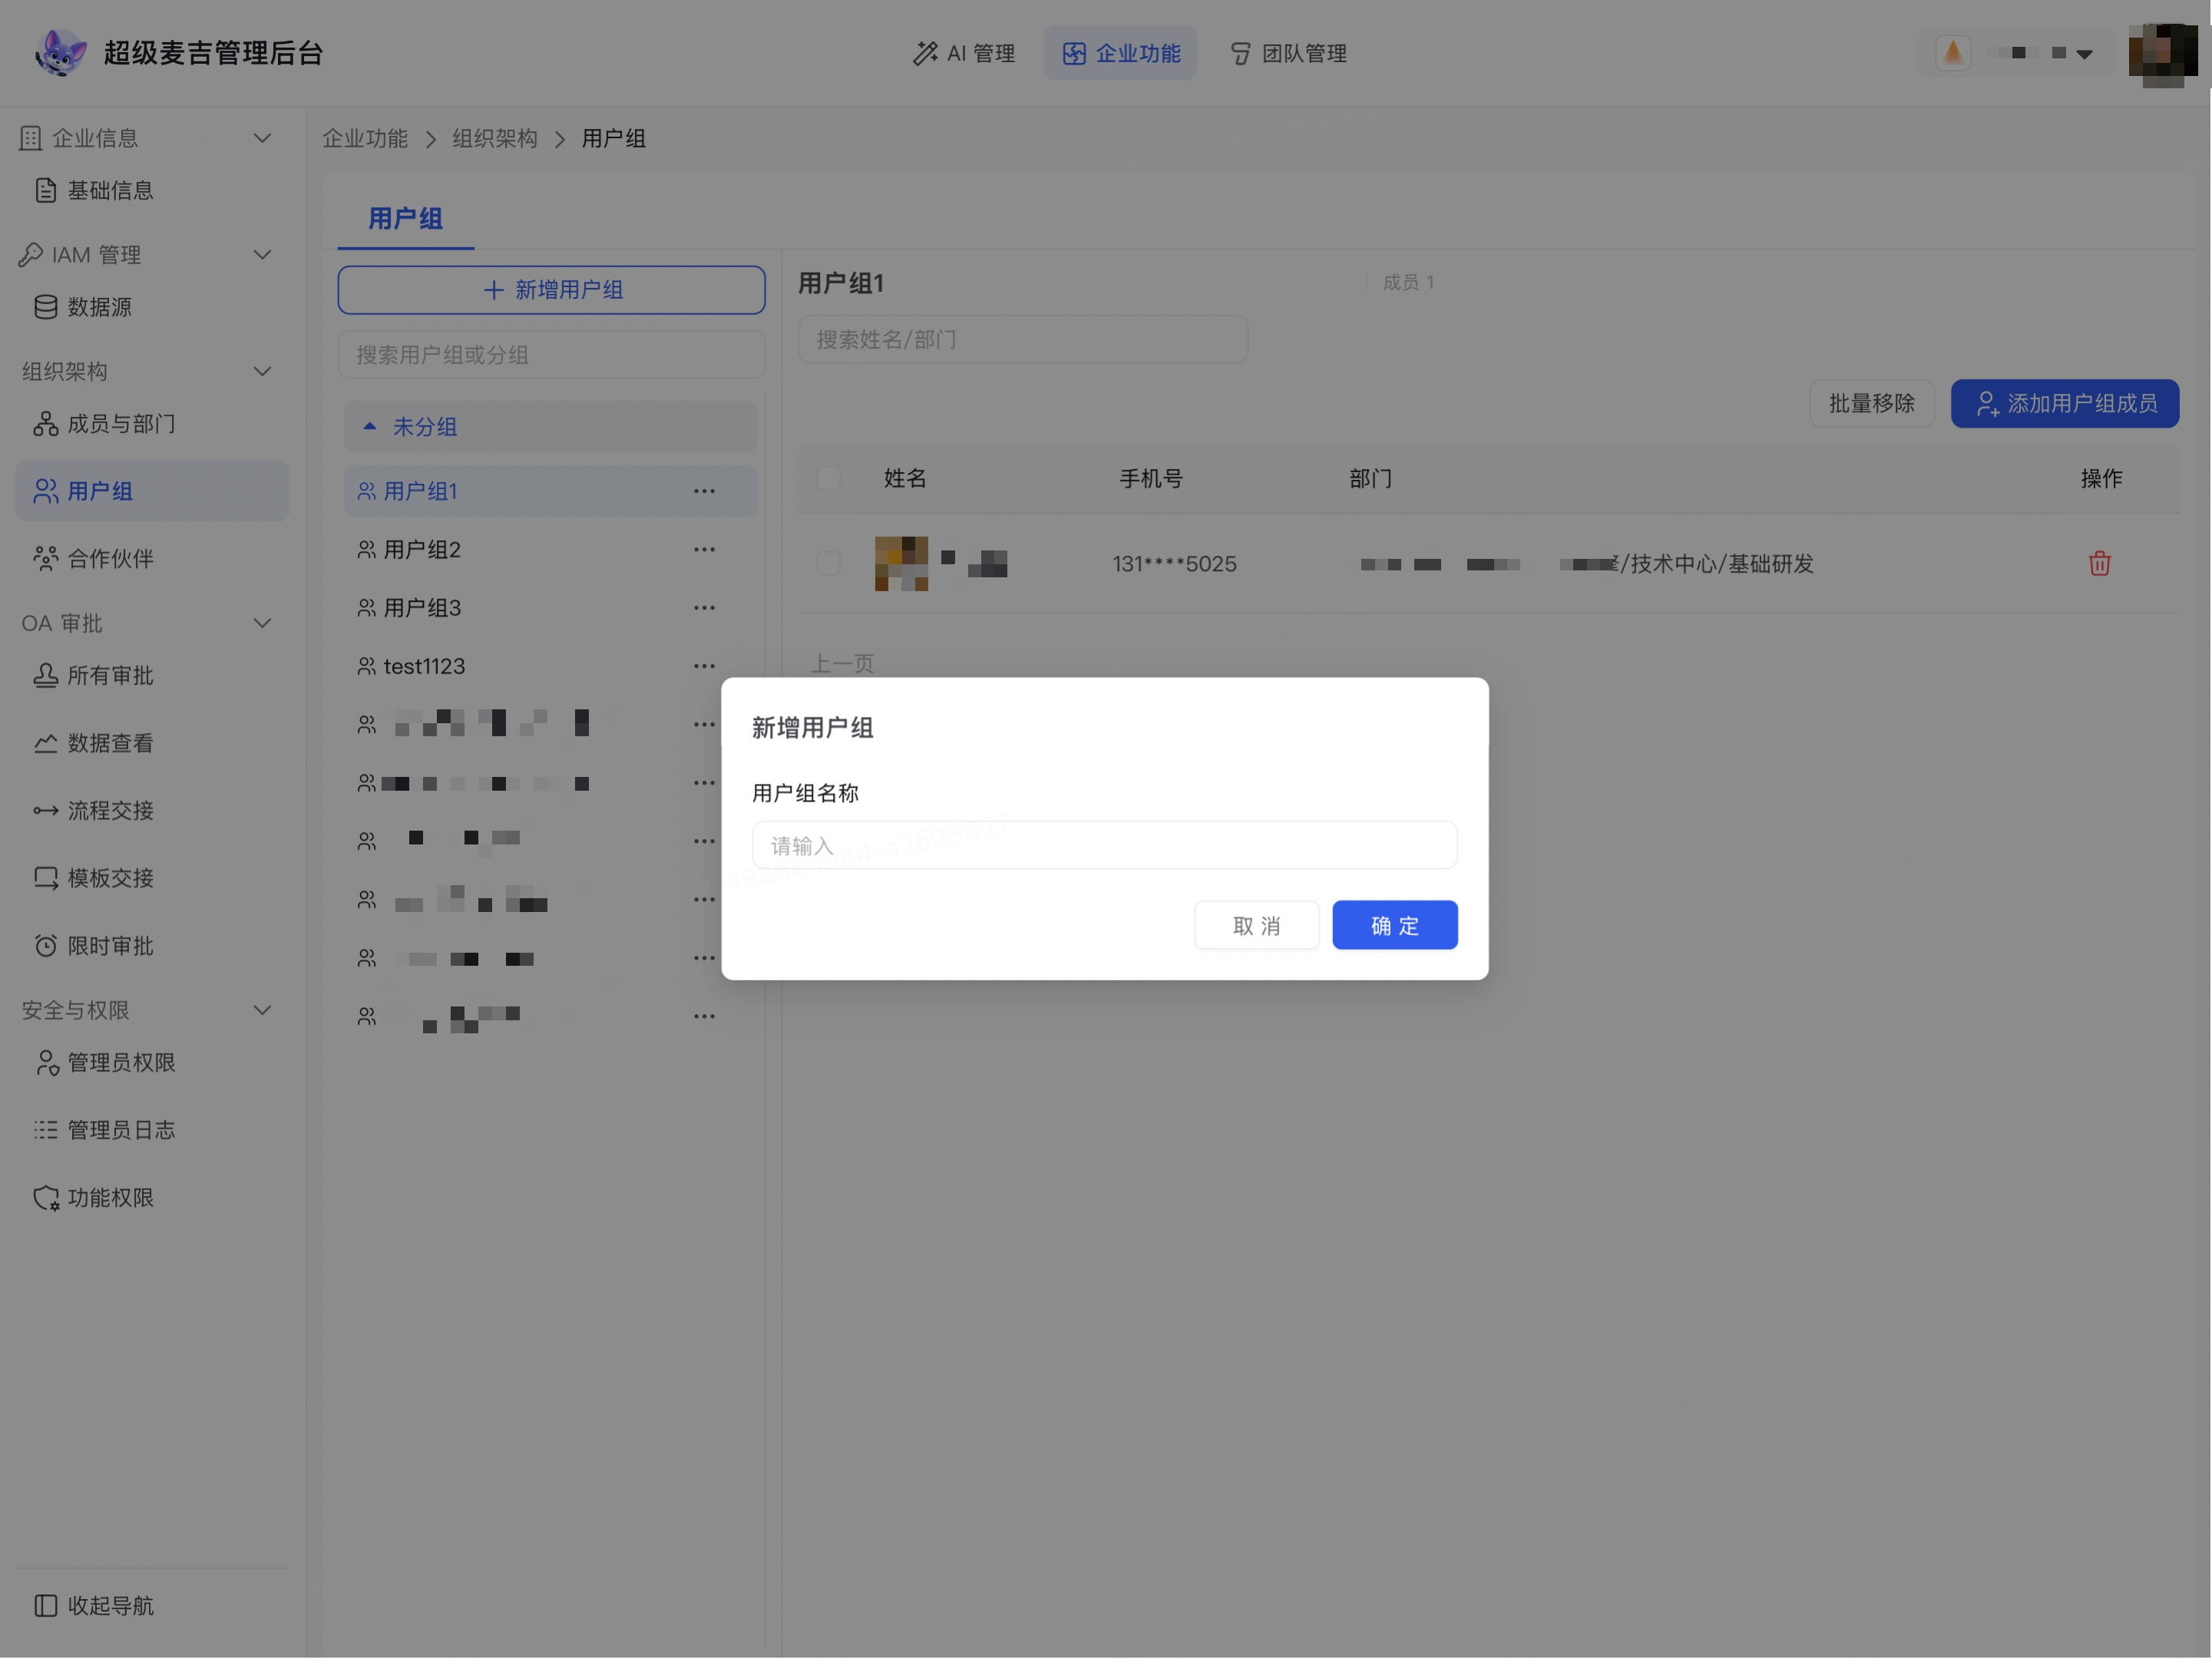
Enter a name in User group name.
Click Confirm.
The new user group appears in the list on the left. Creating a user group does not automatically add members. You must continue by selecting and adding enterprise members.
Edit or delete a user group
Edit the user group name
Find the user group you want to edit on the left.
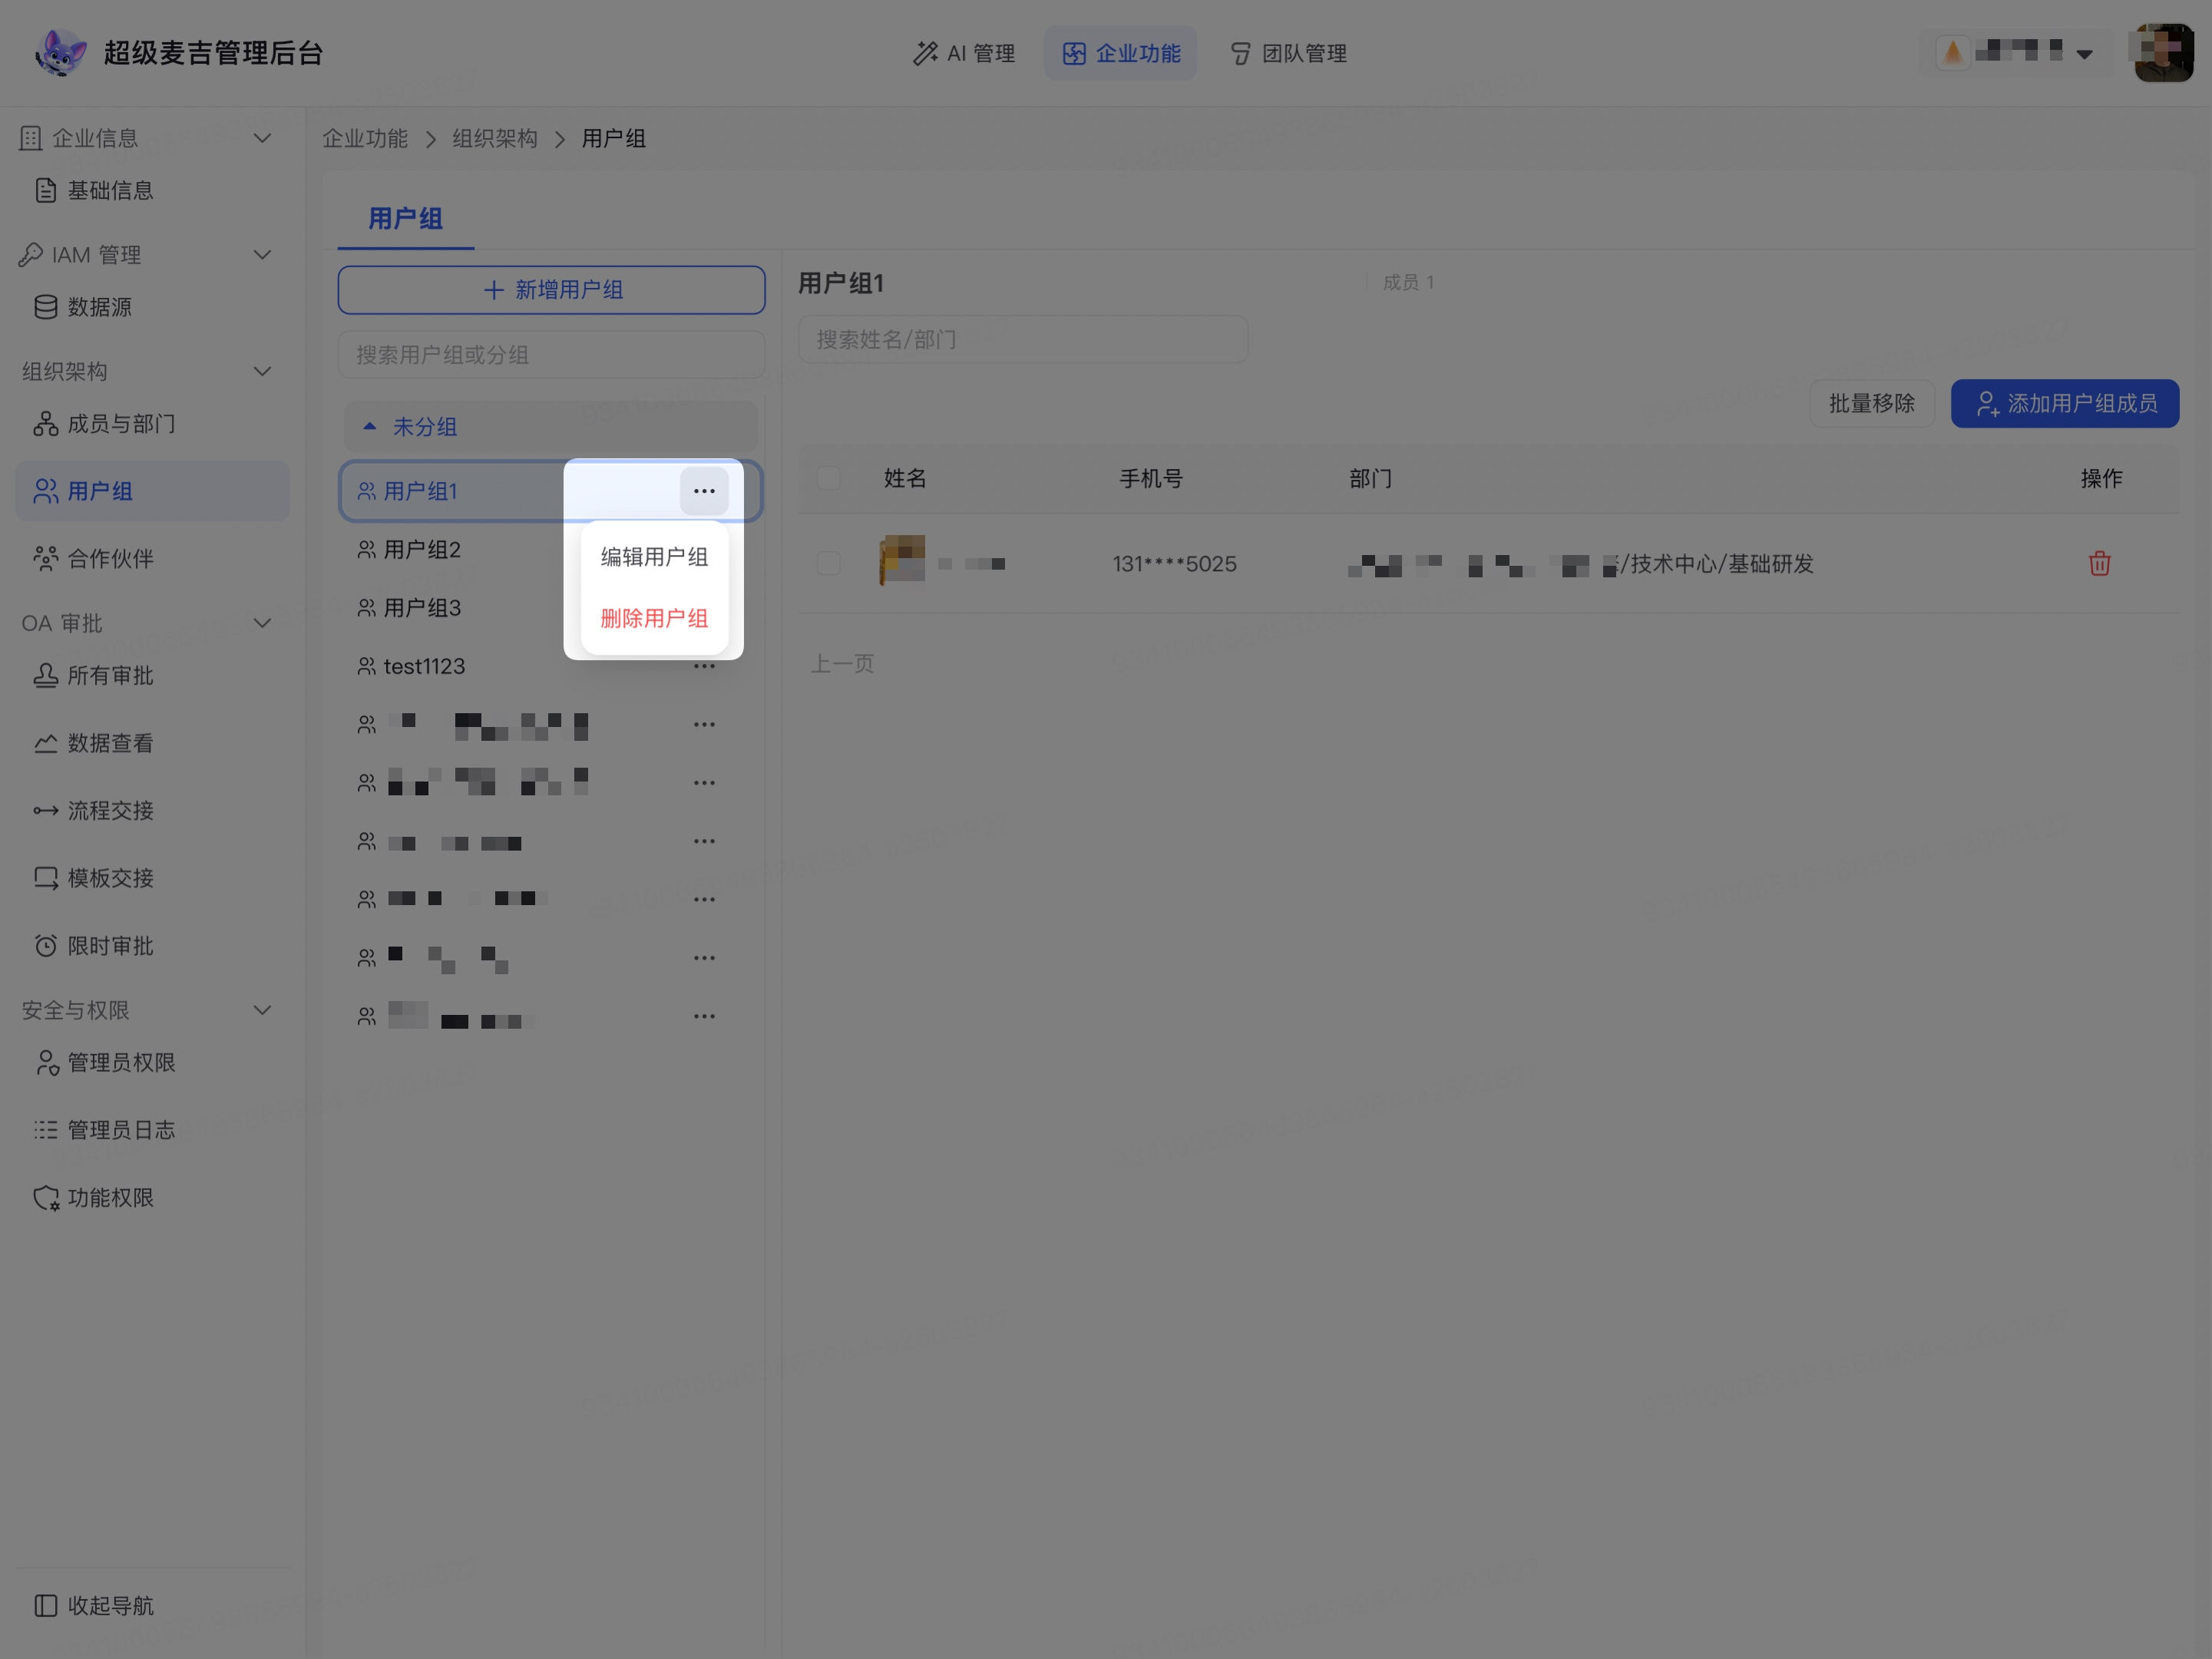
Click the More icon to the right of the user group.
Click Edit user group.
Edit User group name.
Click Confirm.
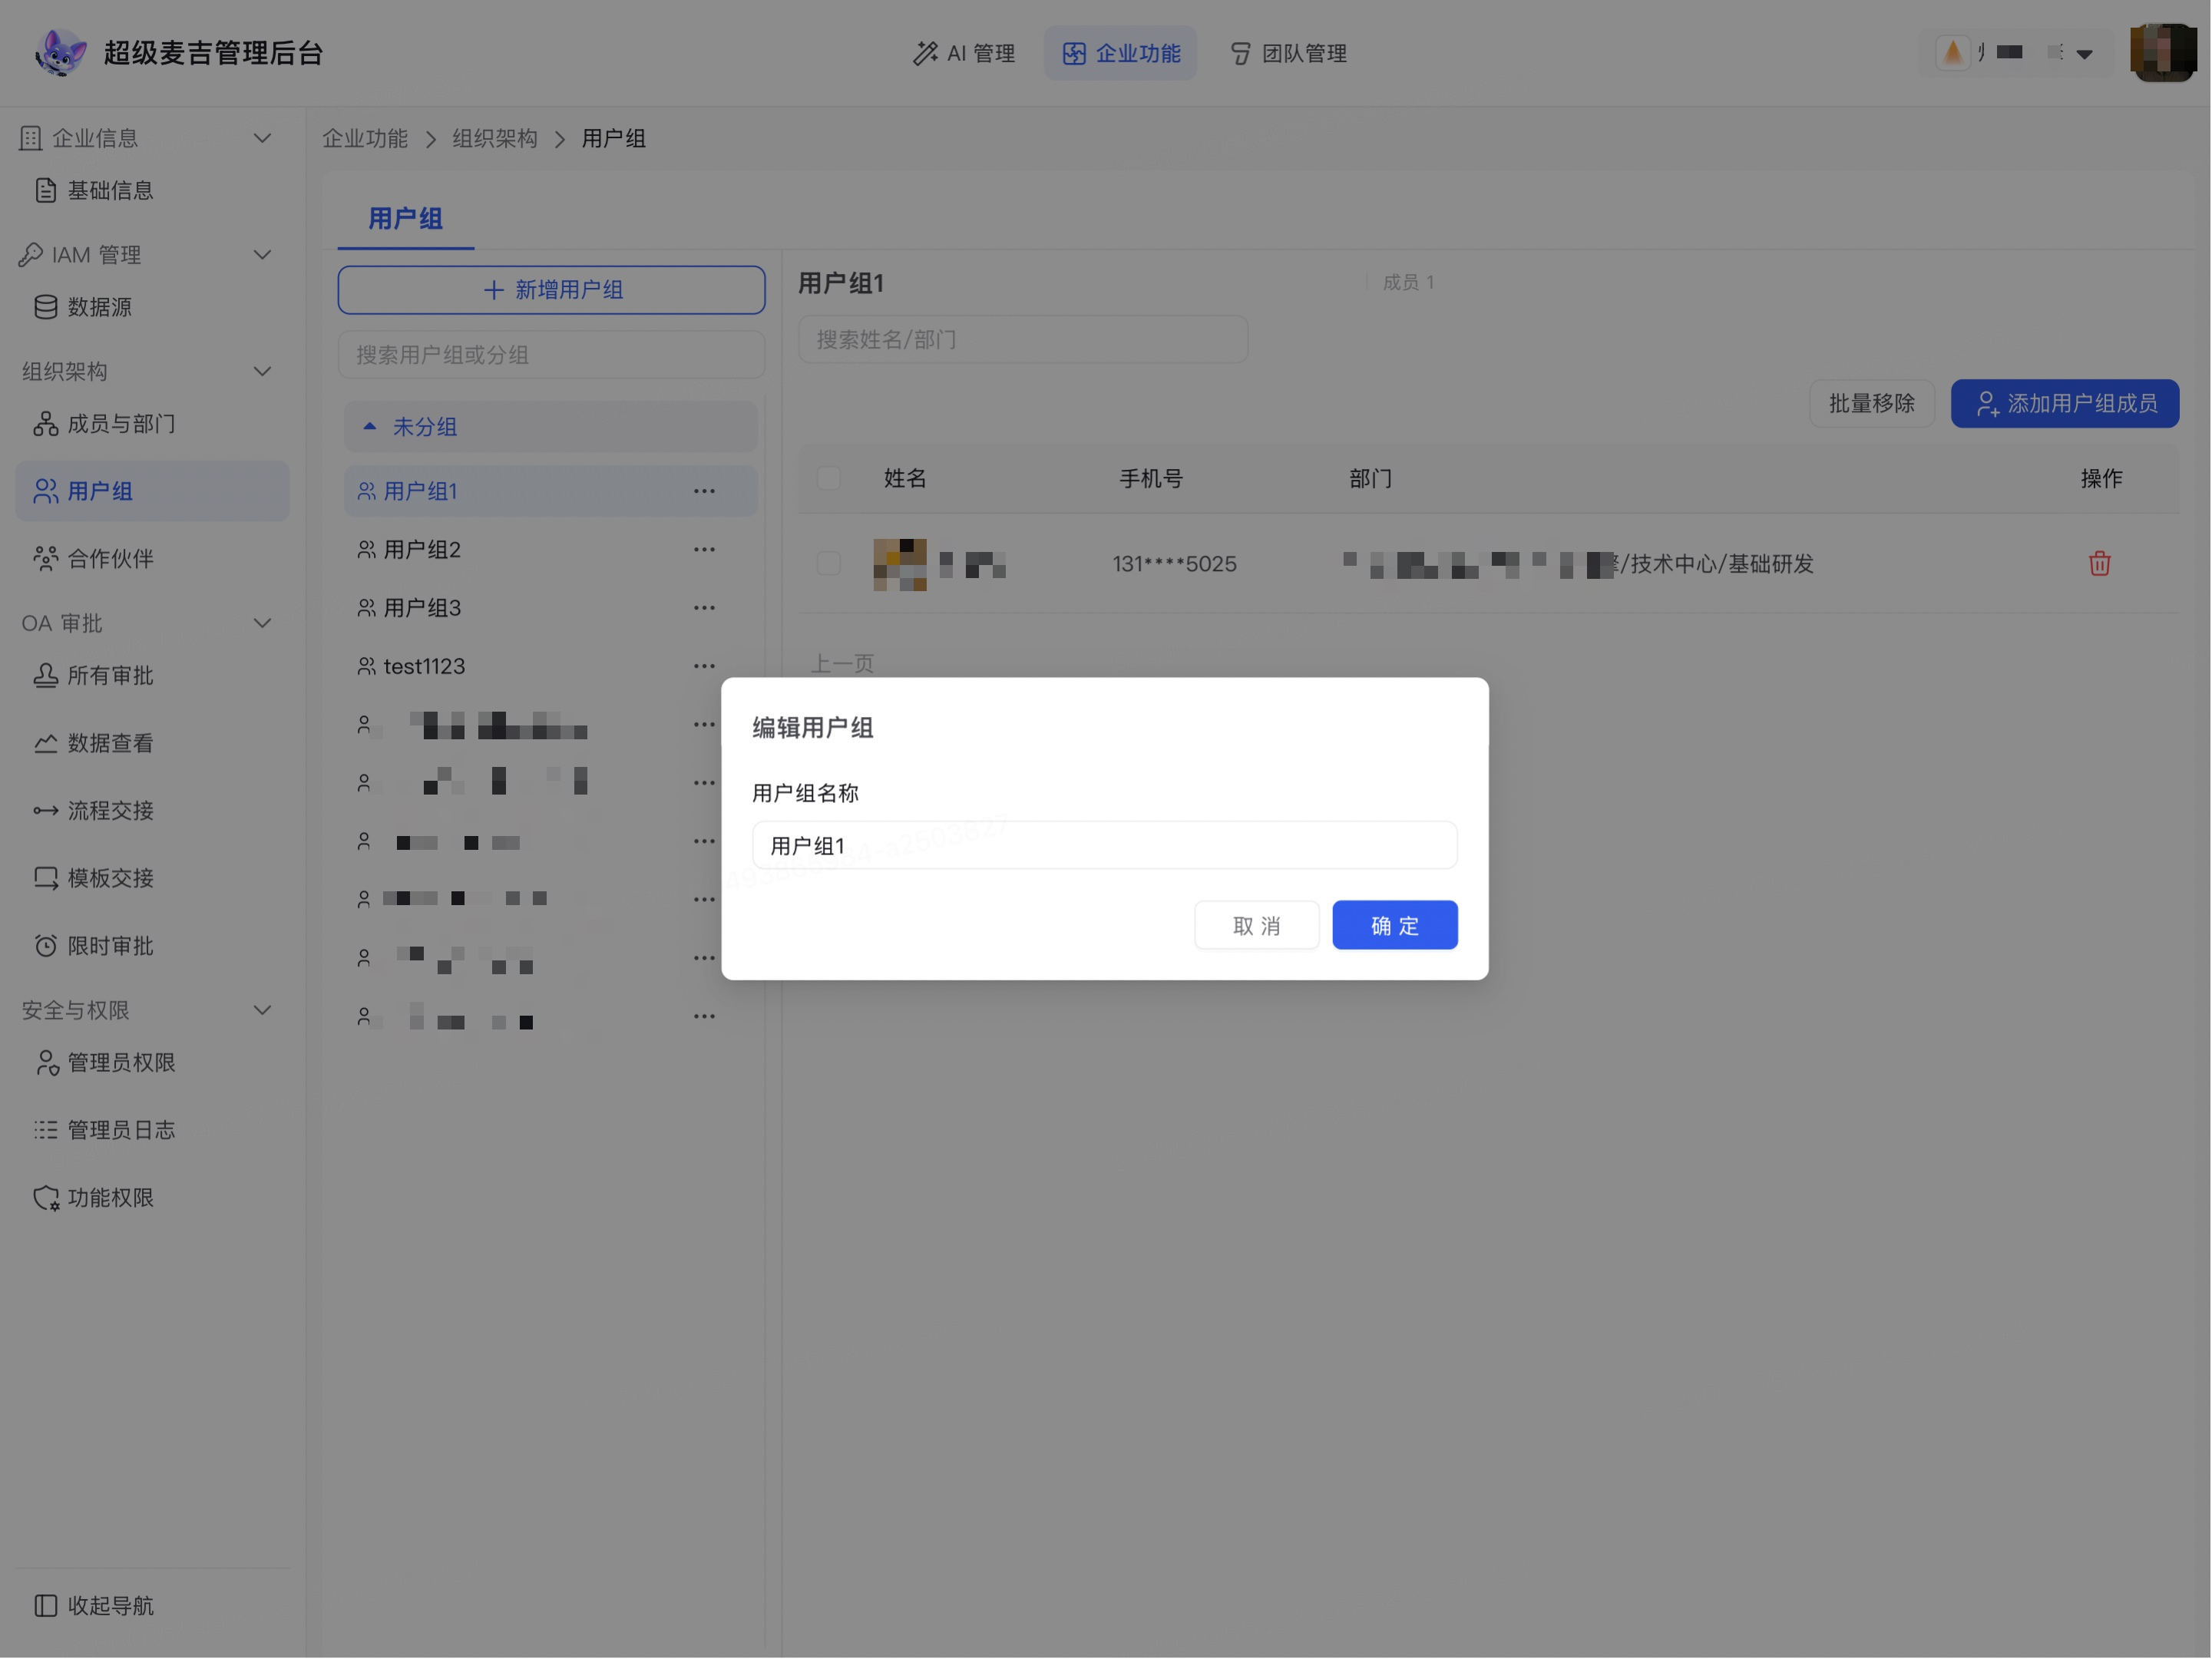
The updated name appears in the list on the left, and the existing user group members remain unchanged.
Delete a user group
Click the More icon to the right of the target user group.
Click Delete user group.
Follow the on-screen instructions to confirm the deletion.
The user group is removed from the list on the left. Deleting a user group does not delete enterprise members. Before deleting a group, confirm that it is no longer in use and record any group information that needs to be retained.
Add user group members
Select the user group you want to manage on the left.
Click Add user group members on the right.
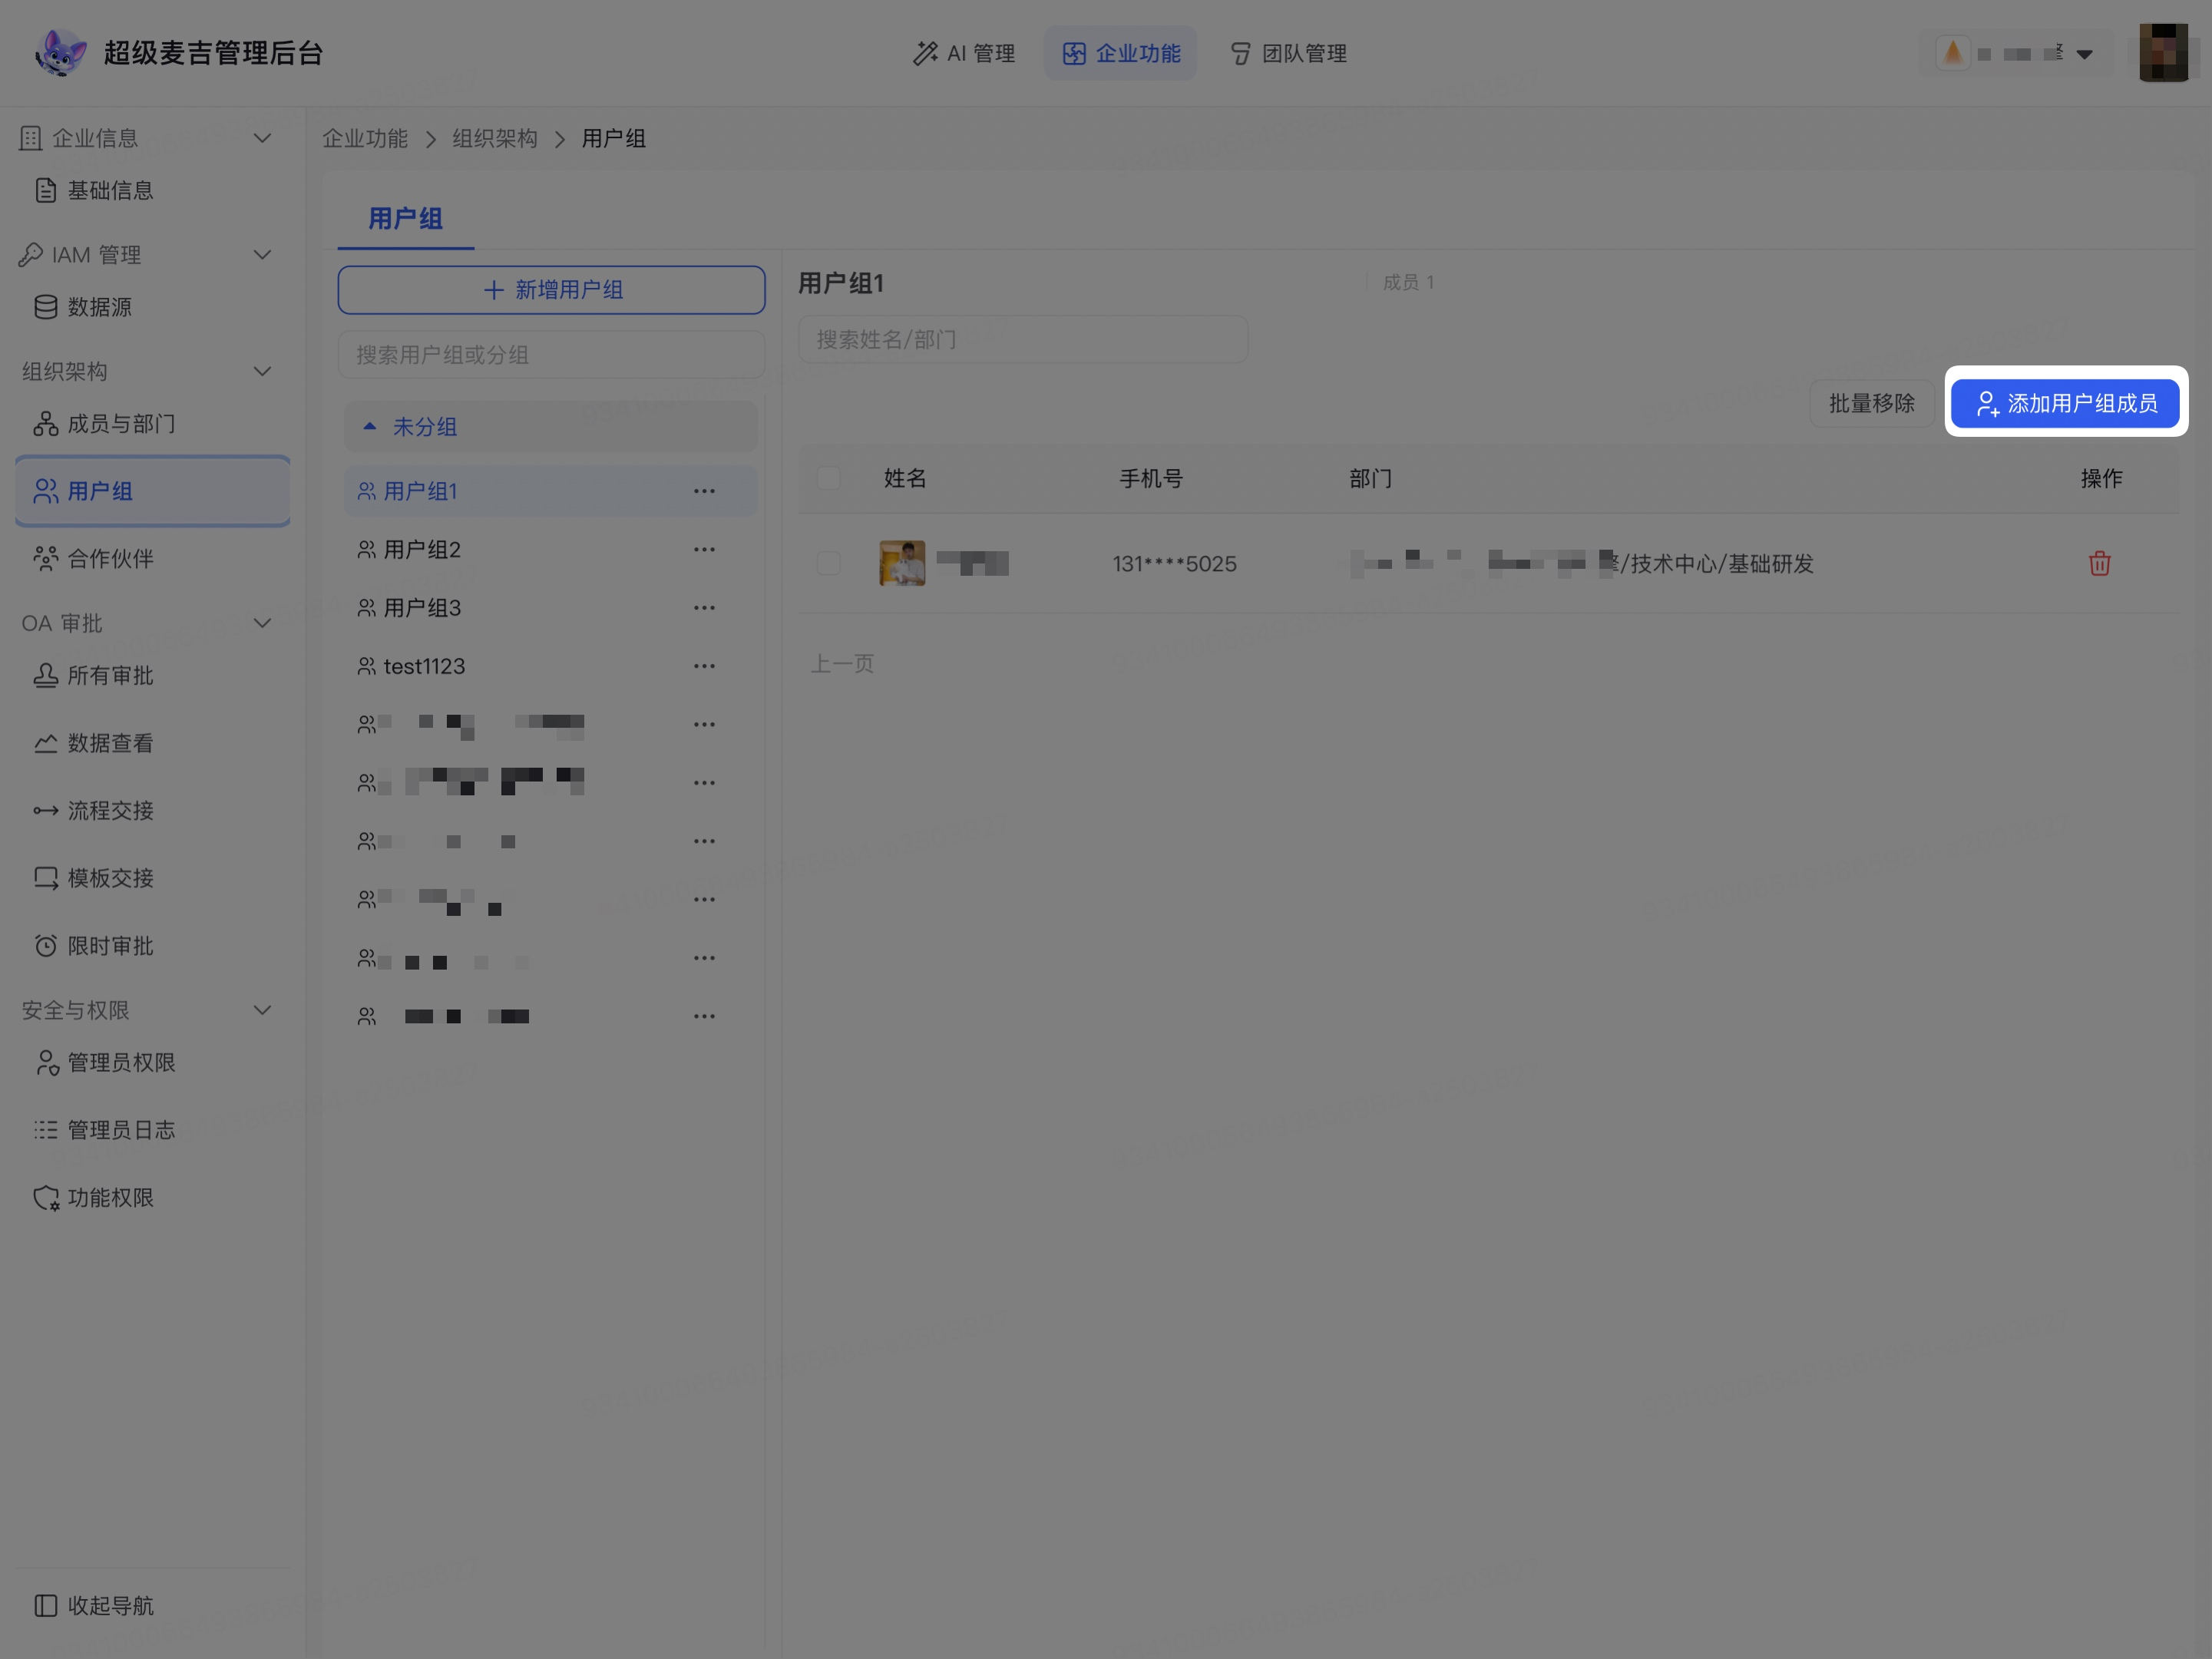
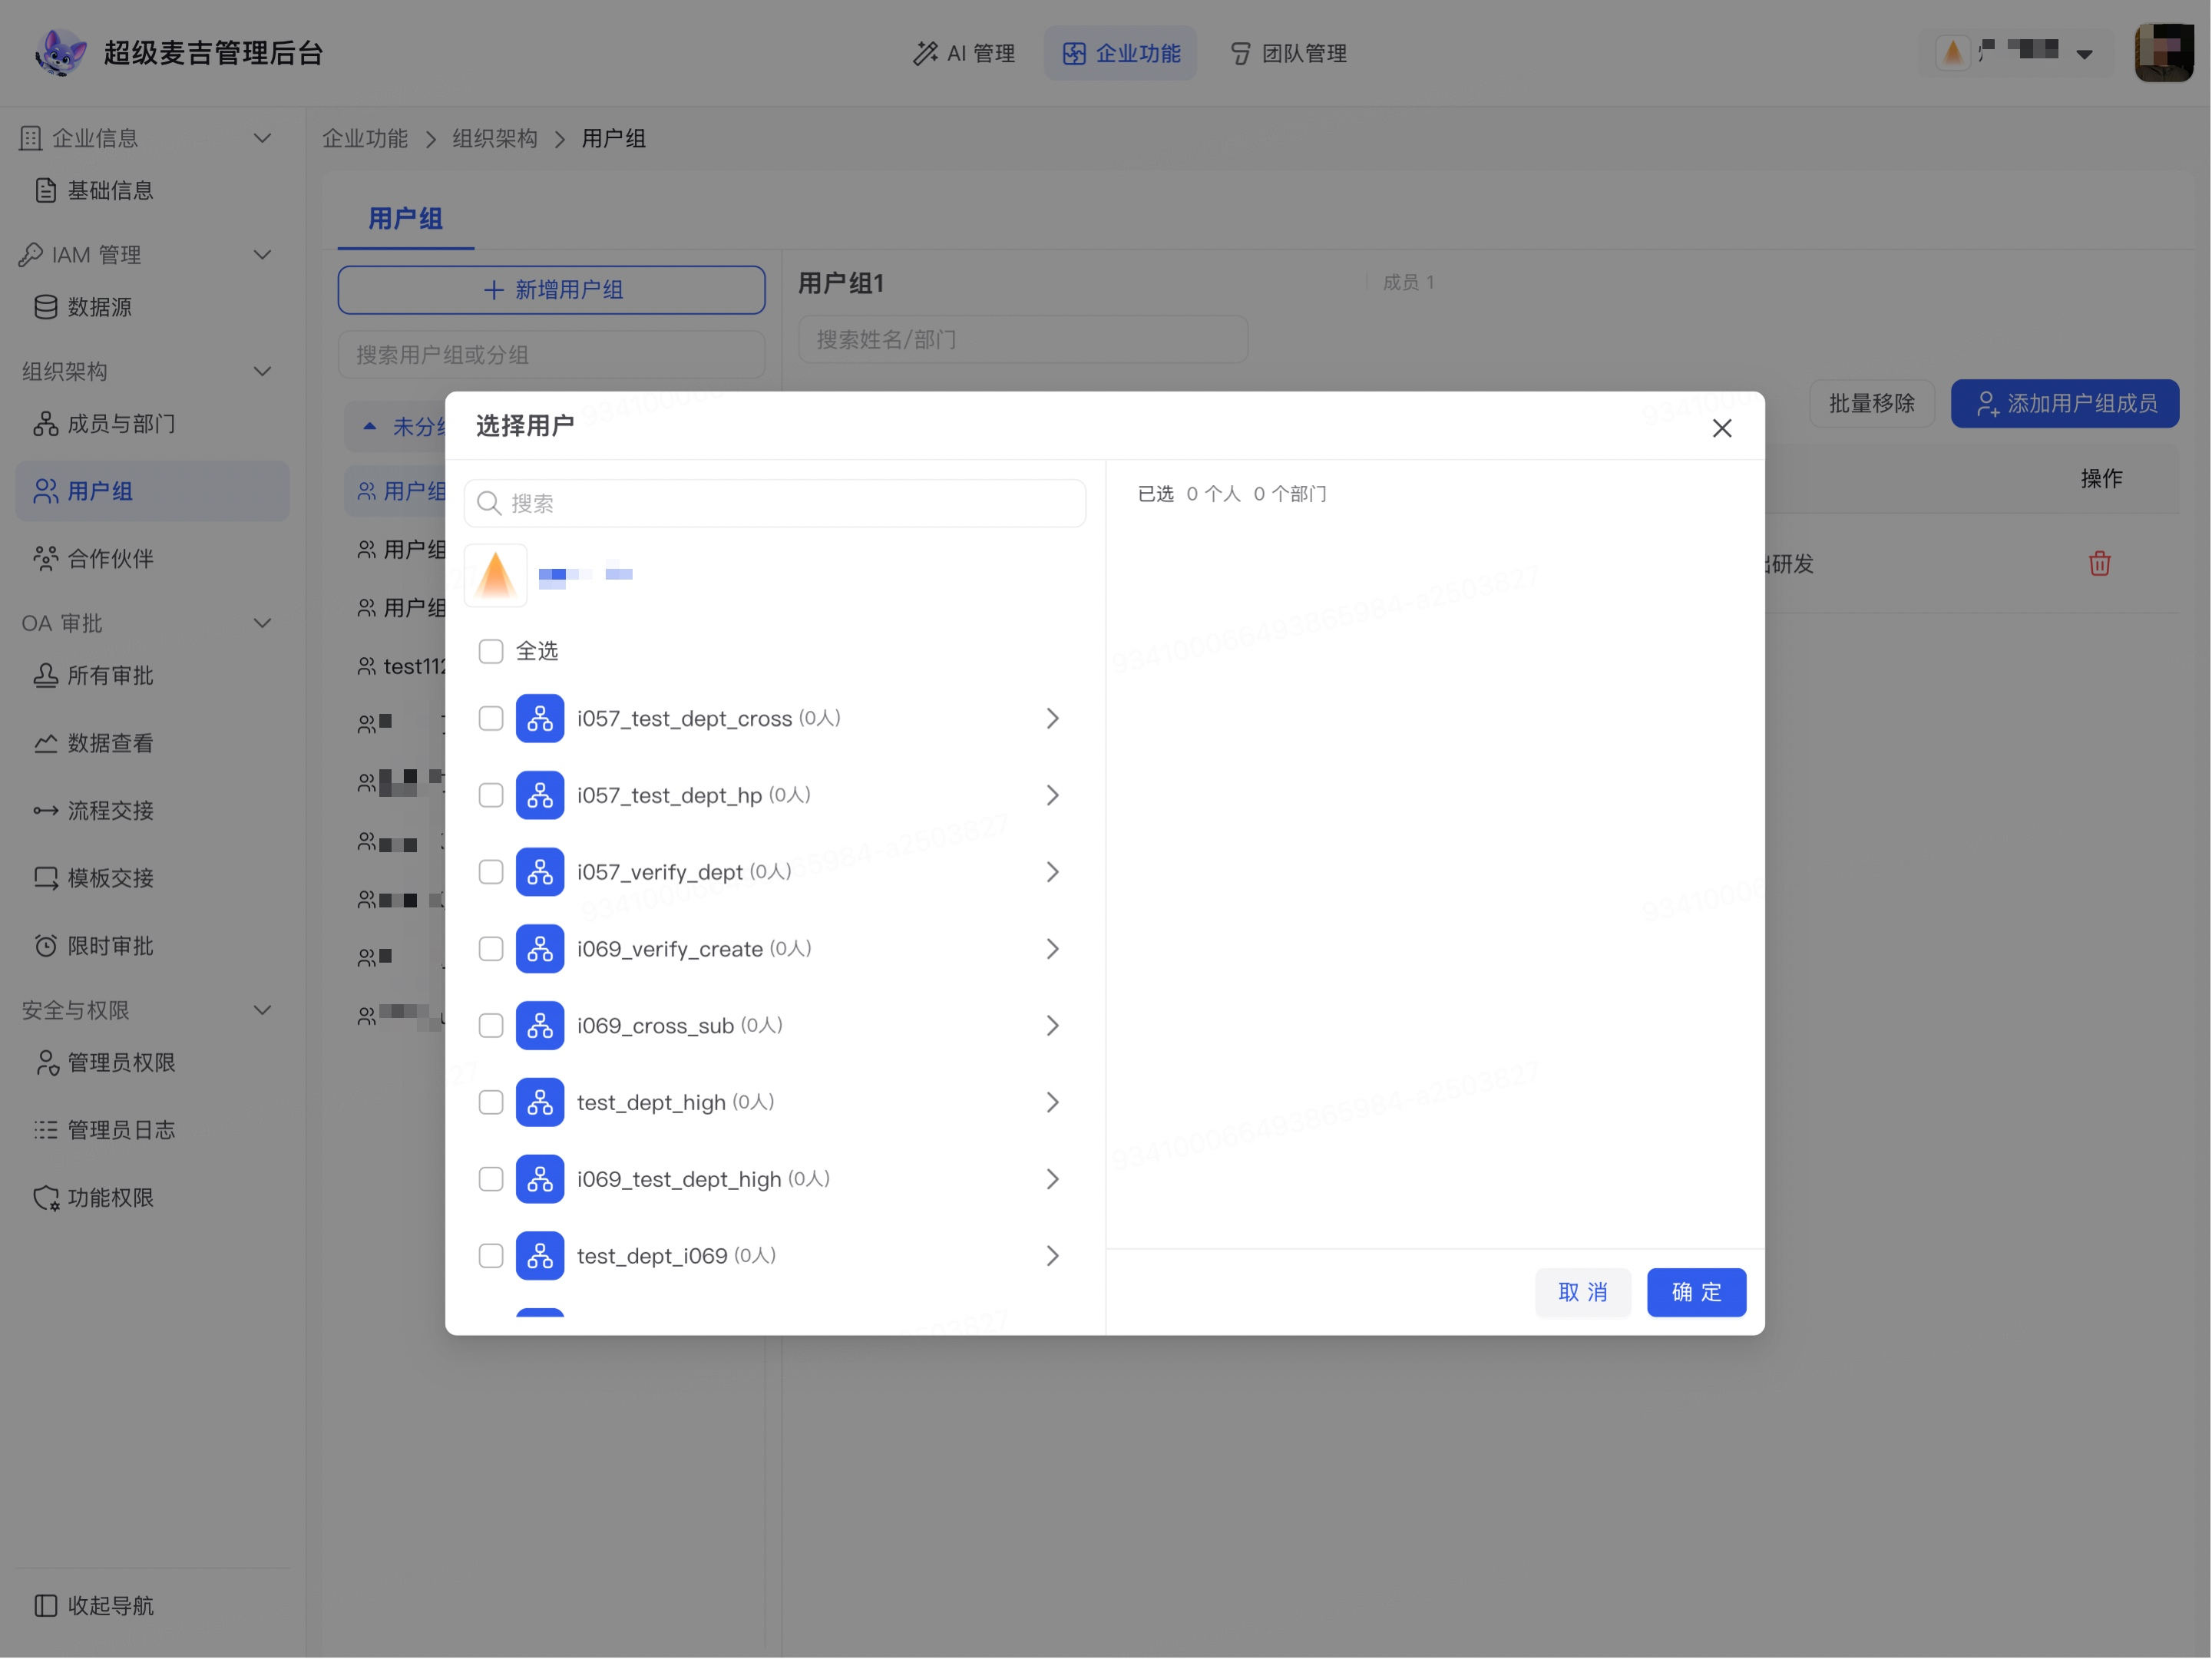
Search for members by name, or find them by browsing the organization structure.
Select the members you want to add to the user group.
Check the selected members displayed on the right.
Click Confirm.
The selected members appear in the member list of the current user group, and the member count at the top of the page updates automatically. The same member can be added to multiple user groups.
Remove user group members
Select the target user group on the left.
Find the member you want to remove in the member list on the right.
Click the delete icon on the right side of the member's row.
Follow the on-screen instructions to confirm the removal.
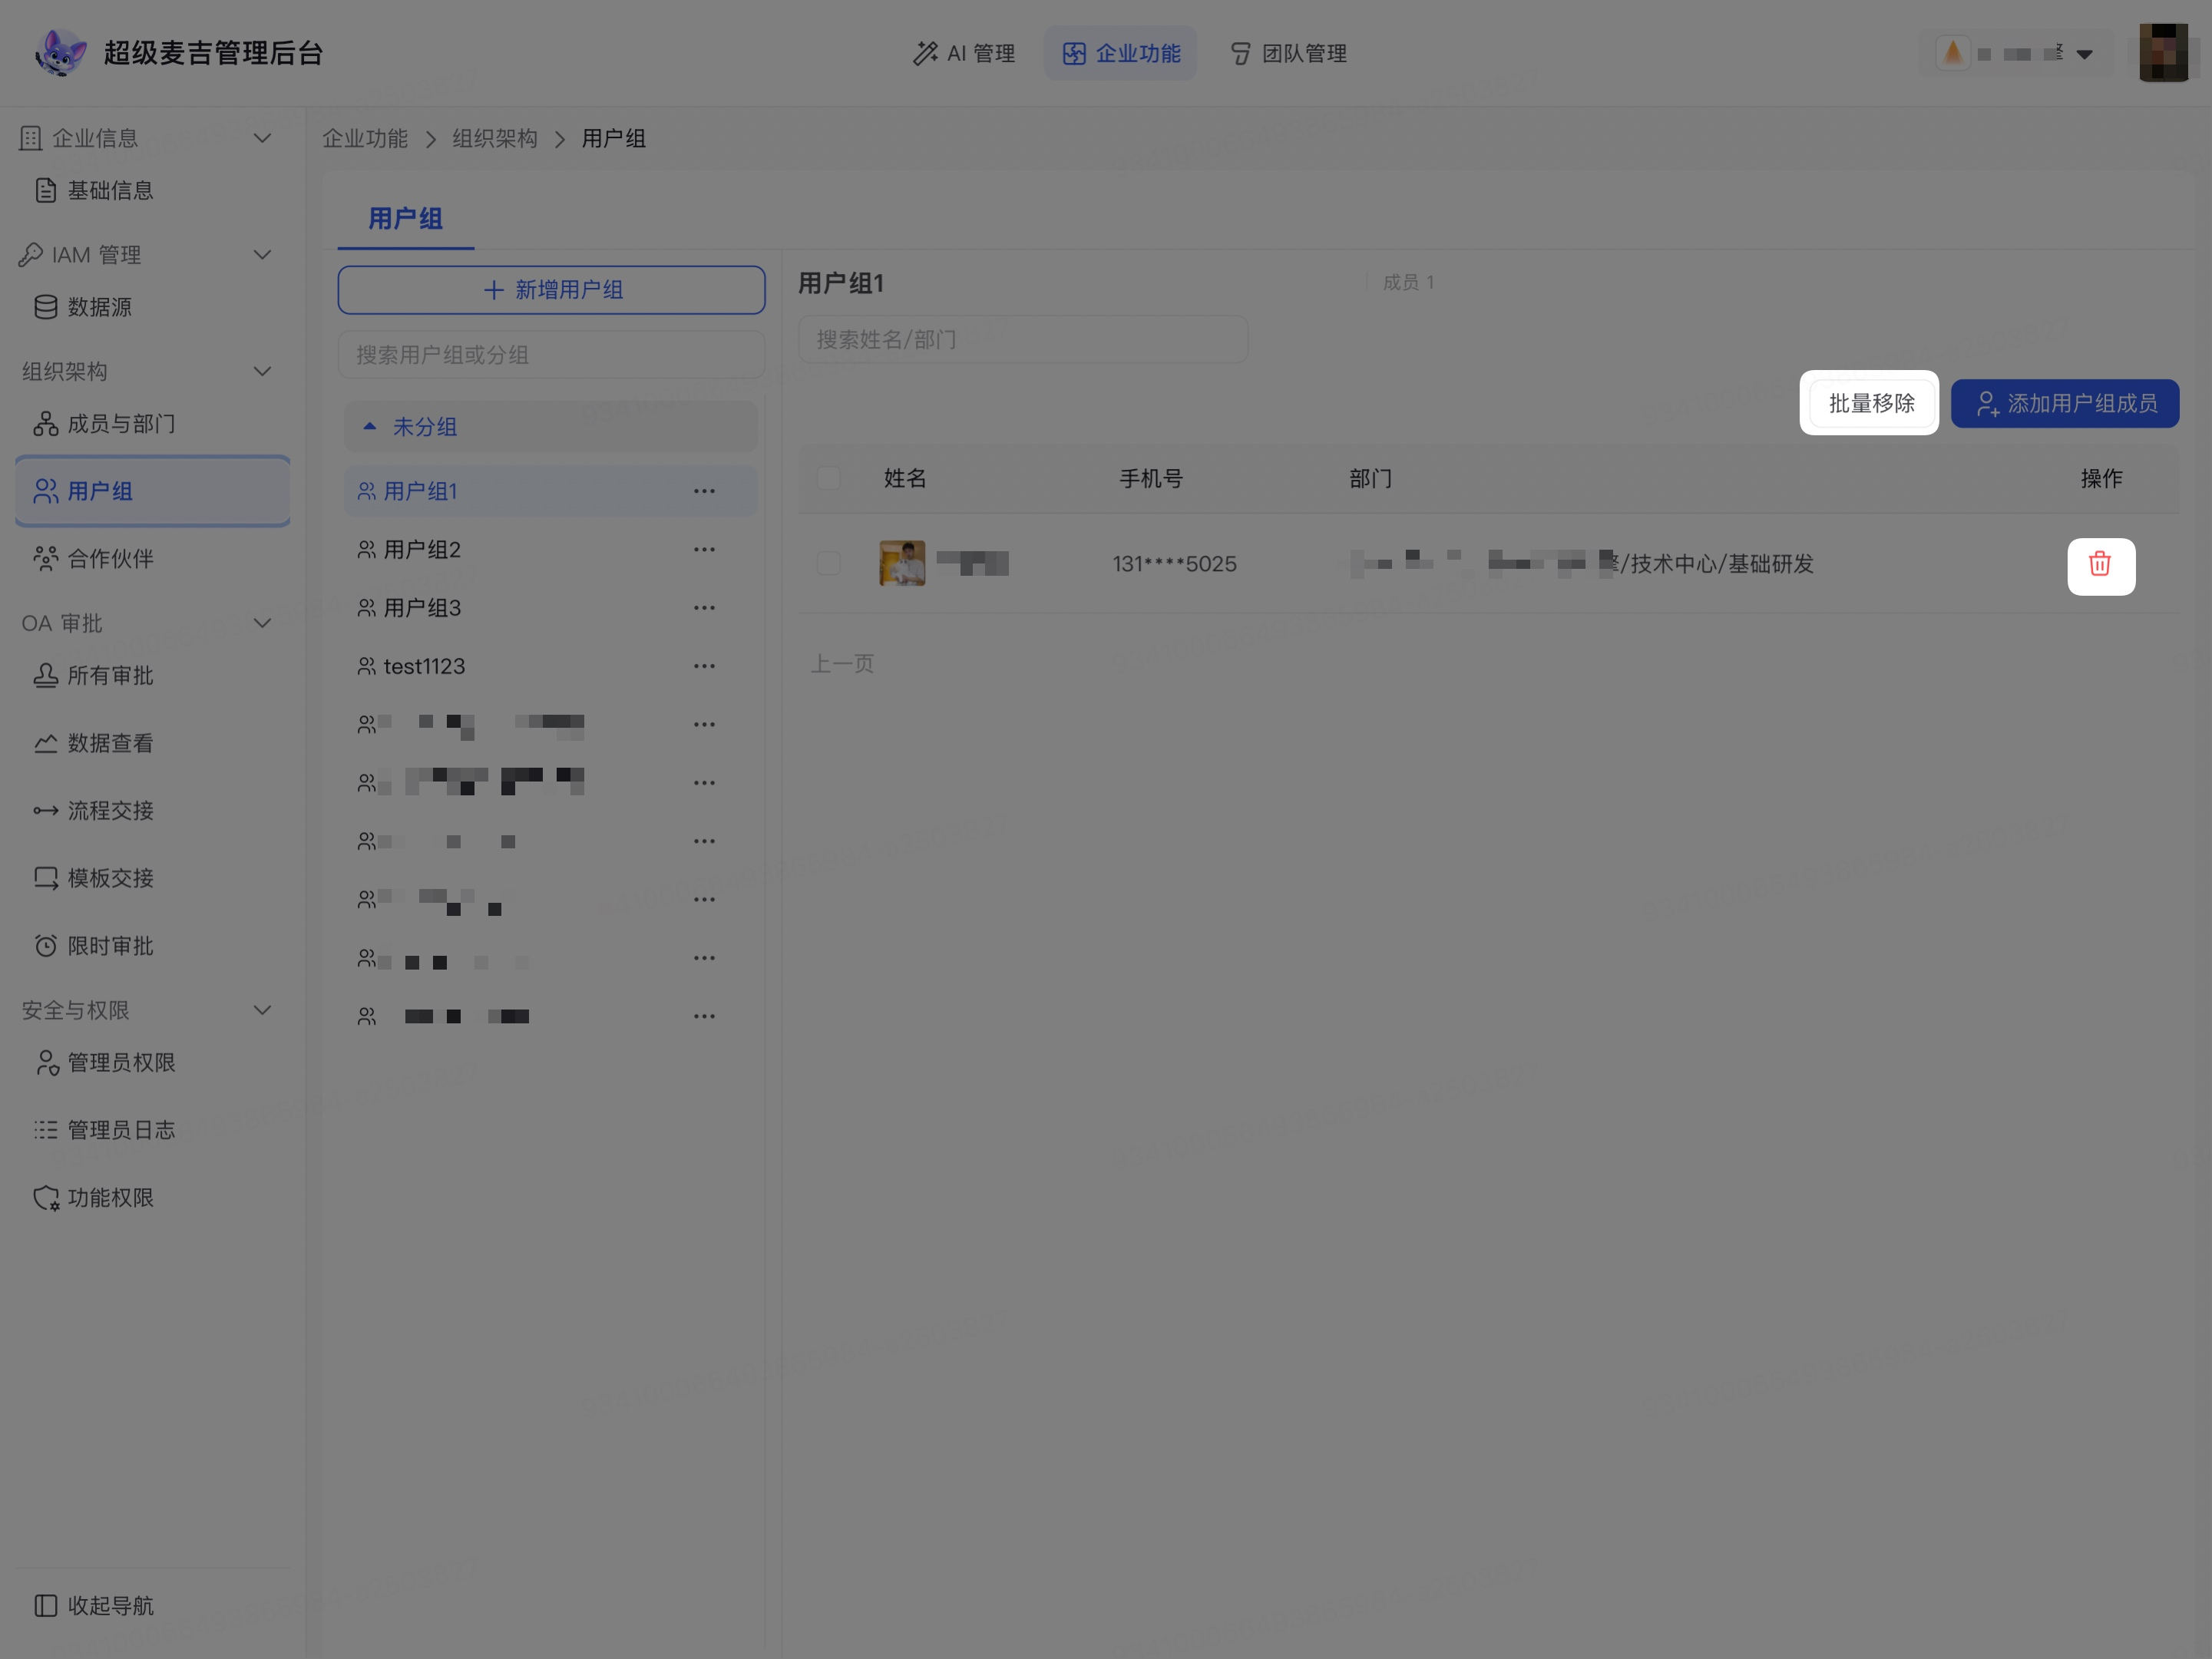
The member is removed from the current user group but retains their enterprise member status and remains unaffected in any other user groups they belong to.
If you need to remove multiple members at once, select the target members and use Bulk remove provided on the page. Check the selection range again before proceeding.
Verify the management results
After completing the operation, check the following:
Confirm that the user group name and its position in the list on the left are correct.
Select the target user group and confirm that the member count on the right matches expectations.
Search for the members you just added or removed to confirm that the member relationships have been updated.
Confirm that members still have the correct department and enterprise member status.